Hard Landscaping & Public Realm
The paved, kerbed and furnished surface people actually walk on — footways, plazas and streetscapes built up in engineered layers, laid to millimetre tolerances and edged, drained and detailed to stay put for decades.
Last updated 2026-07-28 by the BuildPedia Editorial Team.
What is Hard Landscaping & Public Realm?
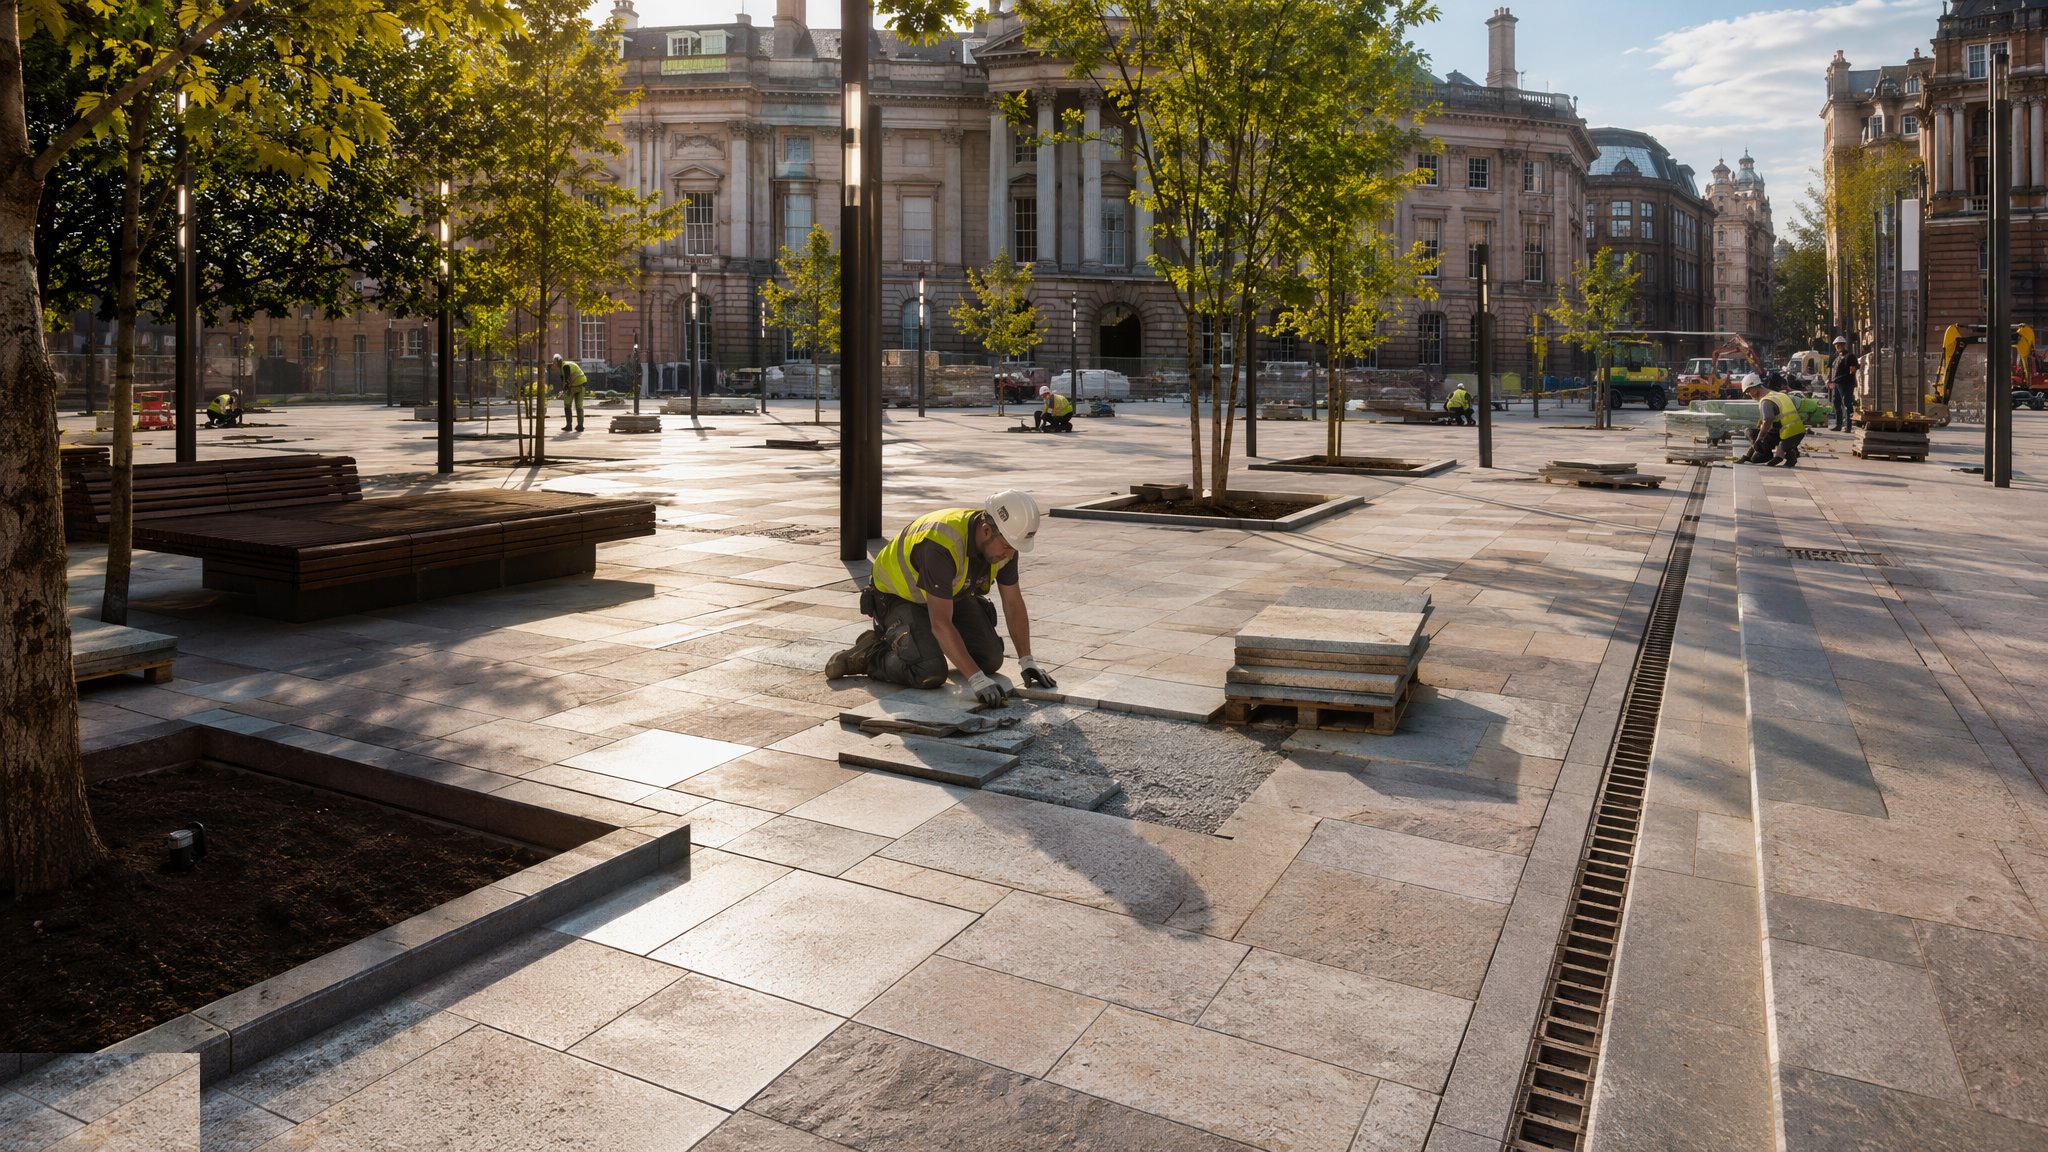
Hard landscaping is everything in the external works that is not alive: paving in its many forms, kerbs and edging, tactile surfaces, tree pits, benches, bollards, cycle stands and lighting. Underneath the finished surface sits the engineering the public never sees — a prepared formation, a compacted granular sub-base (Type 1 to the old Specification for Highway Works terminology everyone still uses), and a laying course that the paving actually beds on. Get those layers right and the surface lasts a generation; skimp them and you are back inside two winters lifting rocking slabs and chasing ponding complaints. In the UK the workmanship benchmark is BS 7533, the code of practice for pavements constructed with clay, concrete or natural stone, and on adoptable highways work the standard details of the local authority and the Specification for Highway Works govern.
Paving splits into two construction families. Flexible construction — block paving and small-element setts — is laid on a screeded sharp-sand laying course, typically 30–50 mm compacted, then vibrated down and jointed with kiln-dried sand; the pavement works as an interlocking raft and it is only as good as its edge restraint. Rigid construction — natural stone flags, large-format slabs and granite setts on streets — is bedded on mortar over a bound base, each unit bonded down with a slurry primer on the back of the stone; miss the slurry coat or leave voids in the bed and the slab will rock, pump and eventually crack. Tolerances are unforgiving because the eye and the wheelchair wheel find every error: levels within ±10 mm of design, and no more than about 6 mm under a 3 m straightedge, with trip lips between adjacent units held to a couple of millimetres.
The public-realm layer is where the detailing lives. Blister tactile paving at crossing points — buff at uncontrolled crossings, red at signal-controlled ones — and corduroy hazard surfaces at the top of stairs, all to Department for Transport guidance. Tree pits in paved areas need structural soils or load-bearing soil cells so the tree gets uncompacted rooting volume without the pavement above it collapsing. Street furniture and lighting columns go in on ducts and bases set before the paving closes around them. In the Gulf the same craft applies with local adjustments: granite and porcelain on mortar beds in the heat, light-coloured stone to keep surface temperatures survivable, expansion gaps that respect 50-degree summer movement, and community or Dubai Municipality standards on public-realm finishes.
When and why is Hard Landscaping & Public Realm used?
Hard landscaping usually runs at the tail of the buildings programme — or leads a regeneration scheme of its own — and it is the most public-facing work a contractor ever does: laid in front of open shops, live footways and watching residents. It matters because it carries legal and adoptable obligations, not just aesthetic ones. Footways and crossings must meet accessibility duties under the Equality Act and the local authority's adoptable standards if the highway is to be taken over under a Section 38 or Section 278 agreement; drainage falls must move water to gullies and not into shopfronts; and the whole surface is expected to survive twenty-five years of footfall, frost, overrun by delivery vehicles and utility trench reinstatements. Do it cheap and it becomes a maintenance liability the client — or the adopting authority — refuses to take on.
Types of Hard Landscaping & Public Realm
Flexible block paving
Concrete or clay pavers on a screeded sharp-sand laying course over compacted sub-base, compacted with a plate and jointed with kiln-dried sand. The workhorse of shared surfaces and pedestrian precincts — forgiving to lay, tolerant of utility openings, and entirely dependent on honest edge restraints to stop the raft spreading.
Natural stone paving
Granite, sandstone, limestone or slate flags and setts to BS EN 1341/1342, rigidly bedded on mortar with a slurry primer bond. The premium public-realm finish: beautiful, durable, and utterly unforgiving of voided beds, missing primer or poor drainage detailing.
Precast concrete flags and slabs
Factory-made flags in standard and large formats, hydraulically pressed or wet-cast, laid rigid on mortar or, in lighter duty, on a bedded and bounded sand system. The default for adoptable footways, where the highway authority's standard details dictate module, bed and reinstatement rules.
Kerbs, channels and edgings
Precast concrete kerbs to BS EN 1340 — bull-nosed, half-battered, splayed for vehicle overrun — plus drainage channels and flat edgings, all bedded and haunched in concrete. Structurally necessary, not decorative: the kerb line is the restraint that holds every flexible pavement together.
Tactile paving systems
Blister surfaces at crossings, corduroy at stairs, lozenge at platform edges and cycle-track delineators, in precast units or applied systems. A statutory accessibility feature with prescribed layouts and colours — laid in the wrong pattern or colour it is a defect that gets dug out, not a detail to argue about.
Hard Landscaping & Public Realm: step by step
Step 1: Prepare the formation and sub-base
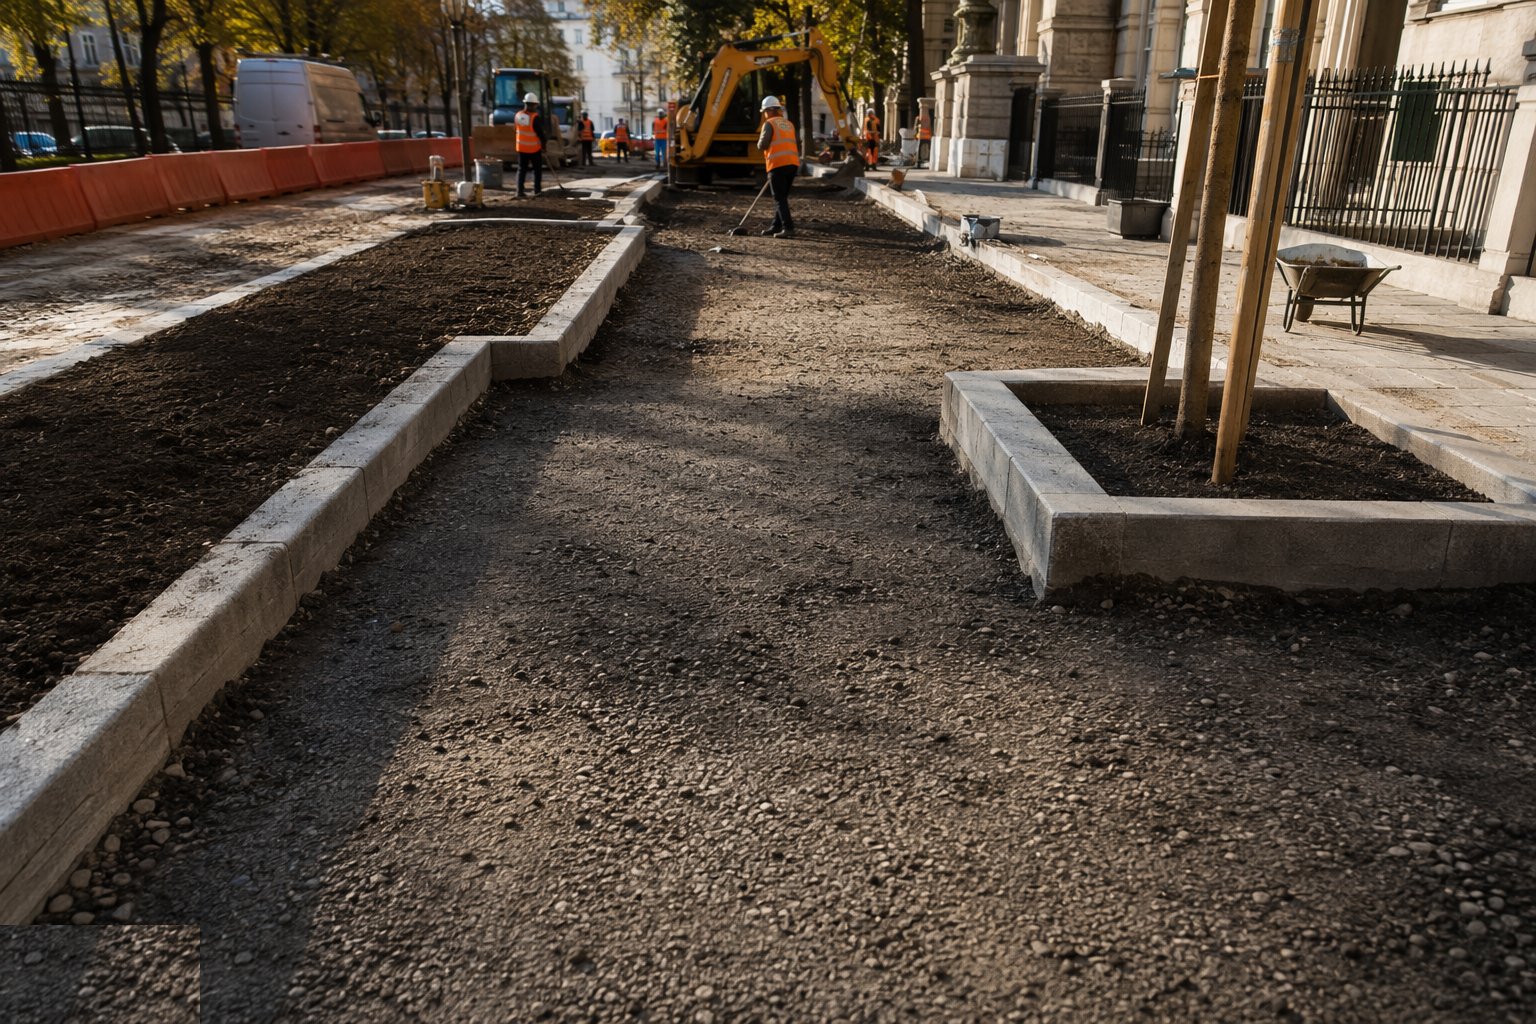
Everything starts at the formation: topsoil and soft spots out, the subgrade proof-rolled and inspected, soft areas dug out and replaced, then the sub-base placed in layers — typically 150–225 mm of Type 1 per pass — and compacted with vibrating rollers to refusal. Levels are set from pins or laser control because the sub-base level determines everything above it; you cannot screed your way out of a formation that is 40 mm wrong. Where the ground is weak, a geotextile or geogrid goes in first, and near trees on shrinkable clay the pavement build-up respects the root-protection rules rather than excavating through the rooting zone.
Step 2: Set the kerbs and edge restraints
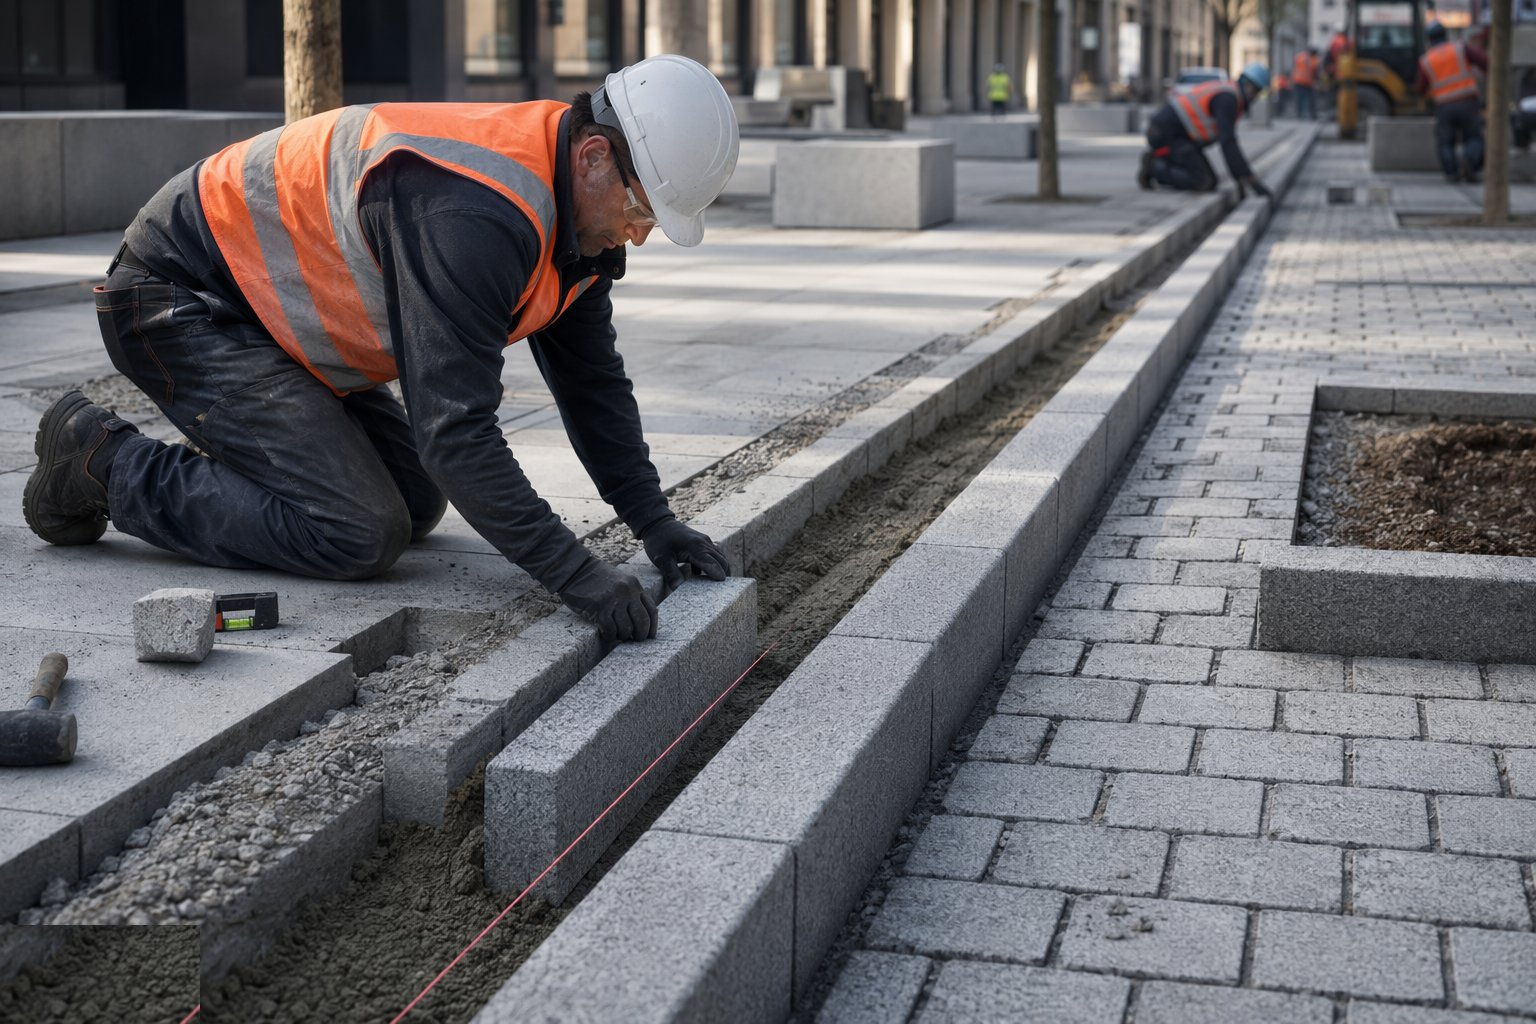
Kerbs are set to a string line on a concrete bed — typically 100–150 mm of ST1 or site-mix concrete — and haunched up behind so the unit cannot be pushed over by the compaction plant that follows. Line and level are everything: the kerb line is the visual datum of the whole scheme and the restraint that keeps block paving from creeping, and a kerb laid 10 mm low is a ponding complaint with your name on it. Drainage channels, transitions, dropped kerbs at crossings and radius kerbs on corners all go in at this stage, checked against the setting-out drawings, with expansion and movement joints where the detail calls for them.
Step 3: Screed the laying course or set out mortar beds
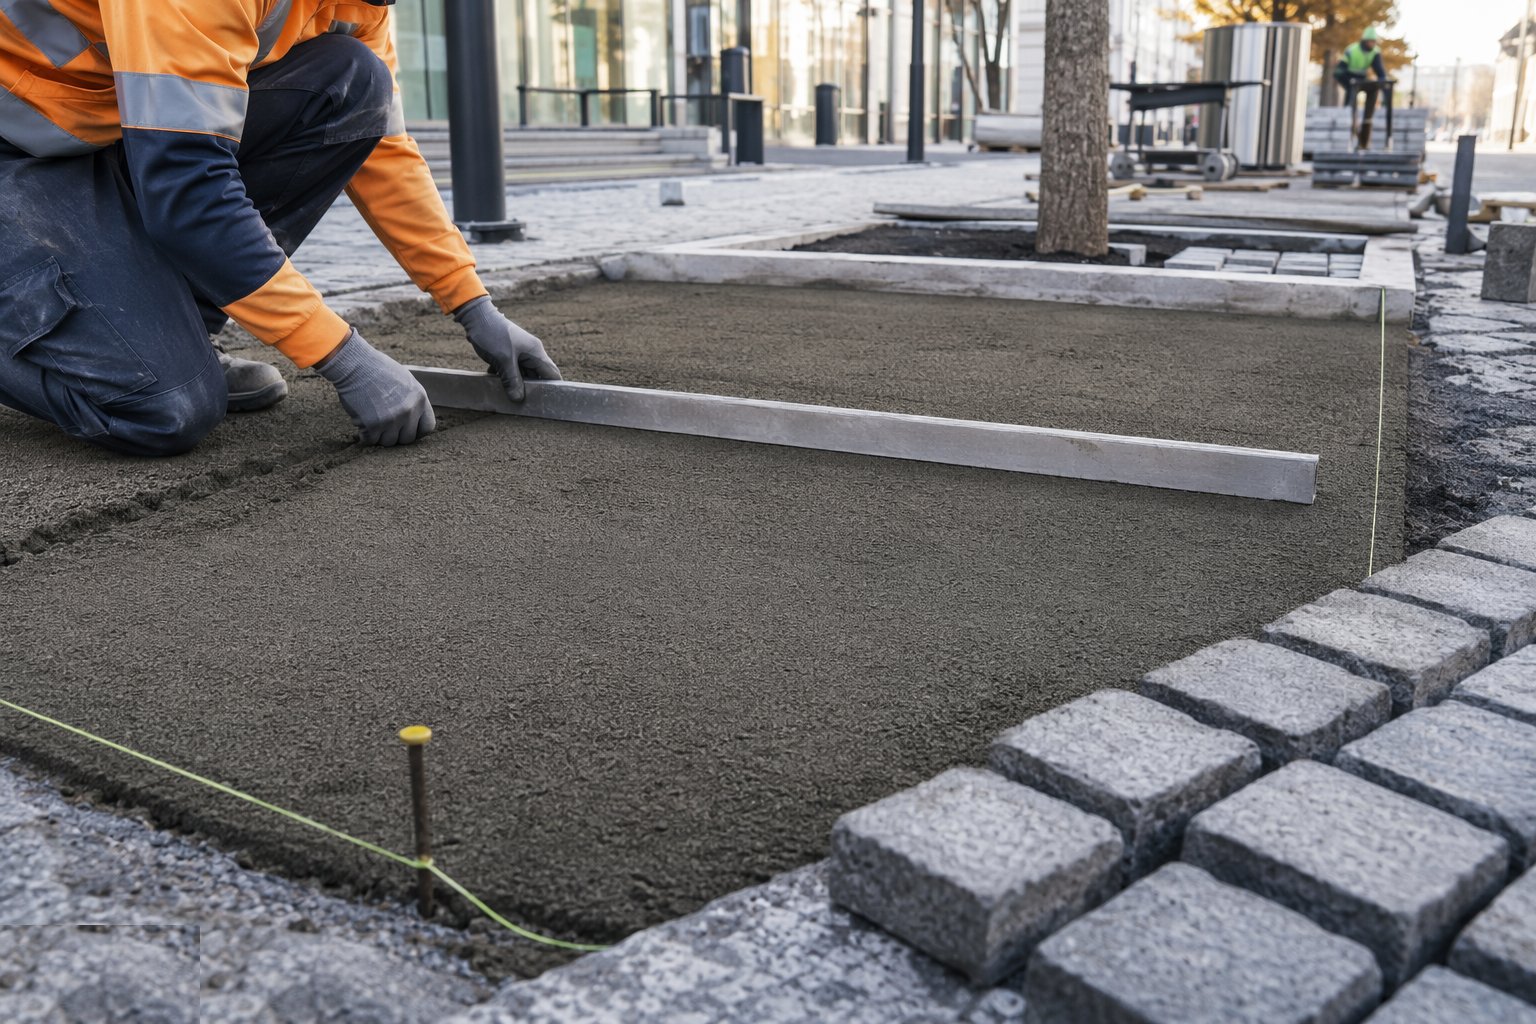
For flexible paving the laying course is sharp sand to the BS 7533 grading, screeded between rails to a loose depth that compacts down to the design 30–50 mm — screeded ahead and not trafficked, because footprints in the laying course become soft spots in the pavement. For rigid work the base is bound and true, and the mortar bed goes down fresh — a workable cement:sand bed, laid full and even, with slurry primer brushed onto the back of every stone immediately before bedding. The primer is the bond; skip it and the slab is sitting on dust, waiting to lift.
Step 4: Lay the paving to line, level and bond
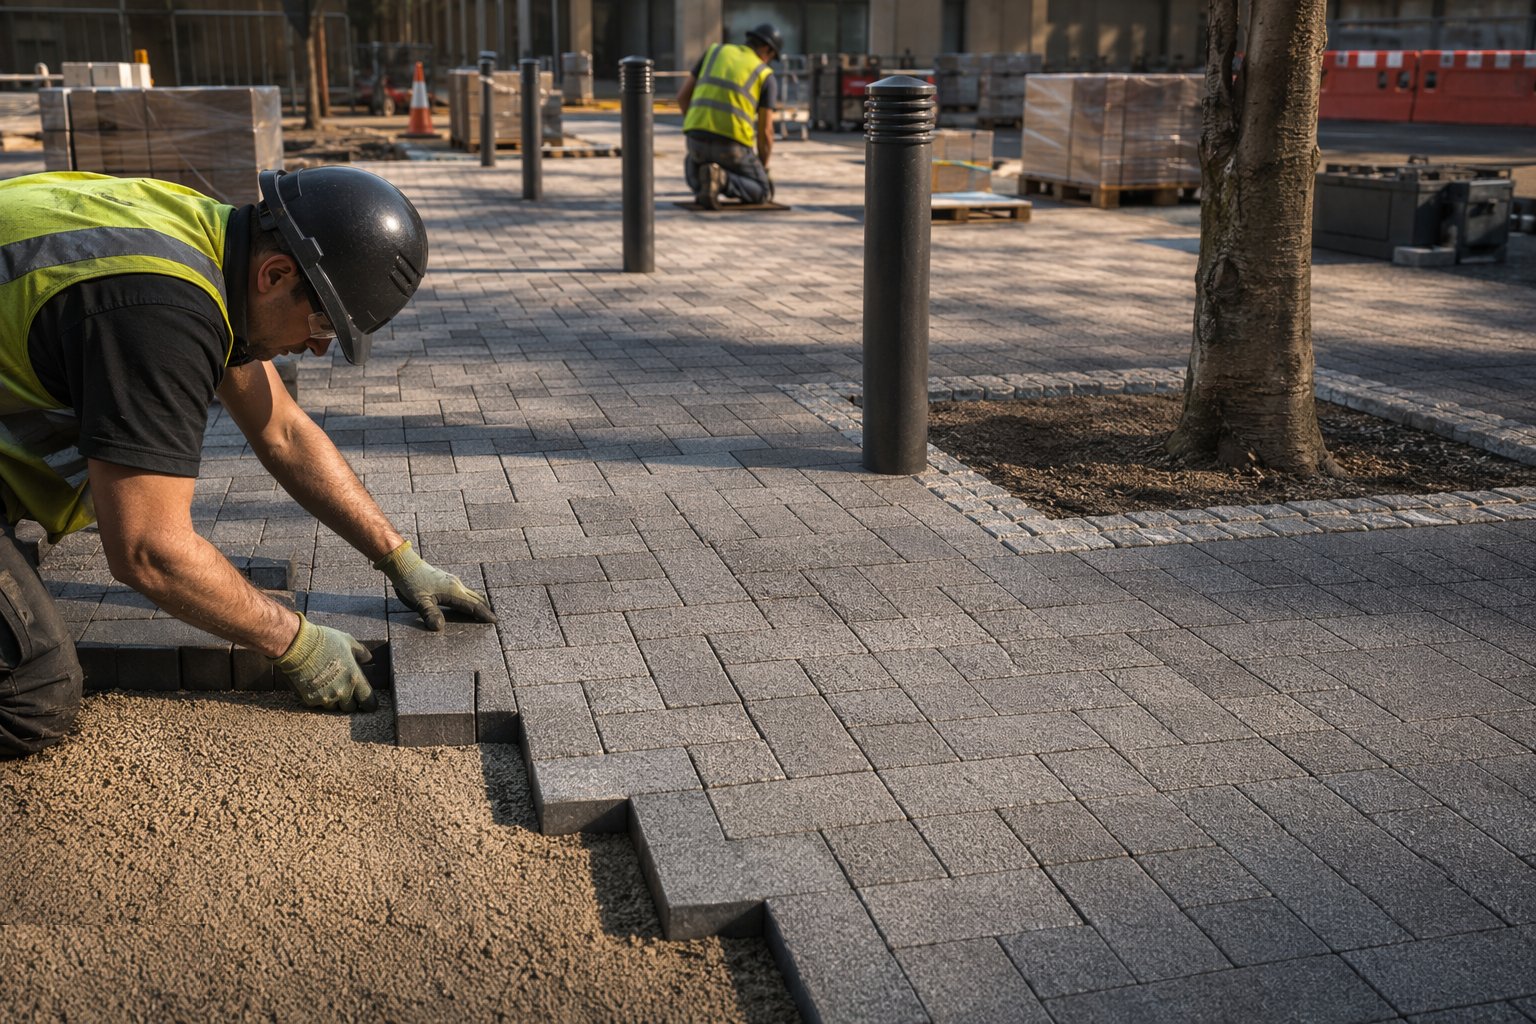
Block paving is laid to the bond pattern off a straight edge, working uphill of the laying course and keeping joints tight but not jammed. Stone and flags are bedded with a rubber mallet or plate to a taut line and level, each unit checked for rock before the next goes down. Cuts come at the end of each run — diamond-sawn, never snapped rough, and no slivers less than a third of a unit at edges and gullies where they will pop out under traffic. Falls are checked as you go with a level and straightedge, because water finding its way to a doorway is found by the client first.
Step 5: Compact, joint and seal the surface
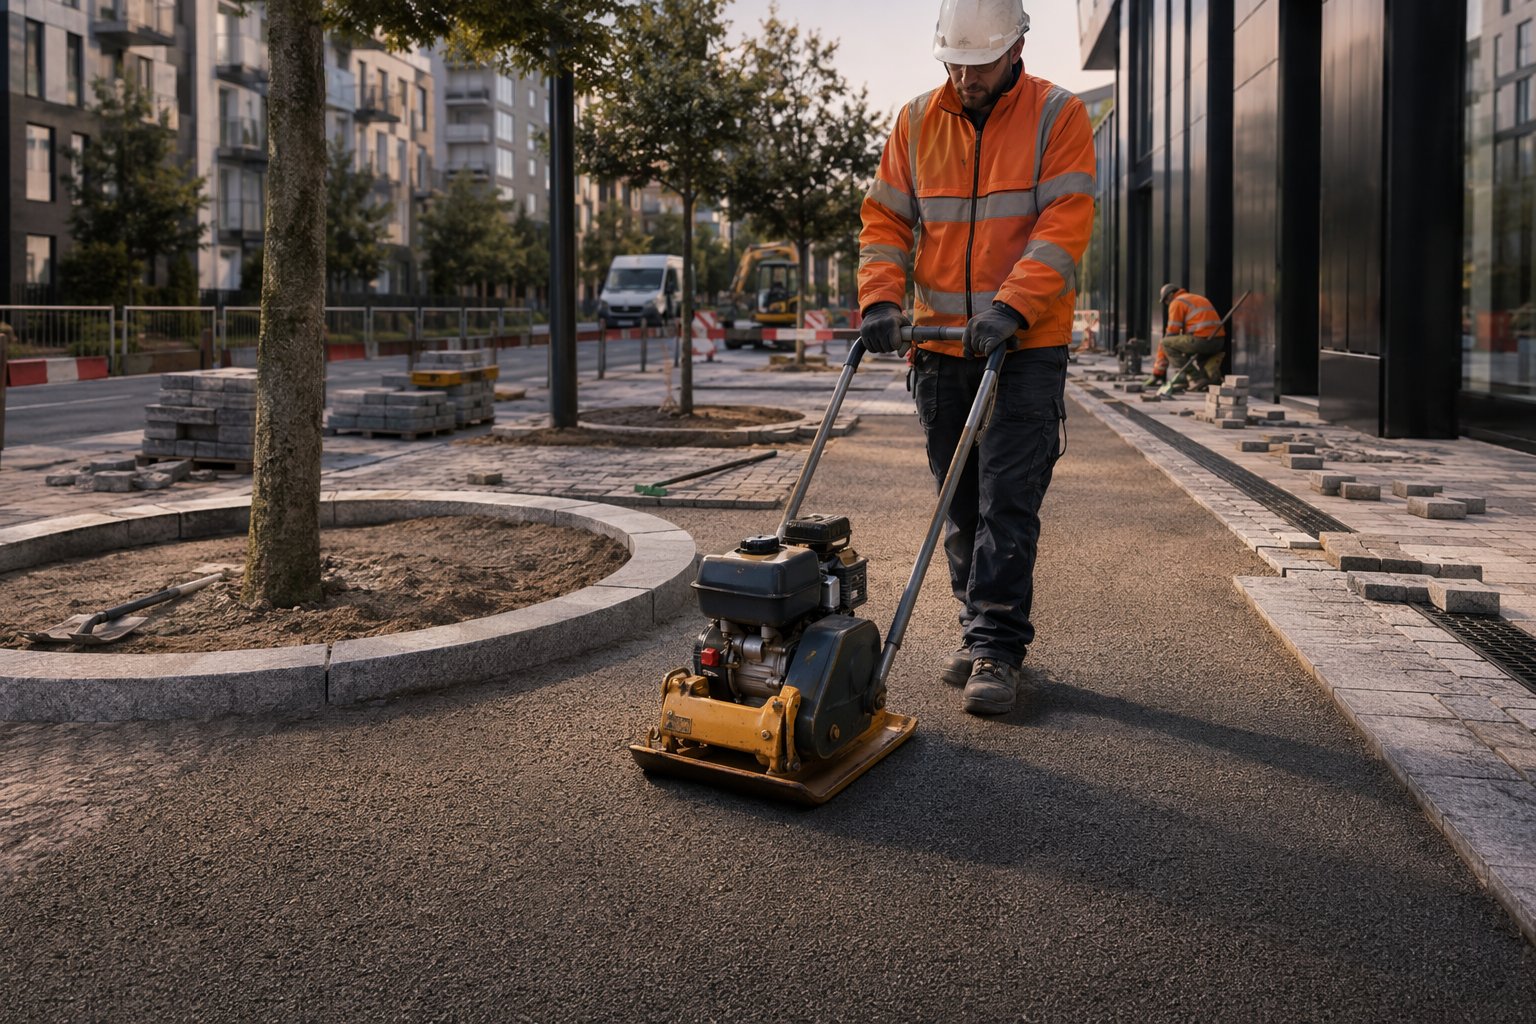
Flexible paving is compacted with a plate vibrator — with a protective mat or polyurethane pad on clay pavers and stone so the surface is not bruised — then jointed with kiln-dried sand brushed in, re-compacted, and topped up until the joints will take no more. The joints are part of the structure: dry, full joints lock the units together; half-filled joints let water and weed seeds in and the blocks start to walk. Rigid paving is pointed as specified — mortar joints struck and tooled, or resin/slurry jointing on modern street schemes — and both systems are protected from traffic until the bed or joint has the strength to take it.
Step 6: Install tactile paving and accessibility details
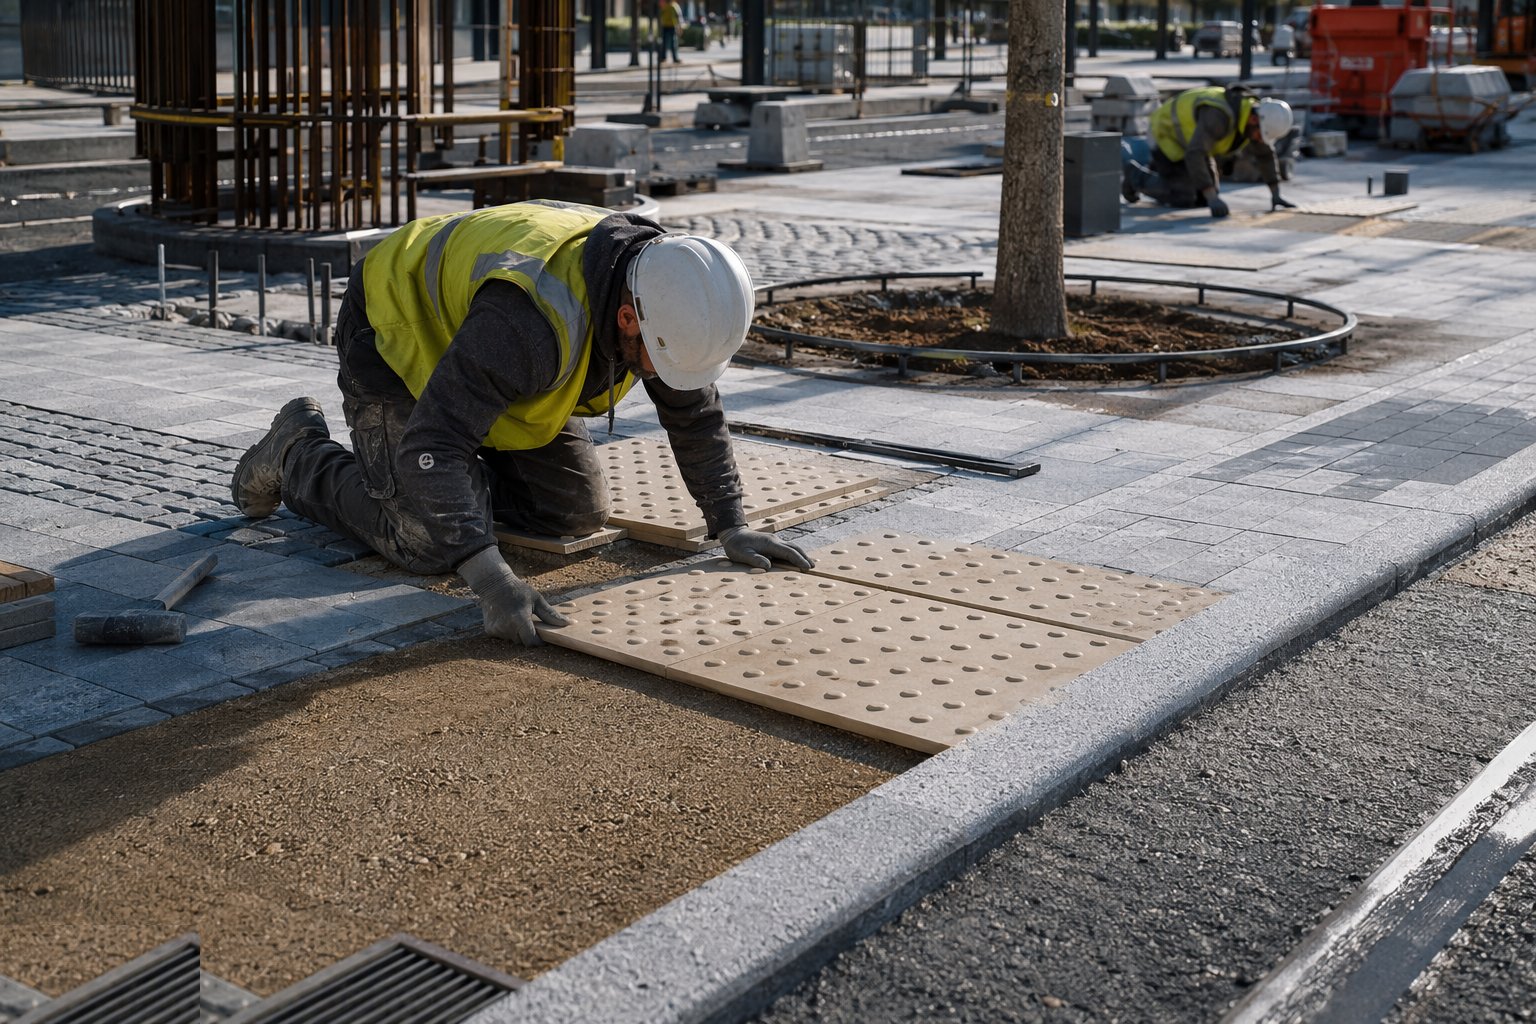
Tactile units go in at crossings, stairs and platform edges exactly to the guidance layouts: blister paving in the prescribed width and setback at dropped kerbs, red at controlled crossings and buff at uncontrolled, corduroy at stair heads, and level transitions throughout. This is inspected work — the layouts exist so a visually impaired person can read the street by feel, and a blister field rotated, misaligned or drowned in the ramp falls is worse than useless. Ramps and crossfalls are checked against the accessibility limits — ramps at 1:21 or flatter where the guidance demands — and every upstand at ironwork and transitions is held to trip-free tolerance.
Step 7: Build tree pits, furniture and lighting
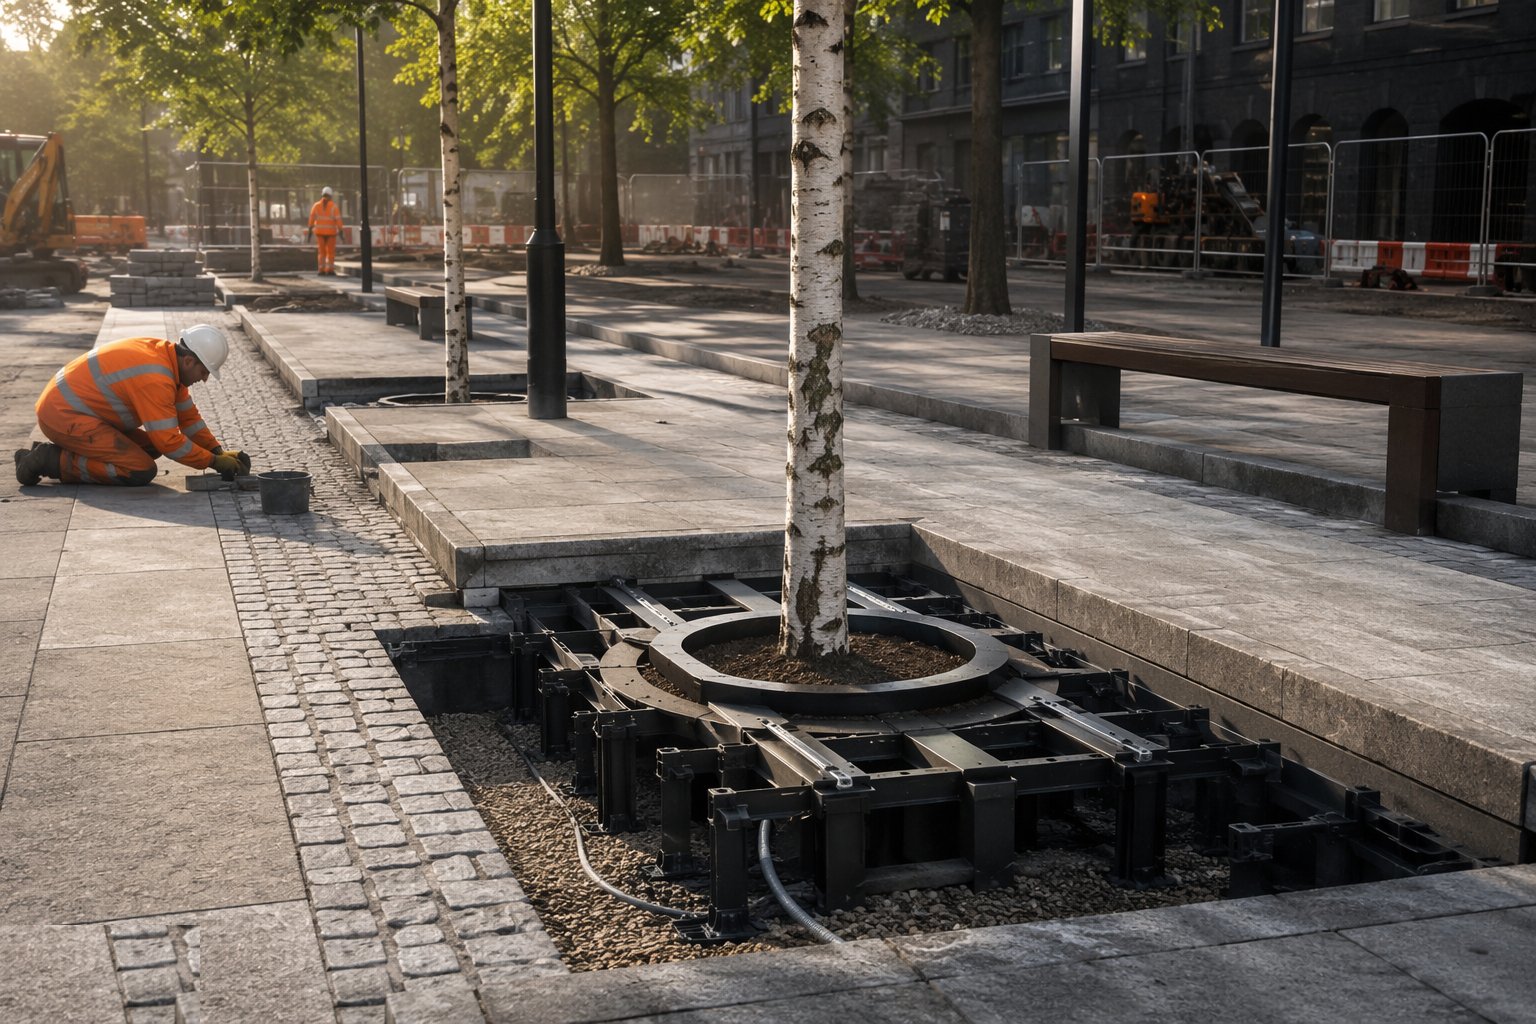
Tree pits in hard surfacing are engineered, not dug: structural soil or proprietary soil-cell systems built up in layers and compacted around the uncompacted rooting zone, root directors to steer growth away from the paving, irrigation and aeration pipes, underground guying assemblies, and a grille or porous surfacing at surface level. Benches, bins, bollards and cycle stands follow on their foundations, and lighting columns land on pre-cast bases with the ducts and draw-pits already in — the electrical contractor's tolerance for a duct that surfaces 200 mm adrift of the column base is famously short. The last operation is the walk-round: snagging every lip, rocking unit and stained slab before the barriers come down.
Plant and equipment
- Vibrating rollers and plate compactors (with protective mats for stone and clay pavers)
- Screed rails, straightedges, string lines and laser levels for laying-course and surface control
- Diamond saws and block splitters/guillotines for cutting, with water suppression
- Vacuum slab lifters and mechanical grabs on telehandlers for large-format units
- Concrete mixers or volumetric trucks for kerb bedding and haunching
- Total station or rotating laser for setting out and as-built level checks
- Telehandlers and loading shovels for handling packs of paving and aggregate
Quality control checks
- Sub-base compaction and level records per layer, with proof-rolling witnessed before covering
- Surface regularity checks — design level ±10 mm and 6 mm under a 3 m straightedge — logged zone by zone
- Laying-course grading certificates and compacted thickness verified before laying
- Bond checks on rigid paving: trial slabs lifted to confirm full mortar contact and slurry primer coverage
- Kerb line and level survey before paving closes up to it
- Tactile layouts, colours and ramp gradients checked against the accessibility drawings and guidance
Safety considerations
- Respirable crystalline silica from dry cutting: water suppression on every saw, RPE as backup, and cutting stations sited away from the public
- Manual handling of slabs and kerbs: vacuum lifters, mechanical aids and team lifts — a 900 × 600 flag is a one-way ticket to a back injury
- Plant and pedestrian segregation in live public areas: barriers, banksmen and signed diversions, especially where shops stay open
- Buried services in footways: CAT scan and permit to dig before any excavation, with hand-digging around known apparatus
- Public interface after hours: open trenches plated or fenced, materials stacked stable, and lighting on any overnight hazards
Common defects
- Rocking and pumping slabs from voided mortar beds or a missed slurry primer — the single most common rigid-paving failure
- Block paving rutting and spreading where edge restraints were omitted, under-haunched or never compacted against
- Ponding from flat spots and reversed falls, usually tracing back to a sub-base laid out of level
- Kerbs settled, cracked or out of line from being bedded on dabs or soft formation
- Joints losing sand within months — half-filled joints, wet sand at laying, or no re-sanding visit after the first compaction
- Trip lips at gullies, ironwork and utility boxes where frames were not adjusted to finished level
Best suited for
- Town-centre public realm, pedestrianised streets and civic squares
- Adoptable footways, crossings and shared-surface schemes to highway authority standards
- Station forecourts, university campuses and retail park externals
- Regeneration streetscapes where durability and accessibility are both on trial
How long does Hard Landscaping & Public Realm take?
Typical duration: A paving gang typically lays 150–300 m² of block paving or 80–150 m² of rigid stone per week including beds; a full high-street scheme with kerbs, drainage tie-ins, tactiles and furniture commonly runs 6–12 months phased zone by zone..