Cleanroom Construction
Rooms where the enemy is dust: ISO 14644 classification, airtight panel envelopes, HEPA-filtered air and pressure cascades, proven by particle counting before the process tools ever arrive.
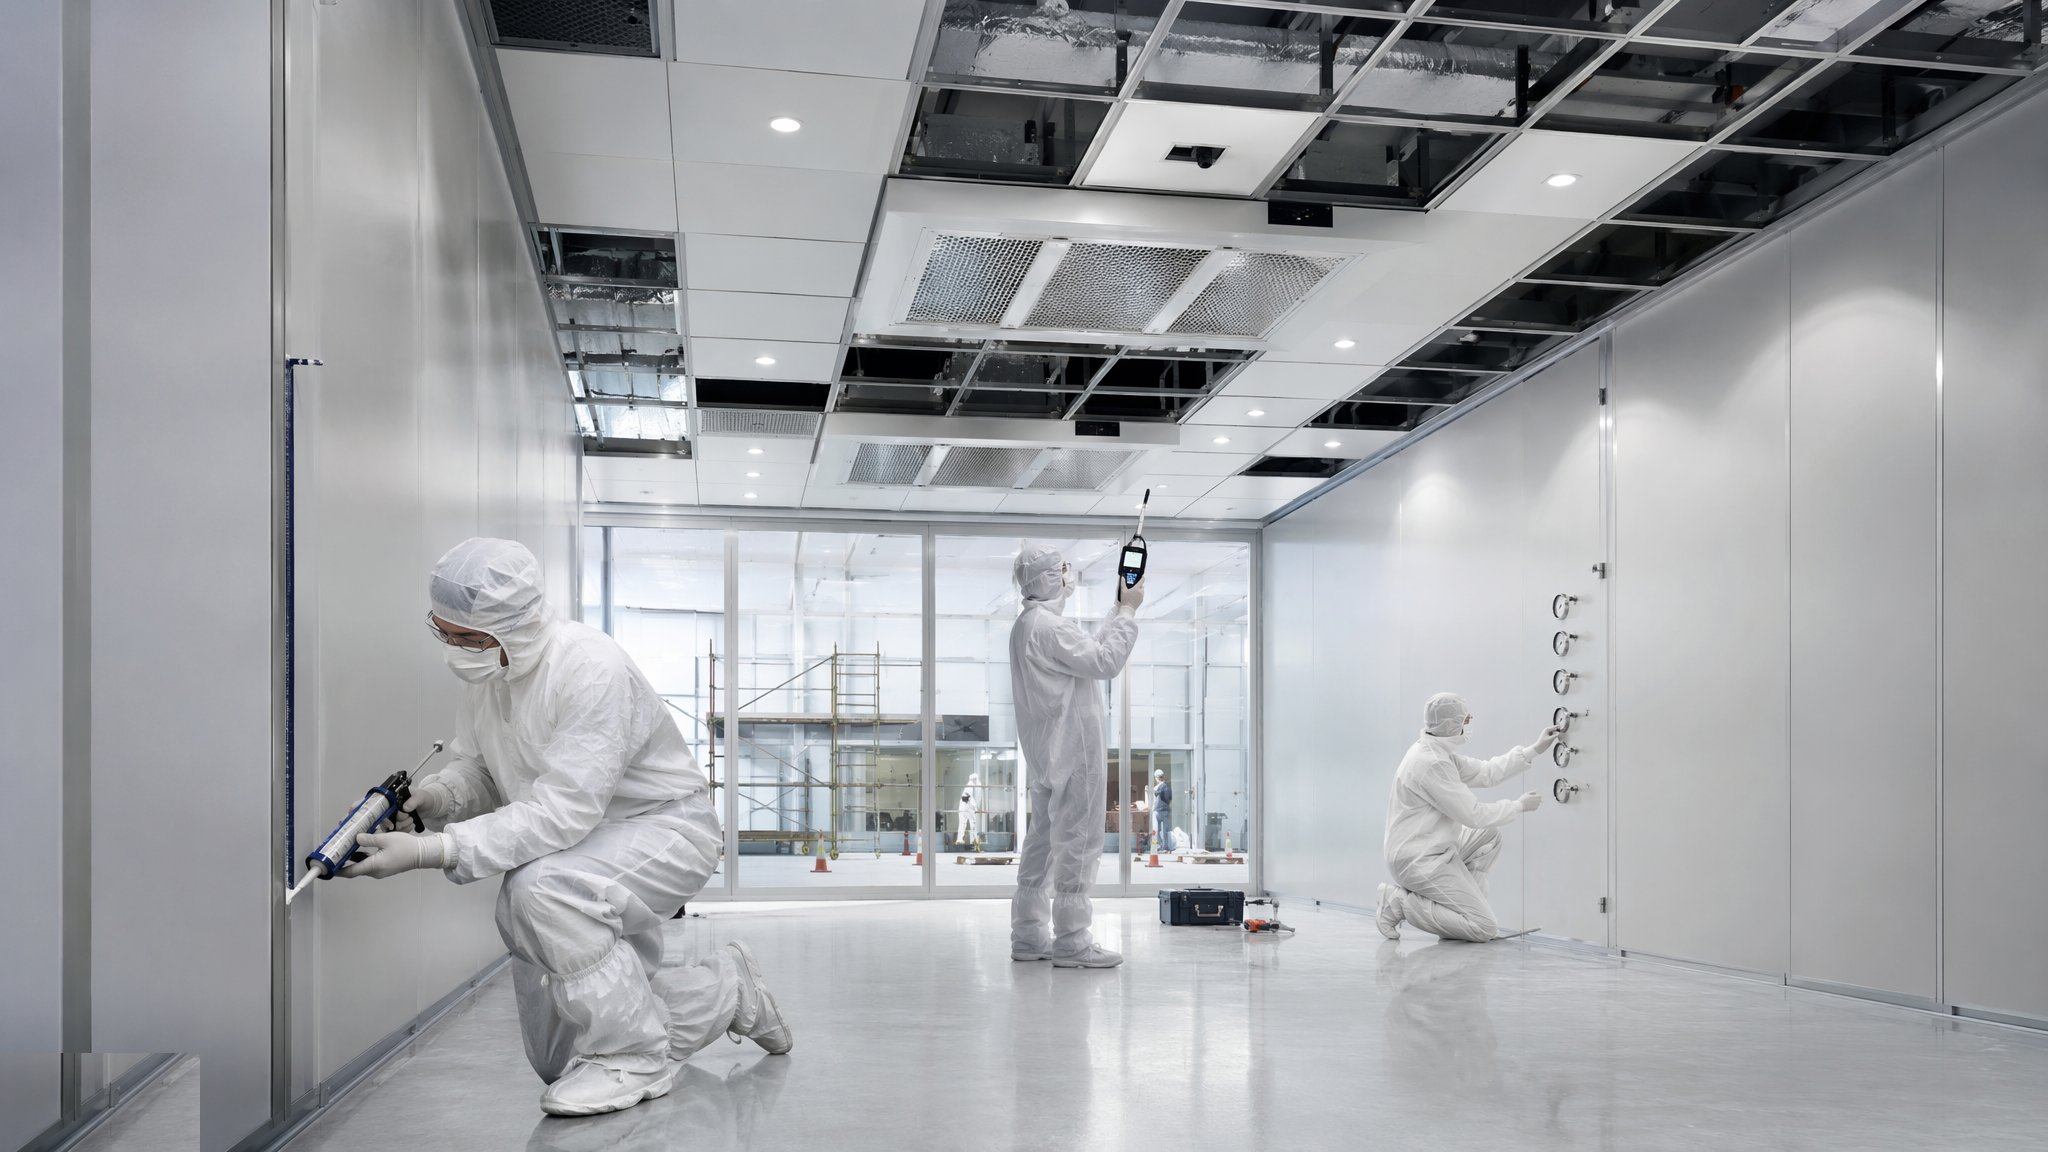
Last updated 2026-07-28 by the BuildPedia Editorial Team.
What is Cleanroom Construction?
A cleanroom is defined by one number: its ISO 14644-1 classification, the permitted count of airborne particles per cubic metre at a given size. An ISO Class 8 room — roughly the old Class 100,000 — is achievable with good filtered HVAC; an ISO Class 5 room (old Class 100) needs unidirectional flow from a ceiling dense with HEPA filters and a discipline of build that treats every surface as a contamination source. Semiconductor fabs work at ISO 5 and below; pharmaceutical aseptic suites live at ISO 5–7 in operation with their own GMP grading layered on top; medical device, optics and aerospace assembly rooms commonly sit at ISO 7–8. The classification drives everything: air change rates from twenty to several hundred per hour, filter coverage, finishes, and the way the room is built and dressed.
The construction system is the envelope. Modular cleanroom panels — steel-faced or uPVC-faced sandwich panels with sealed joints — form walls and ceilings, with flush glazing, sealed lighting and coved floor-to-wall junctions so there is nowhere for particles to lodge and nothing for cleaning to miss. Above the ceiling grid sits the plenum: fan filter units (FFUs) or ducted HEPA terminal housings, each filter individually certified to EN 1822 (H13/H14) and scan-tested in place for pinhole leaks. Walk-on ceiling grids let maintenance happen from above without contaminating the room below — on a production cleanroom that detail alone is worth the cost.
Then the physics: pressure cascades. Cleanest rooms sit at the highest pressure, air bleeding outward through door undercuts, grilles and transfer hatches toward less clean and then unclassified space — typically 10–15 Pa between rooms, held by airflow balance and envelope airtightness alike. Construction is therefore run as a controlled operation: "clean build" protocols with increasing levels of dress and housekeeping, because contamination sealed behind a panel during construction becomes the particle counts you cannot explain at validation. The room is finished when it passes its tests — airflow, pressure, recovery, filter integrity and finally particle counting to ISO 14644-1 — and those tests are witnessed, documented and repeated at requalification intervals for the life of the facility.
When and why is Cleanroom Construction used?
Cleanroom construction applies wherever the product or the process cannot tolerate airborne contamination: semiconductor and photonics fabs, pharmaceutical and sterile manufacturing, medical device assembly, satellite and optics integration, advanced battery production. The specialist phase begins once the host building is weathertight and dust-controlled — you do not build an ISO 7 envelope inside a site still generating concrete dust — and runs through to performance qualification. It matters because the classification is a contractual and often regulatory promise: a pharmaceutical suite that fails its particle counts is not a slightly dusty room, it is a room that cannot make product. Retrofitting cleanliness after the fact barely works — air change rates, filter ceiling coverage and pressure cascades are structural and mechanical decisions — so the classification is fixed at design stage and the whole build is organised around proving it.
Types of Cleanroom Construction
Modular panel cleanrooms
Self-supporting steel-faced panel systems — walls and walk-on ceilings — erected inside a host building, with integrated glazing, doors and service penetrations. The mainstream method: fast, demountable, and the joints and seals are factory-engineered rather than site-improvised.
Stick-built and hybrid cleanrooms
Stud partitions, welded uPVC or GRP linings and epoxy flooring finished to cleanroom standard, sometimes combined with modular ceilings. Cheaper in materials and common on lower classifications, but every joint is a site-made seal and the quality lives or dies with the installers.
FFU ceiling cleanrooms
A ceiling grid densely populated with individual fan filter units pushing unidirectional or mixed flow through HEPA/ULPA media — the semiconductor and microelectronics pattern. Enormous flexibility: coverage and class can be tuned bay by bay, and failed units are swapped from the plenum without entering the room.
Softwall and containment booths
Curtain-walled enclosures, mini-environments and isolator-style booths creating local ISO 5–6 zones inside a classified or unclassified room. Right where the process is small and the classification is tight — no point scrubbing 500 m² when the critical zone is a workbench.
Cleanroom Construction: step by step
Step 1: Establish clean build protocols and host-space readiness
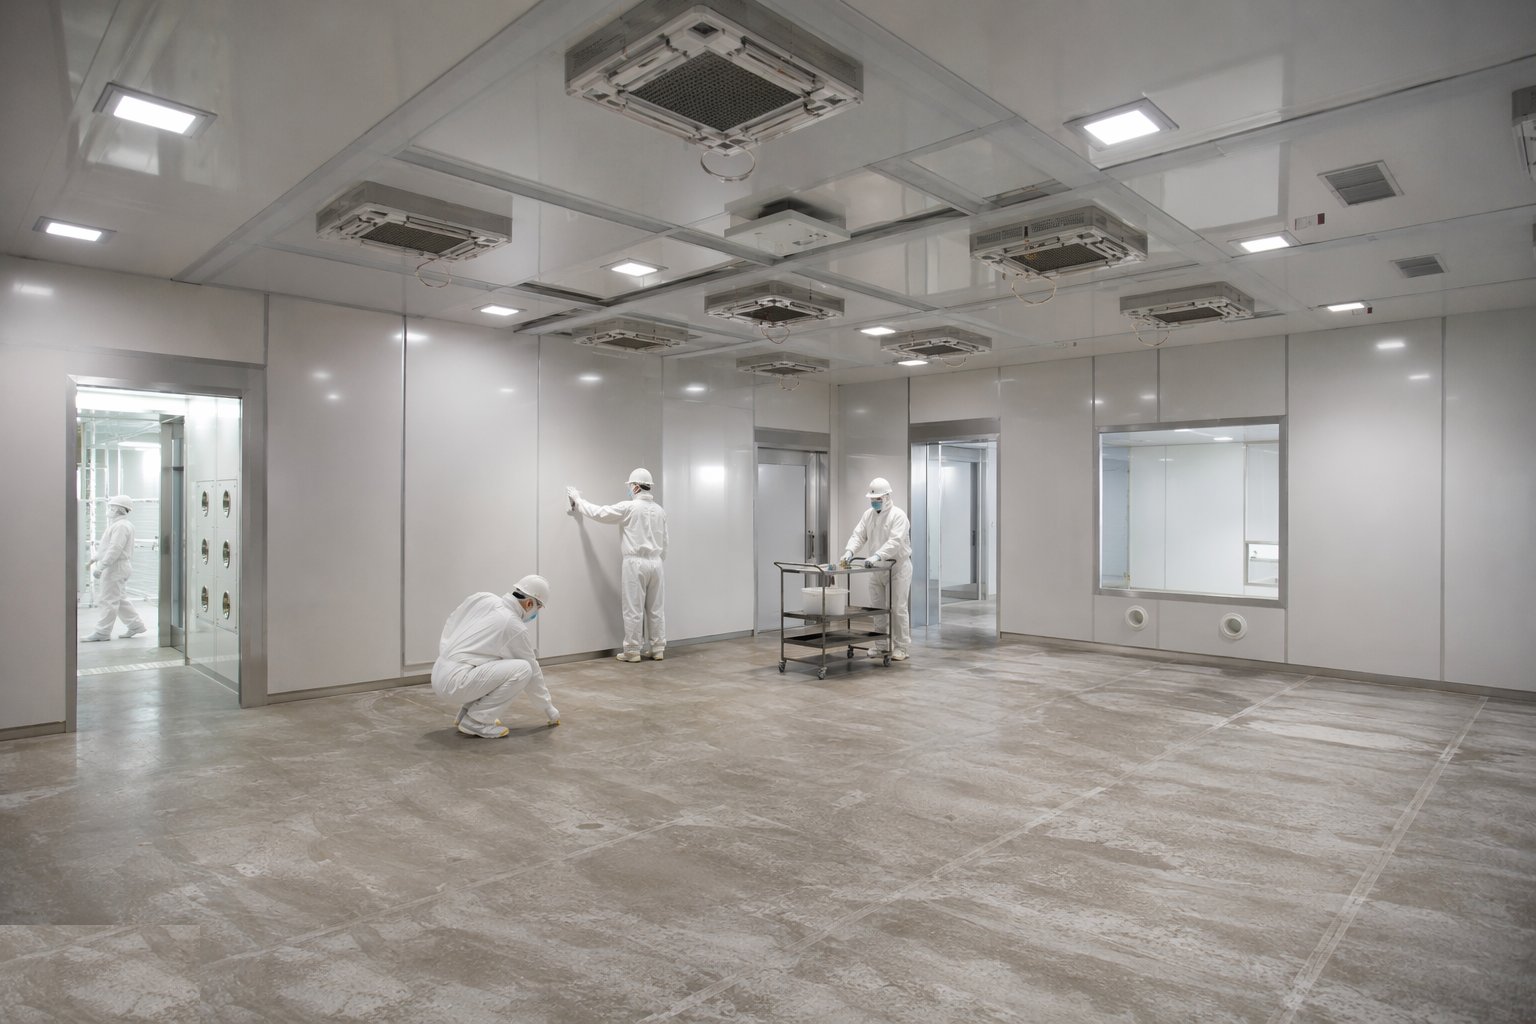
Cleanroom construction fails at the start or not at all. The host building must be weathertight, dried out and deep-cleaned before panels arrive; then a staged clean-build protocol takes over — sticky mats and dedicated access, then overshoes and coveralls, then full gowning for final fit-out and testing. Wet trades are finished before the envelope starts, every material is wiped down before it enters, and anything that generates dust is done outside the line or under extraction. The protocol is enforced like a safety rule, because gypsum dust sealed behind a panel in week one is the rogue particle count at validation in month nine.
Step 2: Install the HVAC plant and duct distribution
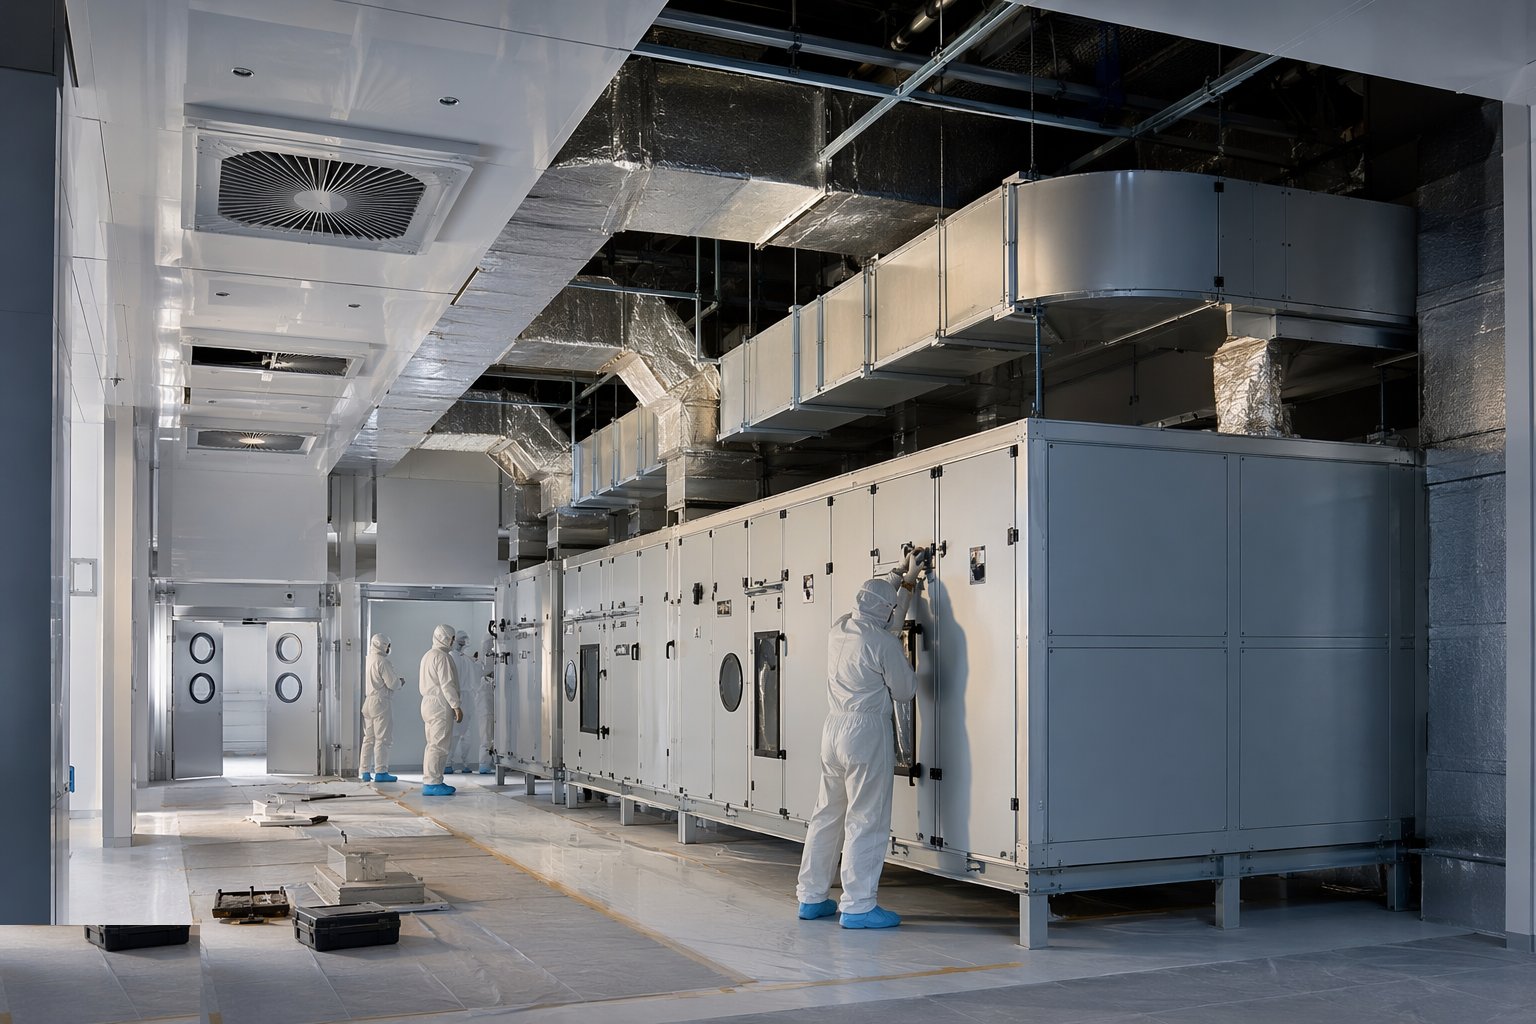
The air handling plant — make-up air units, recirculation units, humidification and the big duct runs — goes in before the ceiling closes the plenum, with ductwork delivered sealed, cleaned internally before hanging, and kept capped until connection. Filter housings and FFU mounting grids are set out precisely: a ceiling that is 90% HEPA media has no spare real estate, and clashes between filters, lights, sprinklers and ceiling grids are resolved in the model, not on the ladder. Duct cleanliness is inspected and signed off before any fan runs — blowing construction dust through new HEPA filters shortens their life from years to weeks.
Step 3: Erect the panel envelope and penetrations
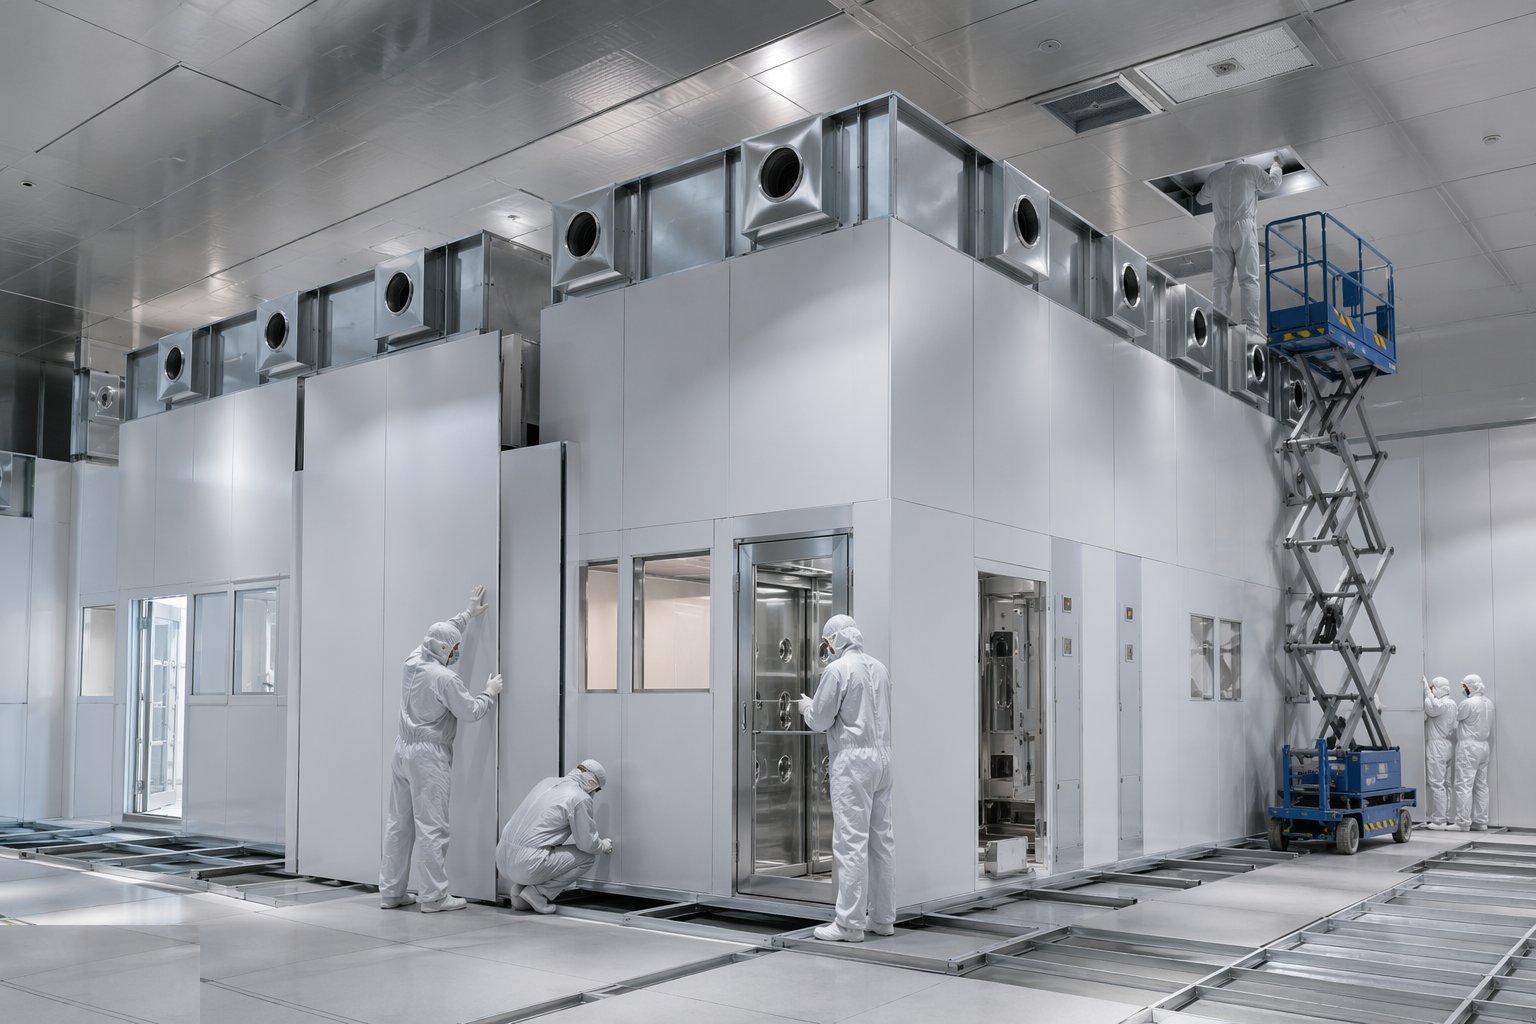
Walls and ceilings rise from the panel system: panels levelled and sealed, coved junctions at floor and ceiling, flush vision panels and interlocked doors, and every penetration — pipe, cable, duct, sprinkler — sleeved and sealed both sides with the specified sealant system. This is the airtightness-critical stage: the pressure cascade the commissioning engineer will chase for weeks is decided by how well ten thousand linear metres of joint were sealed. A room envelope test — pressure hold or leak hunting with smoke — before the fit-out proceeds pays for itself many times over.
Step 4: Lay the floor and install the FFUs/HEPA terminals
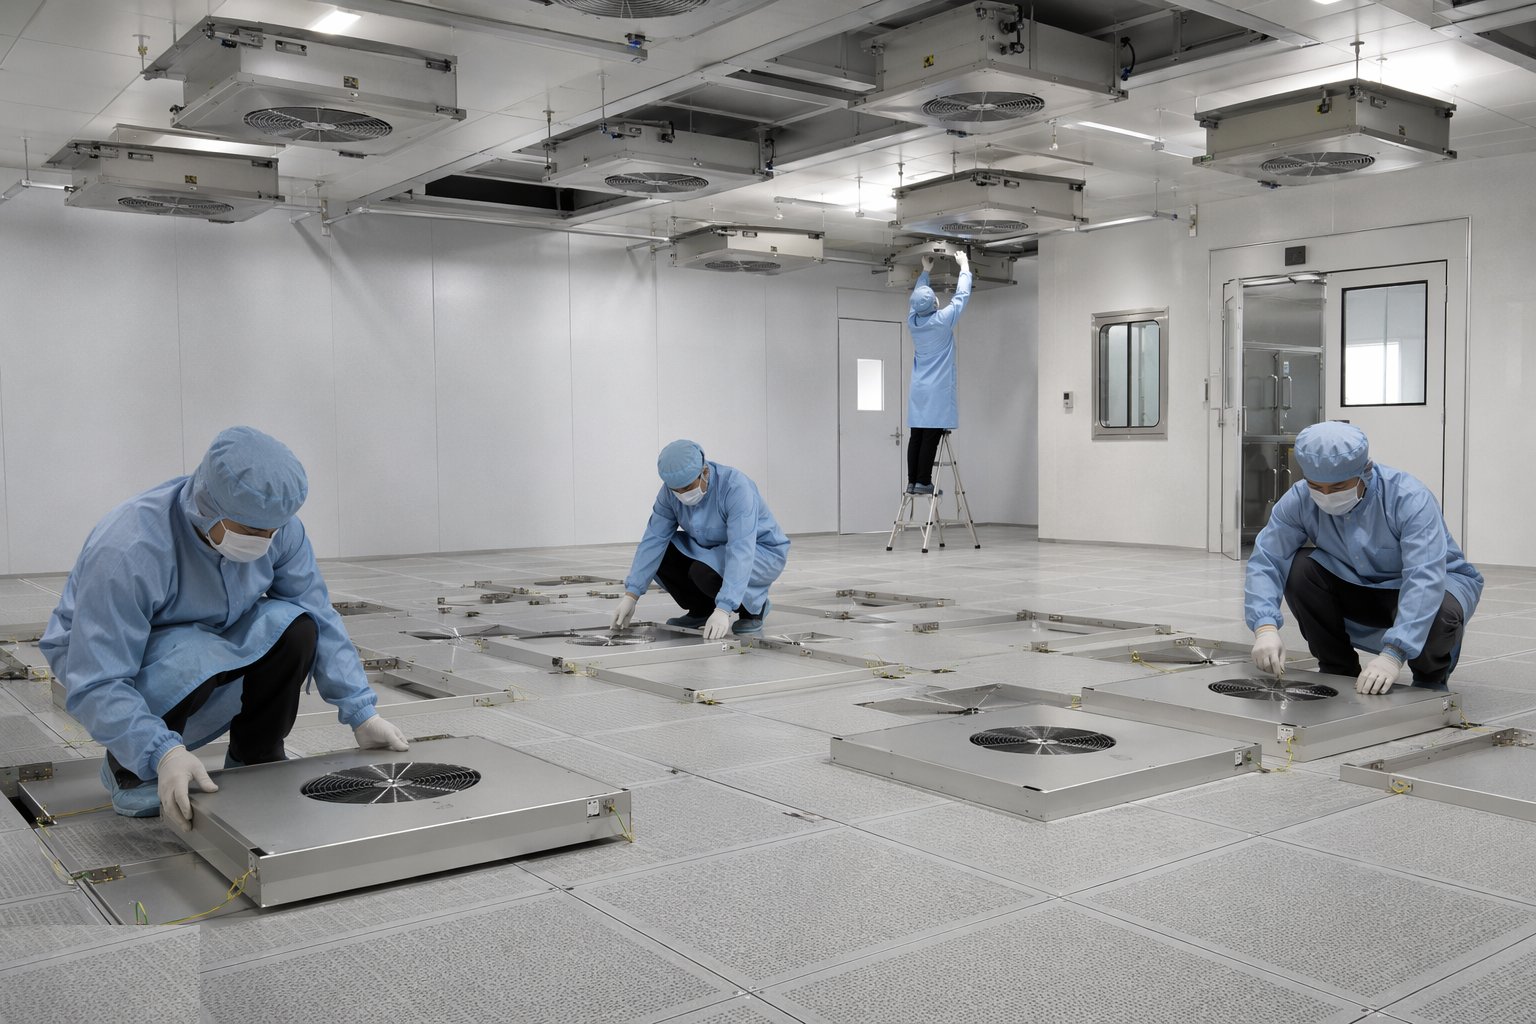
Sheet vinyl or epoxy resin flooring goes down welded and coved — no joints, no traps, tested for continuity and, where static matters, for conductivity to earth. Then the filters: each HEPA/ULPA unit lifted into its housing by handlers in clean gloves — fingerprints on media are a leak path — seated on its gasket or gel seal, and individually scan-tested in place with an aerosol photometer to EN 1822 practice to prove no pinholes, no frame leaks, no seal failures. A filter that fails the scan comes out and goes back; there is no patching a HEPA.
Step 5: Second fix, flush and deep clean
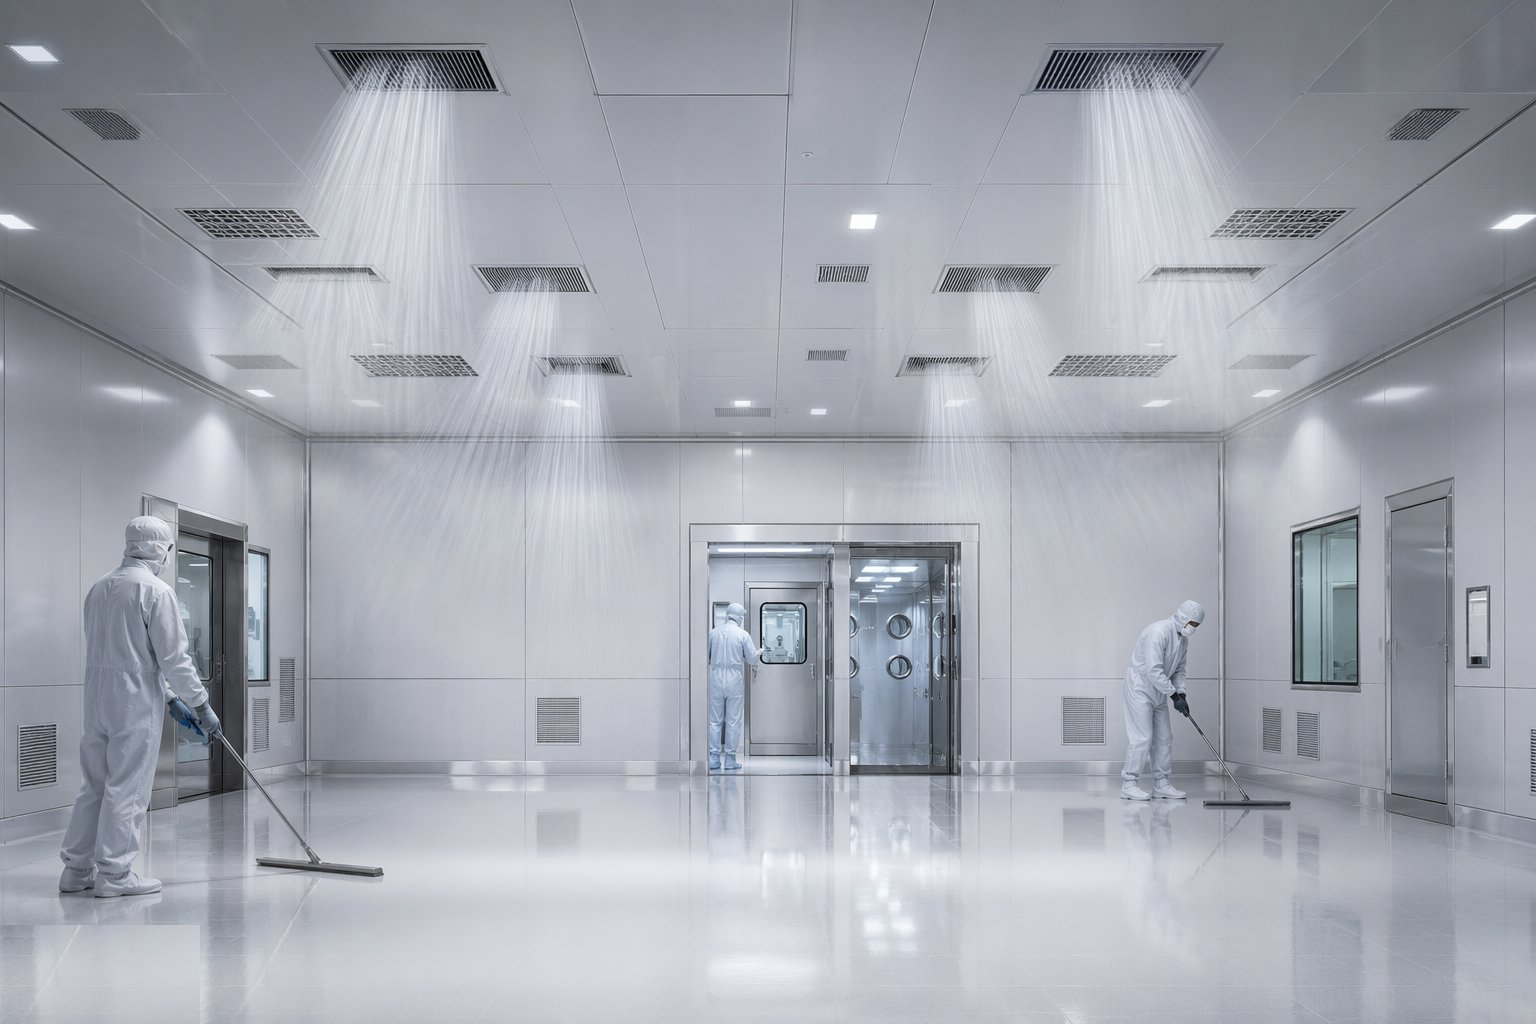
Lights, grilles, sockets, transfer hatches and furniture are fitted under full gowning, then the room is run and flushed: fans on, filters working, days of continuous operation pulling the residual construction load out of the air while cleaners work top-down with lint-free materials and filtered vacuums. Housekeeping at this stage is obsessive and sequential — a room cleaned before the plenum above it is cleaned is a room cleaned twice.
Step 6: Test, classify and validate
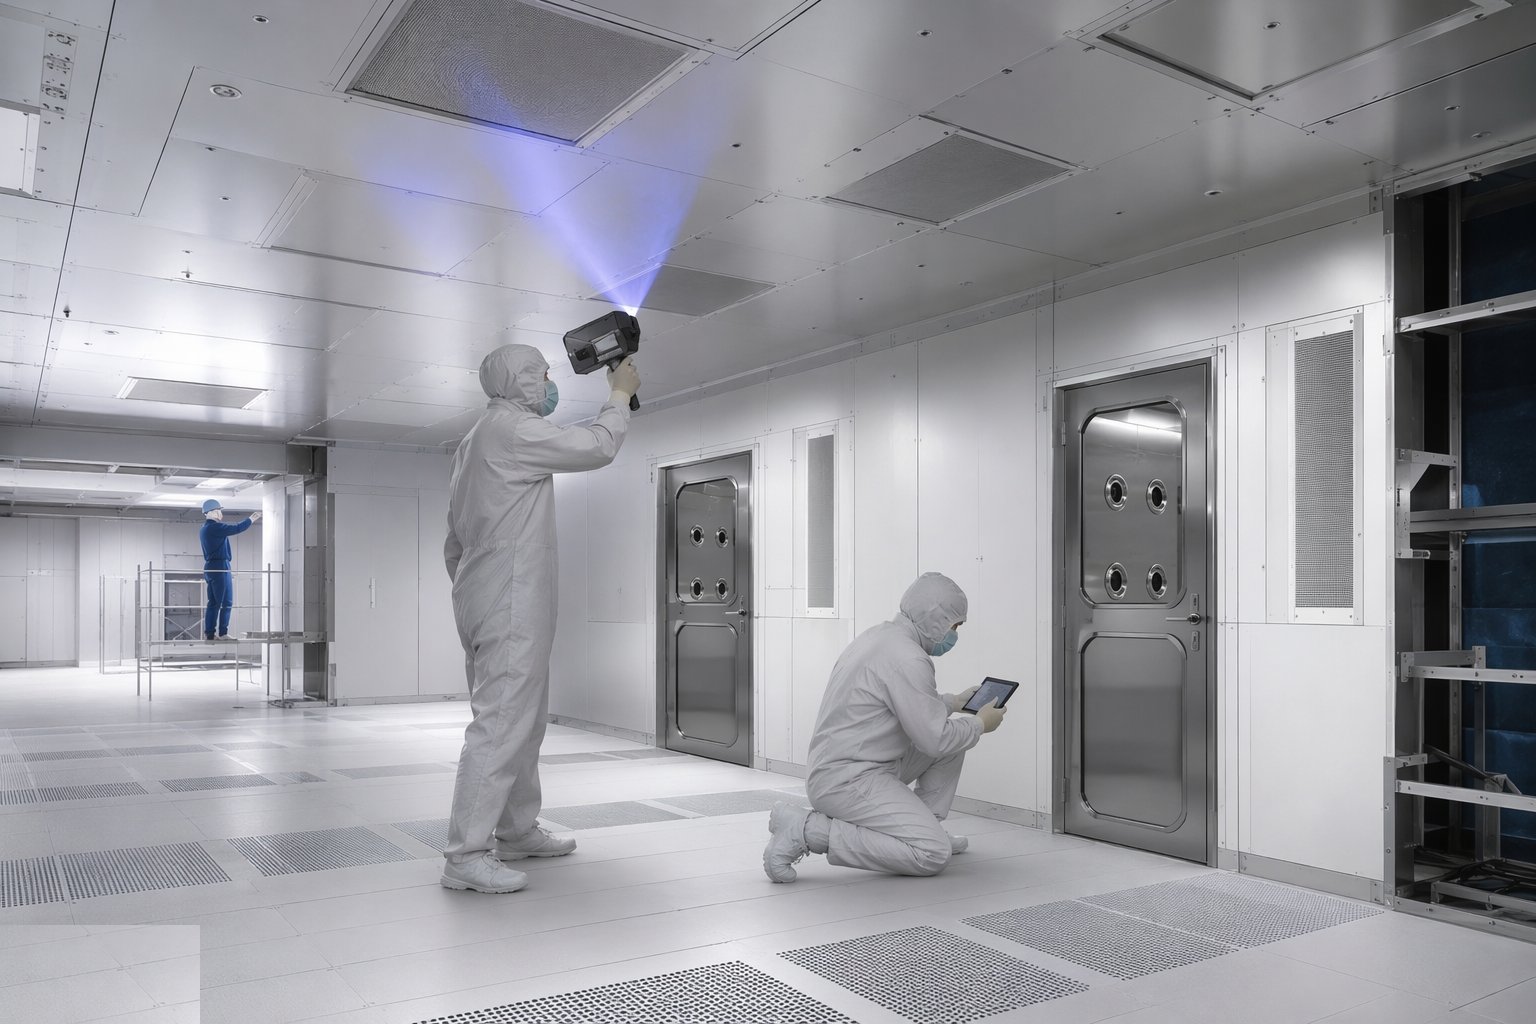
The test regime runs in order: airflow velocities and air change rates, room differential pressures across the cascade, filter integrity scans, recovery time (how fast the room returns to class after a contamination event), airflow visualisation to show the air goes where the design says, and finally particle counting to ISO 14644-1 at the specified states — as-built, at-rest, or in operation. Every instrument is calibrated, every result recorded, and for GMP facilities the whole package feeds the qualification documentation: IQ, OQ, PQ. The certificate on the wall — ISO class, test date, standard — is the deliverable the client is actually buying.
Plant and equipment
- Modular cleanroom panel systems with walk-on ceiling grids, coves and interlocked doors
- Fan filter units (FFUs) and ducted HEPA/ULPA terminal housings certified to EN 1822
- Make-up and recirculation air handling units with humidification and reheat
- Welded sheet vinyl or epoxy resin cleanroom flooring, conductive grades where specified
- Aerosol photometers and discrete particle counters for filter scans and ISO classification
- Airflow visualisation (fog) equipment, anemometers and micromanometers
- Gowning room furniture, pass-through hatches and interlock systems
- Filtered vacuums, lint-free cleaning systems and clean-build access control kit
Quality control checks
- Duct cleanliness inspections signed before systems run; material wipe-down records under the clean-build protocol
- Panel joint and penetration sealing inspections against the airtightness detail, with envelope pressure-hold tests
- In-situ HEPA/ULPA filter scan test records — one certificate per filter, no exceptions
- Room differential pressure, airflow and air-change measurements across the full cascade
- Particle counting to ISO 14644-1 with calibrated counters at the specified occupancy states
- Recovery and airflow visualisation tests documented for the validation file
Safety considerations
- Work at height in plenums and on ceiling grids — load limits of walk-on ceilings respected, fragile zones barriered
- Filter handling: HEPA media and gel seals protected, cut hazards from metal housings controlled
- Electrical work in live plenums as panels close in — isolation and permit discipline
- Manual handling of large panels and FFUs: mechanical lifts planned, no improvisation
- Cleaning chemicals and fog agents used under COSHH assessment with ventilation controlled
- Interlocks and door hardware: entrapment and escape routes checked before the envelope is closed
Common defects
- Pressure cascade unattainable because envelope leakage was never hunted before fit-out
- HEPA housings leaking at gaskets and seals — filters fine, installation failed
- Particle counts failing from contamination sealed in during construction, not from the air handling
- Ceiling grids unable to take maintenance loads, forcing access through the clean space below
- Penetration seals cracking as services settle, opening leak paths months after validation
- Vinyl flooring welds and coves failing, creating particle traps and cleaning dead zones
Best suited for
- Semiconductor, photonics and microelectronics production at ISO 5–7
- Pharmaceutical sterile and aseptic suites with GMP qualification
- Medical device, optics and aerospace assembly at ISO 7–8
- Any facility where the classification is a contractual or regulatory deliverable
How long does Cleanroom Construction take?
Typical duration: A mid-scale cleanroom suite runs 4–9 months from host-space handover to classification; large fab-scale installations run in overlapping zones over 12 months or more, with testing and validation adding 6–10 weeks..