Bridge Finishes — Bearings, Joints & Waterproofing
The small components that decide whether a bridge lasts: bearings, expansion joints, deck waterproofing, drainage and parapets.
Last updated 2026-07-28 by the BuildPedia Editorial Team.
What is Bridge Finishes — Bearings, Joints & Waterproofing?
Bridge finishes are the small components that let the structure move and keep the water out — bearings, expansion joints, waterproofing, drainage and parapets. Ask any bridge maintenance engineer what fails first and they will not say the beams or the piers — they will say these parts. They are the cheap-by-comparison components that accommodate everything the structure does: the deck grows and shrinks with temperature, rotates under load, creeps and shrinks over years. The bearings take that movement at the supports, the expansion joints take it at the ends, and the waterproofing keeps the resulting chemistry experiment — water, oxygen and de-icing salt — off the structural concrete. When any of them fails, water and chlorides go exactly where they do most damage.
UK practice is well codified. Structural bearings are designed and supplied to the BS EN 1337 series — elastomeric, pot, spherical and sliding types — and every bearing is a replaceable component with a stated design life, so the structure is detailed for future jacking and replacement. Bridge expansion joints are specified to DMRB CD 357. Deck waterproofing follows CD 358 — waterproofing and surfacing of concrete bridge decks — with materials certified for the purpose, applied to Series 2000 of the Specification for Highway Works, tested, protected and surfaced hot so the surfacing bonds to the system. Vehicle parapets go in to Series 400, with containment levels selected to BS EN 1317.
In the UAE the movements are bigger and the salt comes from the air rather than the gritter. Long decks through a Gulf summer see large thermal ranges, so joint selection and preset are critical; chloride-laden marine atmospheres make waterproofing and drainage detailing as important as any de-icing regime; and the occasional but violent Gulf storm means deck drainage is sized for intensity, not frequency. The components are the same families — EN 1337-type bearings, proprietary joints, certified membranes — specified through the authority's structures standards, with replaceability and inspection access written into the details.
When and why is Bridge Finishes — Bearings, Joints & Waterproofing used?
Finishes follow the structural deck and precede surfacing and opening, because the waterproofing must go down before the blacktop, the joints must be set to the deck's actual temperature and position, and the parapets must be in before anyone drives across. They matter out of all proportion to their cost: bearings, joints and waterproofing are the maintenance cycle of the bridge for the next century, and every shortcut taken here is paid back, with interest, in lane closures and jack-ups twenty years from now. The same waterproofing logic turns up on a house wherever structure meets water — a buried podium roof over a basement, a balcony deck, a tanked retaining wall: certified membrane, sealed laps, protection before covering, because a leak under finishes is archaeology at any scale.
Types of Bridge Finishes — Bearings, Joints & Waterproofing
Elastomeric bearings
Laminated rubber-and-steel pads that accommodate movement by shear and rotation by compression — simple, no moving parts, nothing to lubricate, and the default for short to medium spans. Fixed, free and guided variants control where the deck is allowed to move; in hot climates the grade of elastomer and the shear deflection at summer peak are the design drivers.
Pot, spherical and sliding bearings
For bigger loads and rotations: an elastomer pad confined in a steel pot, or a spherical sliding element, usually paired with PTFE–stainless steel sliding surfaces for movement. Higher capacity and lower resistance to movement than plain elastomerics, at the cost of precision machined parts that must be kept clean and protected during installation.
Expansion joints
The family that bridges the gap at deck ends: asphaltic plug joints for small movements, reinforced elastomeric and comb/finger joints for medium movements, and modular multi-seal joints for the big ranges. Every one is a wear item living in the wheel tracks — the detail at the joint nosing, and the concrete it is cast into, decides whether it lasts five years or twenty.
Deck waterproofing systems
Certified sheet membranes or liquid sprayed systems bonded to the deck concrete, continuous between the parapet upstands, lapped and sealed at every outlet and joint bay, then protected and surfaced. Under CD 358 the system is tested and site-trialled; in Gulf practice the same certified systems are used, with detailing attention at outlets sized for storm intensity.
Bridge Finishes — Bearings, Joints & Waterproofing: step by step
Step 1: Prepare the bearing shelves and set the bearings
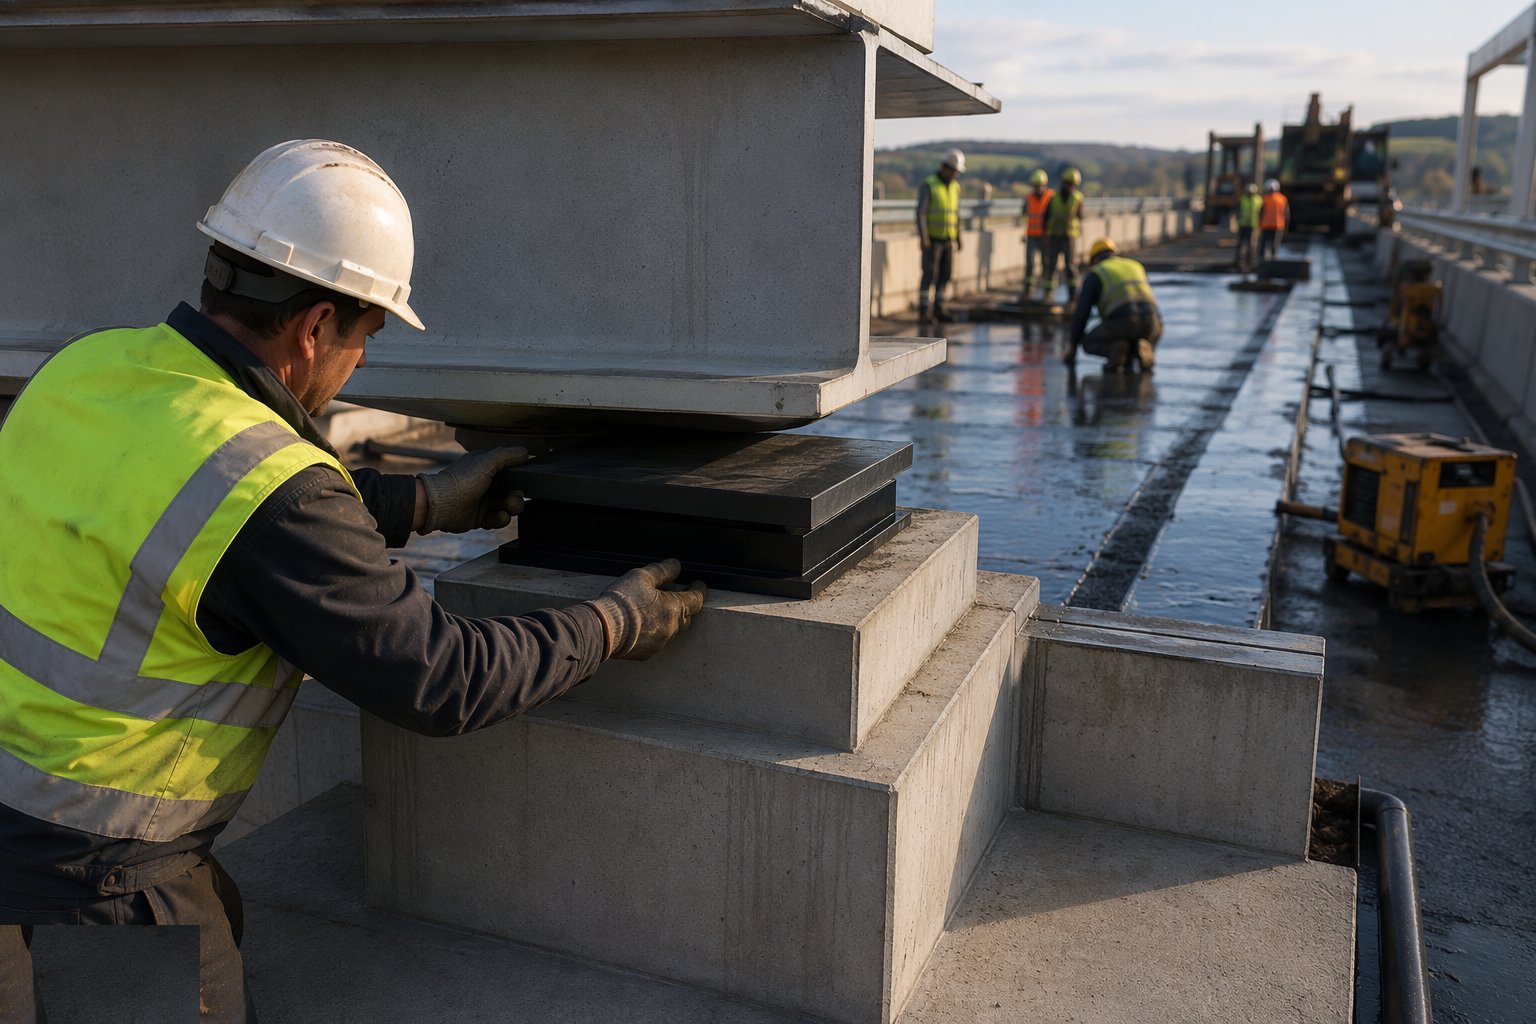
Survey the bearing plinths and confirm levels, then set each bearing to line on its mortar bed or holding-down bolts — position preset for the deck temperature at the time of installation, because a bearing installed square on a cold morning is offset for the rest of its life if the design expected otherwise. Keep sliding surfaces masked and clean, and leave any temporary restraints in place until the deck's own restraint system takes over. Record every bearing's type, position and preset in the asset file.
Step 2: Prepare and waterproof the deck
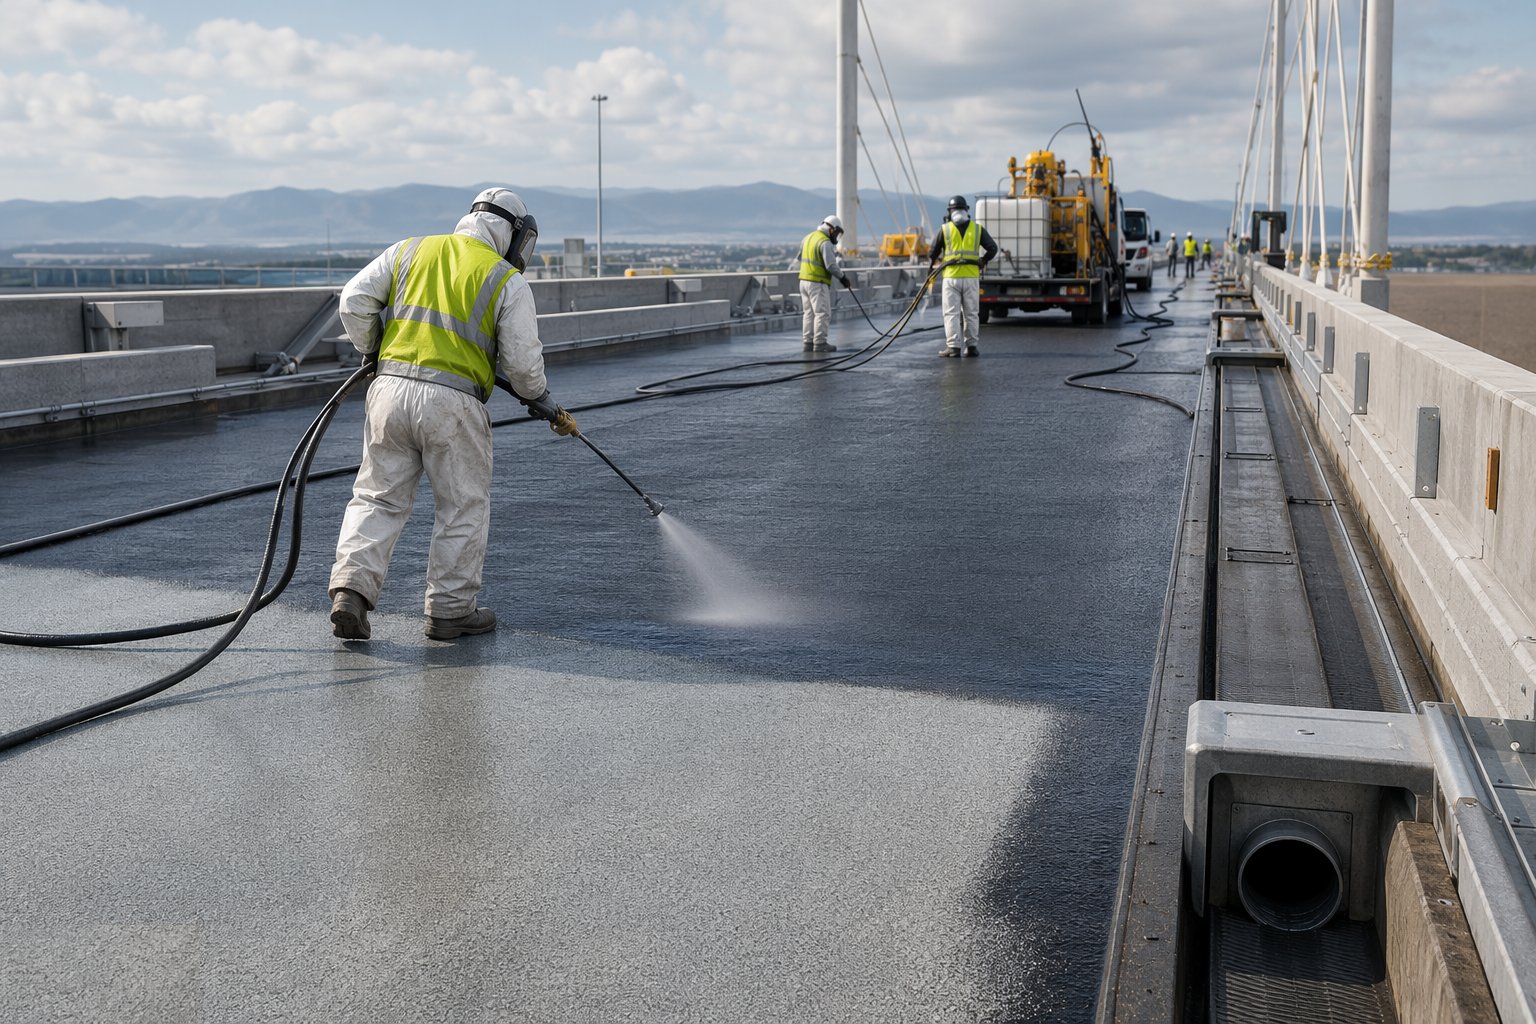
Prepare the deck surface to the membrane manufacturer's standard — clean, dry, to the specified texture, usually by captive blasting — and prime. Apply the waterproofing system continuously between parapet upstands: sheet systems lapped and rolled, liquid systems sprayed to the specified wet-film thickness, both checked and holiday-tested or gauged as the system demands. Detail every penetration — outlets, joint bays, kerb lines — because that is where leaks begin. Protect the membrane immediately; nothing traffics it unprotected.
Step 3: Install deck drainage

Form the deck drainage with the waterproofing, not after it: scuppers and outlets sealed into the membrane, downpipes or collector pipes routed where they can be rodded and maintained, and falls verified so water actually reaches them — a ponding deck ages its surfacing and loads the structure. In the Gulf, outlets are sized for storm intensity and detailed against wind-driven sand blockage; in the UK the detailing follows the CD 358 drainage requirements, with inlets positioned adjacent to the joint lines.
Step 4: Form the joint bays and install the expansion joints
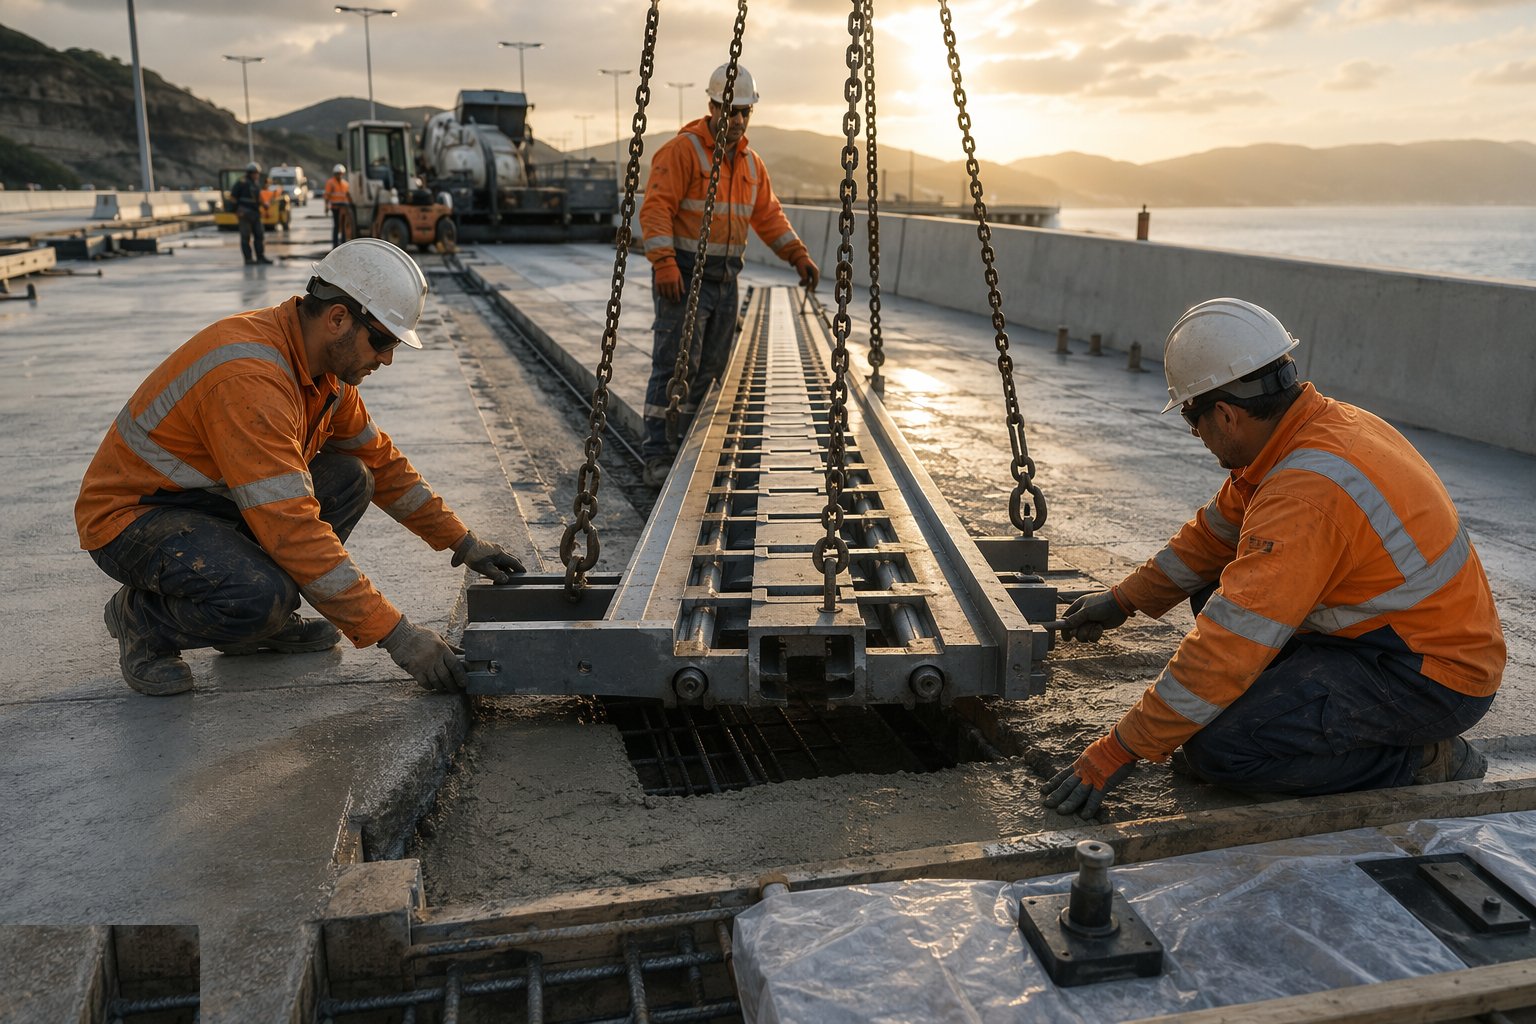
Cut back and form the joint bays, fix the joint reinforcement and cast the high-quality nosing concrete or resin mortar that the joint anchors into — most joint failures are nosing failures, and most nosing failures are workmanship. Set the joint itself to line and level with the correct gap for the deck temperature at installation, weld or bolt it down per the system, and cure the nosing fully before trafficking. The riding surface through the joint is checked with a straightedge: a joint that clunks on day one is already dying.
Step 5: Erect the parapets and edge details

Install the vehicle parapets to the specified containment level — anchorages torqued and tested into the deck edge, posts plumb, rails aligned through the transitions and across the joints where special details accommodate movement. Parapet type testing to BS EN 1317 is the designer's responsibility; the site's responsibility is anchorage, alignment and the transition details at joints and terminations. Pedestrian parapets, handrail and edge kerbs follow the same discipline.
Step 6: Surface the deck and prove the finished works

Lay the surfacing over the waterproofing within the system's temperature rules — CD 358 ties the bond to laying and compaction temperatures — so the asphalt and membrane become one bonded system. Check the finished levels and ride quality through every joint, flood-test or hose-test the drainage, and walk the whole deck against a finishing snag list: joints, parapet line, drainage, membrane at verges, kerb upstands. The completion records — bearing schedules, membrane test certificates, joint settings — are assembled for handover, because the first inspection after opening starts from them.
Plant and equipment
- Captive blasting or scabbling equipment for deck preparation
- Membrane spray rigs or sheet-laying and hot-air welding kit
- Wet-film thickness gauges, holiday detectors and bond test dollies
- Small cranes or telehandlers for joint and parapet installation
- Torque wrenches and anchor pull-test equipment for parapets
- Resin mortar and nosing concrete mixers and vibrating pokers
- Straightedges, dipsticks and survey equipment for level control
- Paver, rollers and bond coat sprayer for the deck surfacing
Quality control checks
- Bearing schedule: type, position, preset and bedding recorded per bearing; EN 1337 certification on file
- Deck surface preparation approved before priming; membrane thickness and holiday tests logged
- Waterproofing system certificates to CD 358; site trial records where required
- Joint gap set to surveyed deck temperature and recorded; nosing concrete strength before trafficking
- Parapet anchor torque and pull-test records; alignment through transitions surveyed
- Drainage flood or hose test passed before surfacing closes it in
- Finished ride quality through joints checked with a straightedge — no step, no clunk
Safety considerations
- Work at unprotected deck edges: edge protection in place until parapets are complete
- Hot works and sprayed materials: COSHH controls, respirators, ignition control for solvents
- Captive blasting: dust and debris containment, eye protection, exclusion zones
- Manual handling of joint units and parapet sections — mechanical aids as default
- Traffic interface on phased decks: approved temporary traffic management at all times
- Heat management for membrane and surfacing crews in Gulf summer — the deck radiates
- Confined or semi-confined work in box girders during bearing and drainage installation
Common defects
- Bearing installed with the wrong preset — locked offset for life, guides binding within years
- Membrane applied to a damp or poorly prepared deck: blisters and debonding under the surfacing
- Joint nosing cracked within a year — the classic workmanship failure
- Joint gap set at the wrong temperature: the joint crushed in August or gaping in January
- Drainage outlet detailed against the membrane lap — a leak factory at every scupper
- Surfacing laid too cold on the membrane: no bond, and the asphalt slides at the first braking lorry
- Parapet anchors into edge concrete that was never compacted — pull-tests fail at handover
Best suited for
- The small components that decide whether a bridge lasts a century
- Bearings and expansion joints designed to move for decades
- Deck waterproofing and drainage protecting the structure from salt and water
- Parapets, surfacing and the final inspection regime
How long does Bridge Finishes — Bearings, Joints & Waterproofing take?
Typical duration: 6–12 weeks for a typical single structure, usually split across traffic phases; the waterproofing and surfacing windows are weather-critical and the joint installations are often night or possession work..