Road Markings, Signage & Lighting
The information and visibility layer — markings, signs and lighting that turn a strip of asphalt into a legal, usable road.
Last updated 2026-07-28 by the BuildPedia Editorial Team.
What is Road Markings, Signage & Lighting?
Road markings, signage and lighting are the finishing systems that turn a finished pavement into a legal, usable road. A road without them is not a road; it is a liability with a surface course. These systems carry the road's legal meaning — the give-way line, the speed limit roundel, the direction sign — and its night-time usability, and they are the last major operation before opening, laid onto a finished surface that every earlier process has been building towards. Because they are last, they inherit every earlier mistake: a marking can only be as straight as the surfacing, and a sign can only be legal if the design behind it was.
In the UK, the legal basis is the Traffic Signs Regulations and General Directions 2016 (TSRGD) — signs and markings must conform to its prescribed designs to be lawful and enforceable — with the Traffic Signs Manual giving the working guidance. Marking performance is specified to BS EN 1436 (retroreflectivity, luminance, skid resistance), materials to BS EN 1871, and installation sits under Series 1200 of the Specification for Highway Works (traffic signs and road markings) with sign assemblies manufactured to BS EN 12899. Road lighting runs to Series 1400: columns to the BS EN 40 series, lanterns and photometrics designed to BS EN 13201, electrical installation certified to BS 7671, with skid and visibility performance checked after opening.
In the UAE the same layer answers to the RTA's traffic control device standards and the emirate's traffic law: Dubai's signs are bilingual Arabic–English with their own prescribed fonts and layouts, approved through the RTA before manufacture. The environment is harsher on every component — thermoplastic must be formulated for road surface temperatures that can soften ordinary material, glass bead retroreflectivity degrades under sand abrasion and dust film, and electronics and lanterns are specified against heat and ingress. Solar-powered lighting and signing is common on remote and desert corridors, and every installation in the right of way runs under the road reserve permit regime with RTA inspection before energisation and opening.
When and why is Road Markings, Signage & Lighting used?
Markings, signs and lighting come last in the road sequence because they must go onto the finished surface course — markings onto clean, cured asphalt, sign faces and lanterns onto structures that no longer risk damage from paving plant — and because the road cannot legally open until the prescribed signs and markings are in place or an approved temporary arrangement stands in their stead. It matters because this is the road's contract with its users: an unenforceable speed limit sign, a marking that vanishes in the wet at night, or a lighting scheme below its design lux levels is a safety failure with a paper trail leading straight back to whoever installed or accepted it. There is no real domestic version of this process — the closest a private site gets is factory or estate white-lining and amenity bollard lighting, where the same materials logic applies but none of the statutory prescription, and nobody polices the retroreflectivity but the client.
Types of Road Markings, Signage & Lighting
Thermoplastic markings
Hot-applied thermoplastic — screed, extrusion or spray — with premix glass beads in the material and drop-on beads applied to the wet surface for immediate retroreflectivity. The default UK and Gulf marking: durable, fast and reflective, specified to performance classes of BS EN 1436. Thickness, bead embedment and line accuracy are all checked; in Gulf climates the formulation must resist softening and flow at high pavement temperatures.
Preformed, paint and special markings
Preformed thermoplastic sheets for symbols, arrows and lettering where crisp shapes matter; paint-based markings for lower-traffic or temporary use; and specialist treatments such as high-friction (anti-skid) surfacing with coloured aggregate at approaches and crossings, and coloured surfacing for cycle lanes and bus lanes. Each is a system with its own substrate preparation and curing rules — anti-skid laid on dust peels off in sheets.
Permanent traffic signs
Sign assemblies to BS EN 12899 — plate, substrate, brackets, posts and foundations — from single-post warning signs to gantry-mounted direction signs, illuminated where prescribed by TSRGD. Mounting heights, lateral clearances and orientation are specified so signs are visible and survive being struck as designed; passively safe posts and supports are used where errant vehicles may hit them. In Dubai every sign face runs through RTA approval before fabrication.
Road lighting
Columns to the BS EN 40 series — steel, aluminium, concrete or composite — on planted or flanged foundations, with lanterns selected for the lighting class designed to BS EN 13201, fed by ducted cable networks from feeder pillars. Photocell, group or smart central-management control switches the scheme; solar standalone columns serve remote corridors. The whole installation is an electrical system: designed, installed, tested to BS 7671 and commissioned under witness.
Road Markings, Signage & Lighting: step by step
Step 1: Confirm the schedules against the approved design
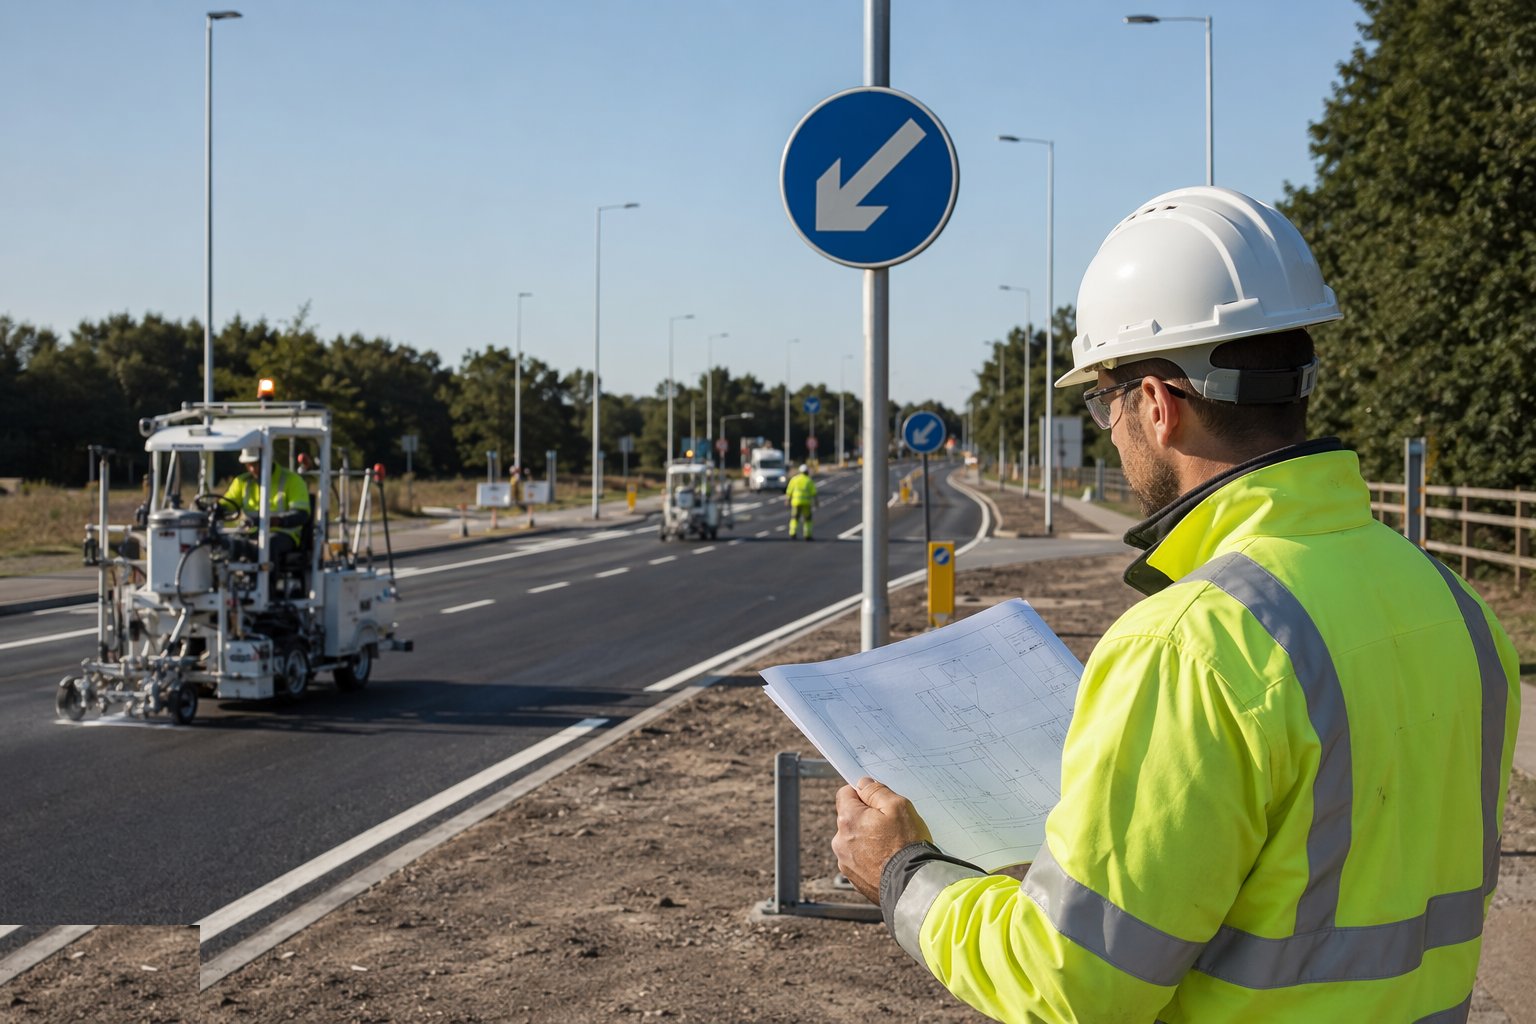
Reconcile the sign schedule, marking drawings and lighting design against what is actually approved: TSRGD-compliant sign faces with working-drawing authorisation where needed in the UK, RTA-approved sign layouts in Dubai, and the lighting photometric design with its column spacings and lantern selections. Check the ground against the drawings — sight lines, verge widths, duct routes installed earlier — because a sign scheduled for a verge that is now a retaining wall is a design query, not a site bodge.
Step 2: Set out and pre-mark the road markings
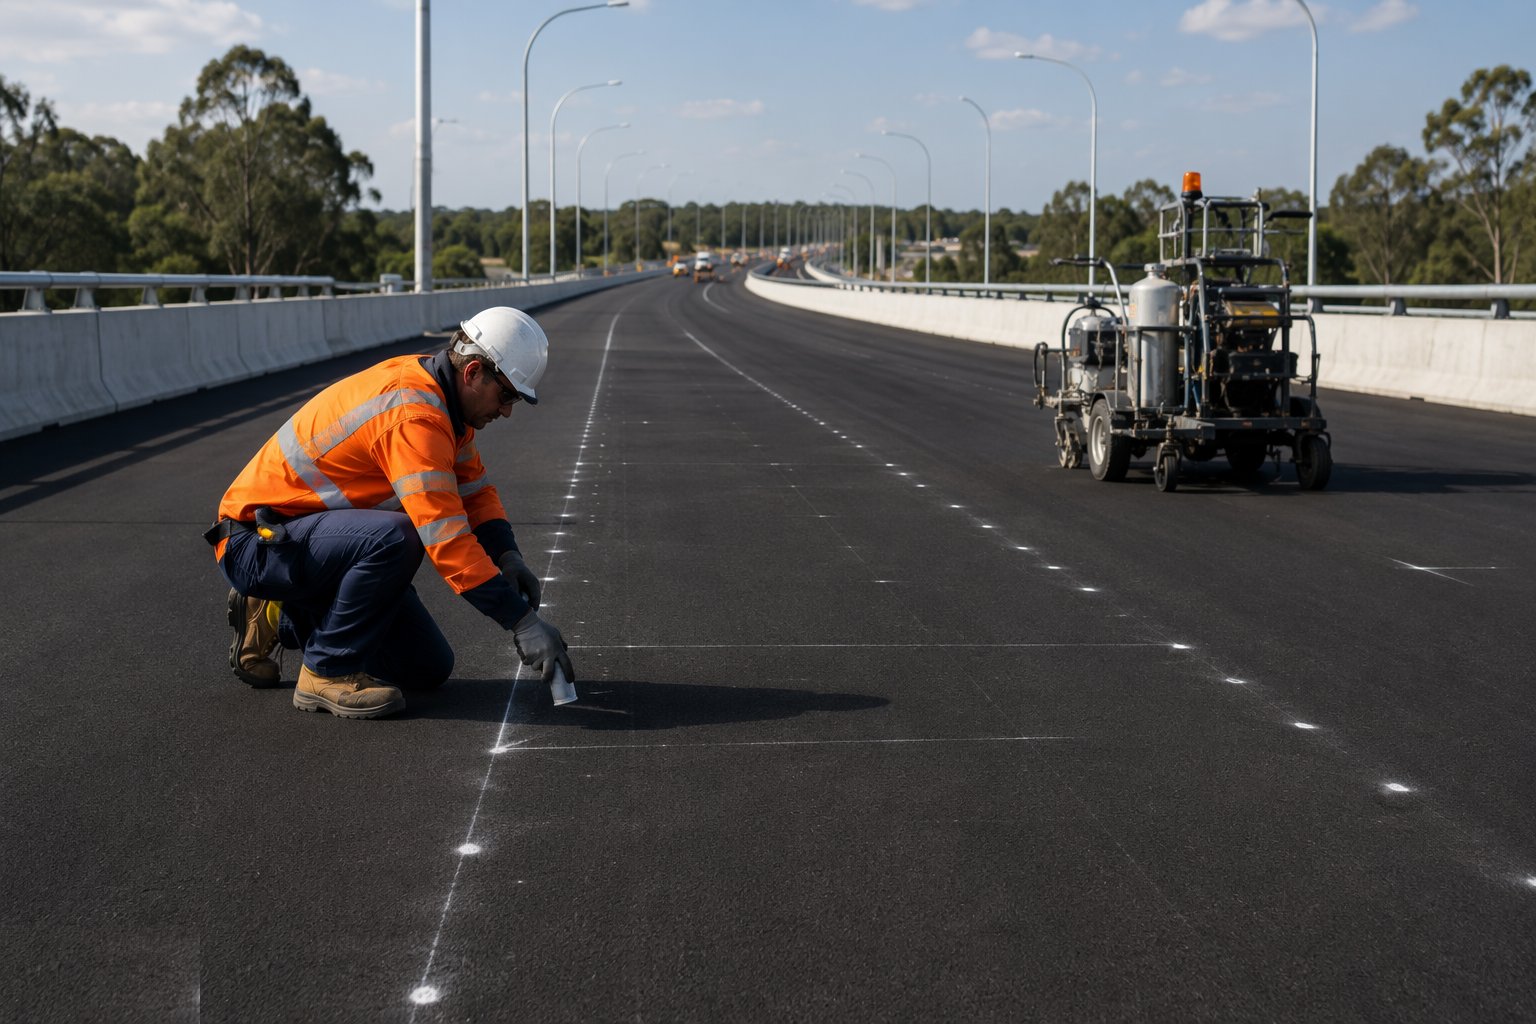
Set out the markings from the design: centre lines, lane lines, edge lines, hatching, arrows and symbols, pre-marked with chalk lines, spots or string so the applicator follows a checked layout. Measure the tricky ones — give-way triangles, roundabout geometry, box junctions — because an illegally dimensioned marking is an unenforceable one. Confirm studs and their spacings where specified. Nothing is applied until the layout is signed off; thermoplastic is remarkably difficult to unpick.
Step 3: Prepare the surface and apply the markings
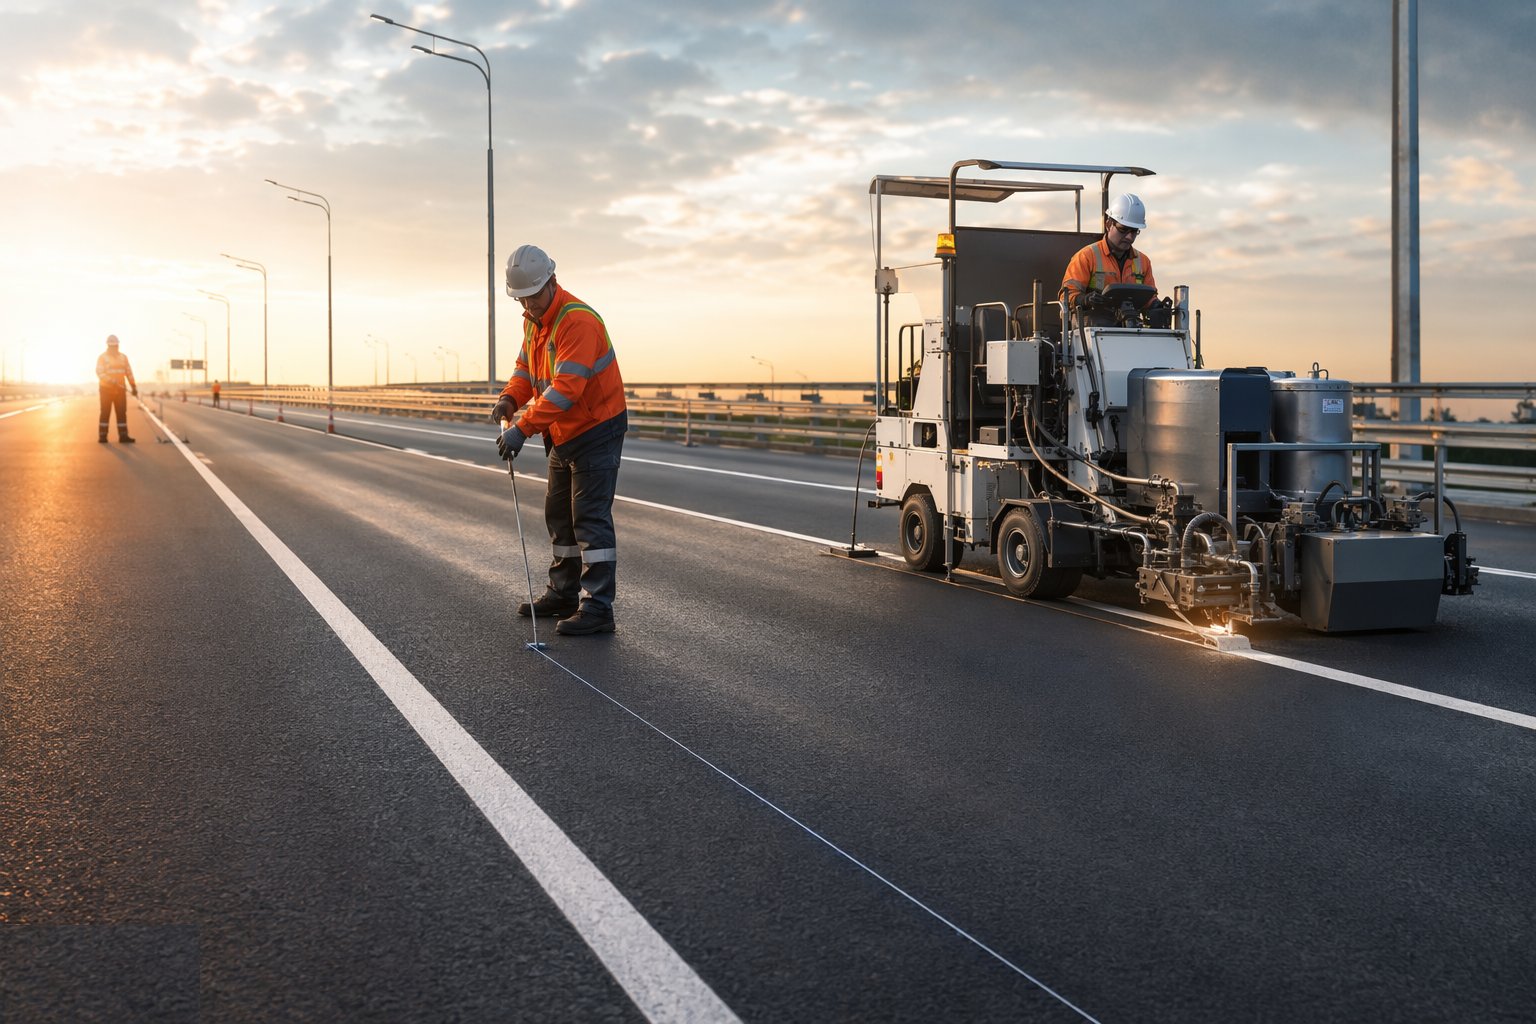
The surface must be clean, dry and free of curing contamination or loose chippings — sweep, blow and, where needed, tack the concrete or surface-dressed substrates per the material manufacturer. Apply thermoplastic within its temperature band, at the specified thickness, with drop-on beads broadcast into the wet material for instant reflectivity. Check wet-film thickness, bead coverage and line width as you go; a line that cannot be seen in headlights on a wet night failed at the moment the beads missed the melt.
Step 4: Erect the signs
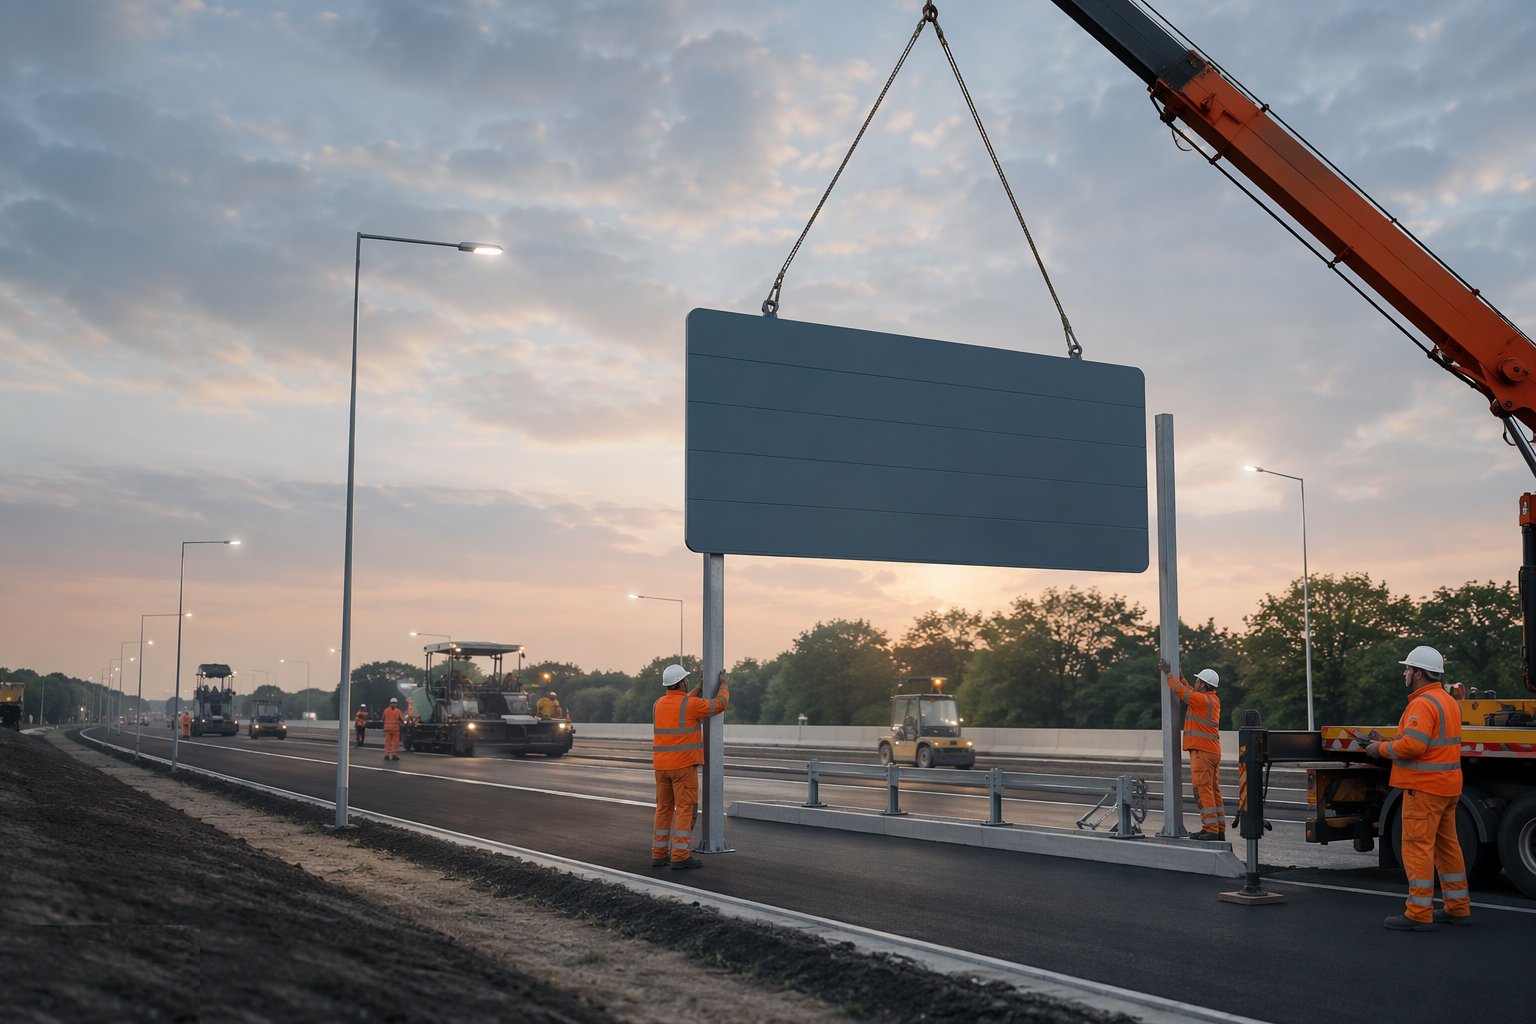
Install posts on foundations or in sockets to the specified embedment, plumb and at the correct lateral clearance from the carriageway edge; passively safe supports go where the design puts them. Mount the plates at the prescribed mounting height, oriented to the approaching traffic, with fixings torqued and caps fitted. Cover or bag any sign that is not yet legally in force — an uncovered give-way at an unfinished junction causes real crashes — and inspect every sign day and night before it is handed over.
Step 5: Install the lighting: bases, columns, cabling
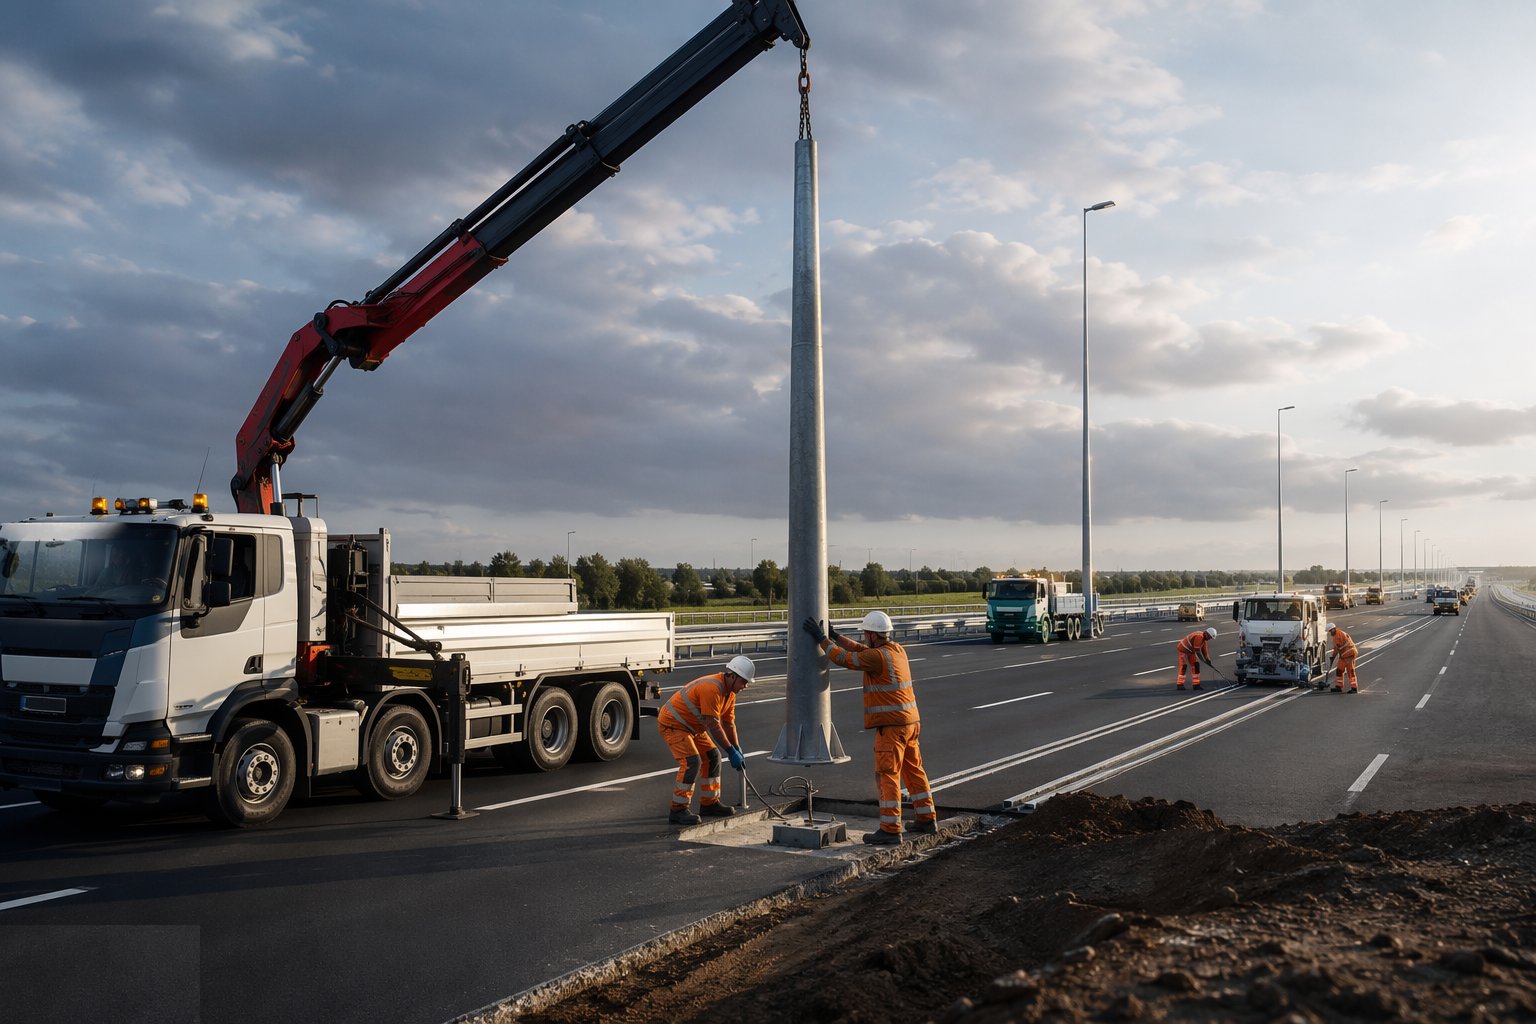
Excavate or drill the column foundations, set the base plates or root sections true and level, and stand the columns with a crane or HIAB under control — watching overhead lines, because a column being raised is a conductor looking for one. Pull cables through the duct network installed earlier, gland into columns and feeder pillars, and terminate under safe isolation procedures. Every duct and chamber position is recorded as-built; the maintenance team thirty years from now has only your records.
Step 6: Test, energise and commission the electrical works
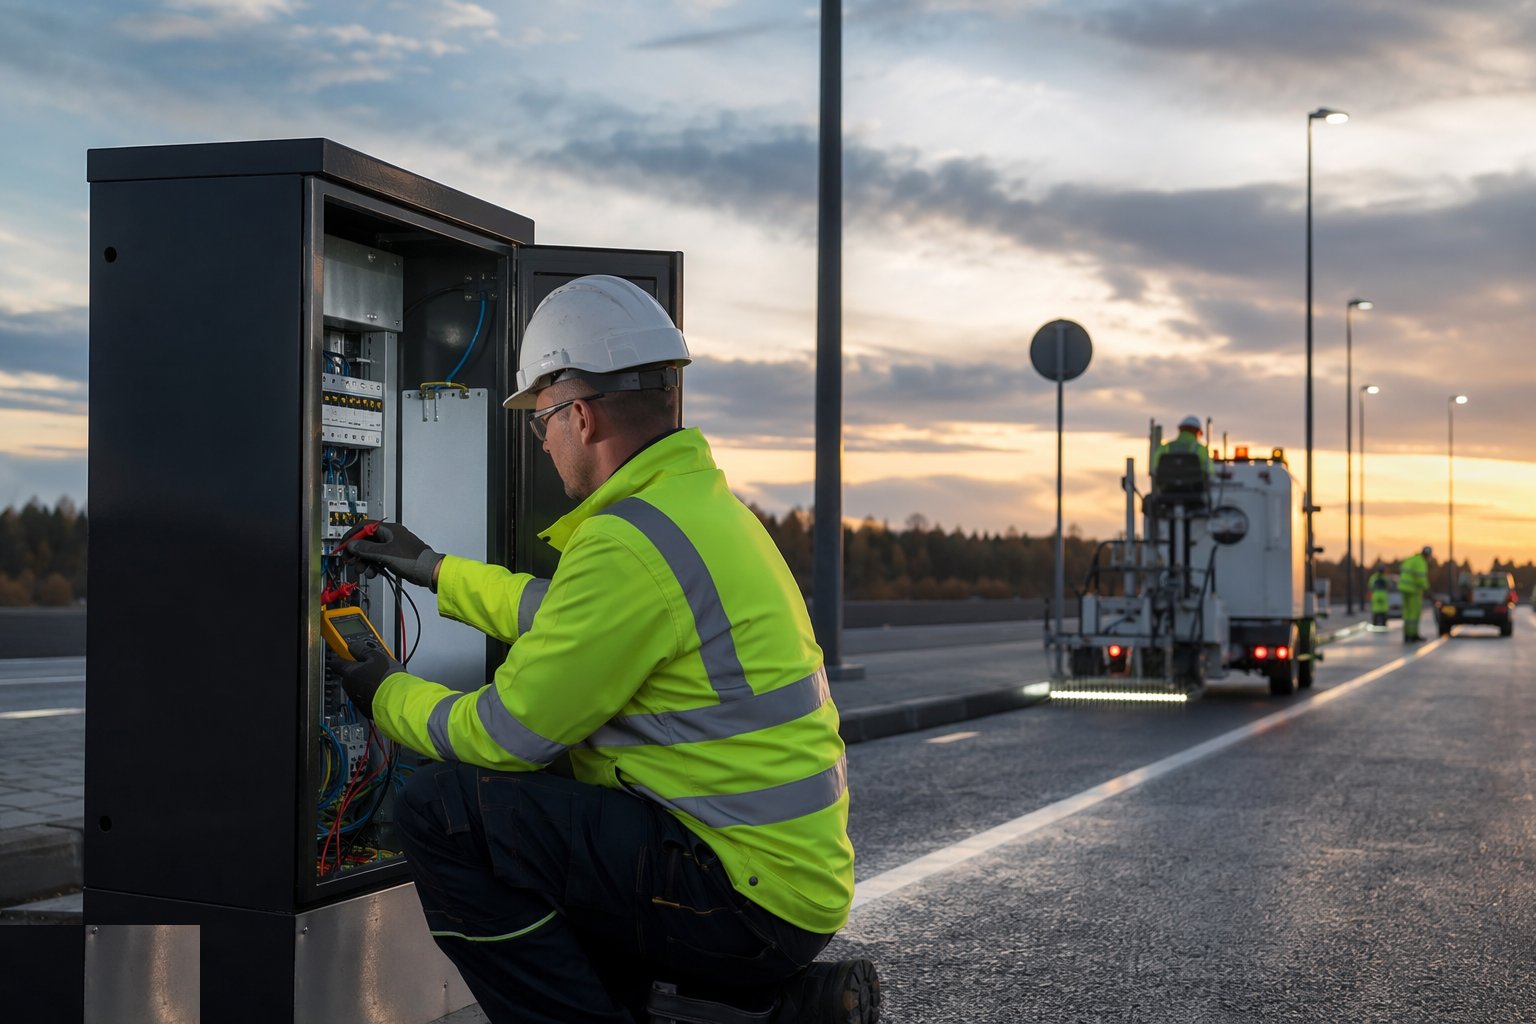
Test every circuit to BS 7671 — insulation resistance, earth continuity, polarity, protective device operation — and record the certification before energisation. Commission the controls: photocells, timers or central management system, switching verified at dusk levels. Measure the lighting: a lux or luminance survey against the design class, with uniformity checked, not just a few readings at convenient points. In the UAE, energisation and final connection run through the authority inspection regime before the scheme is accepted.
Step 7: Verify performance and open the road
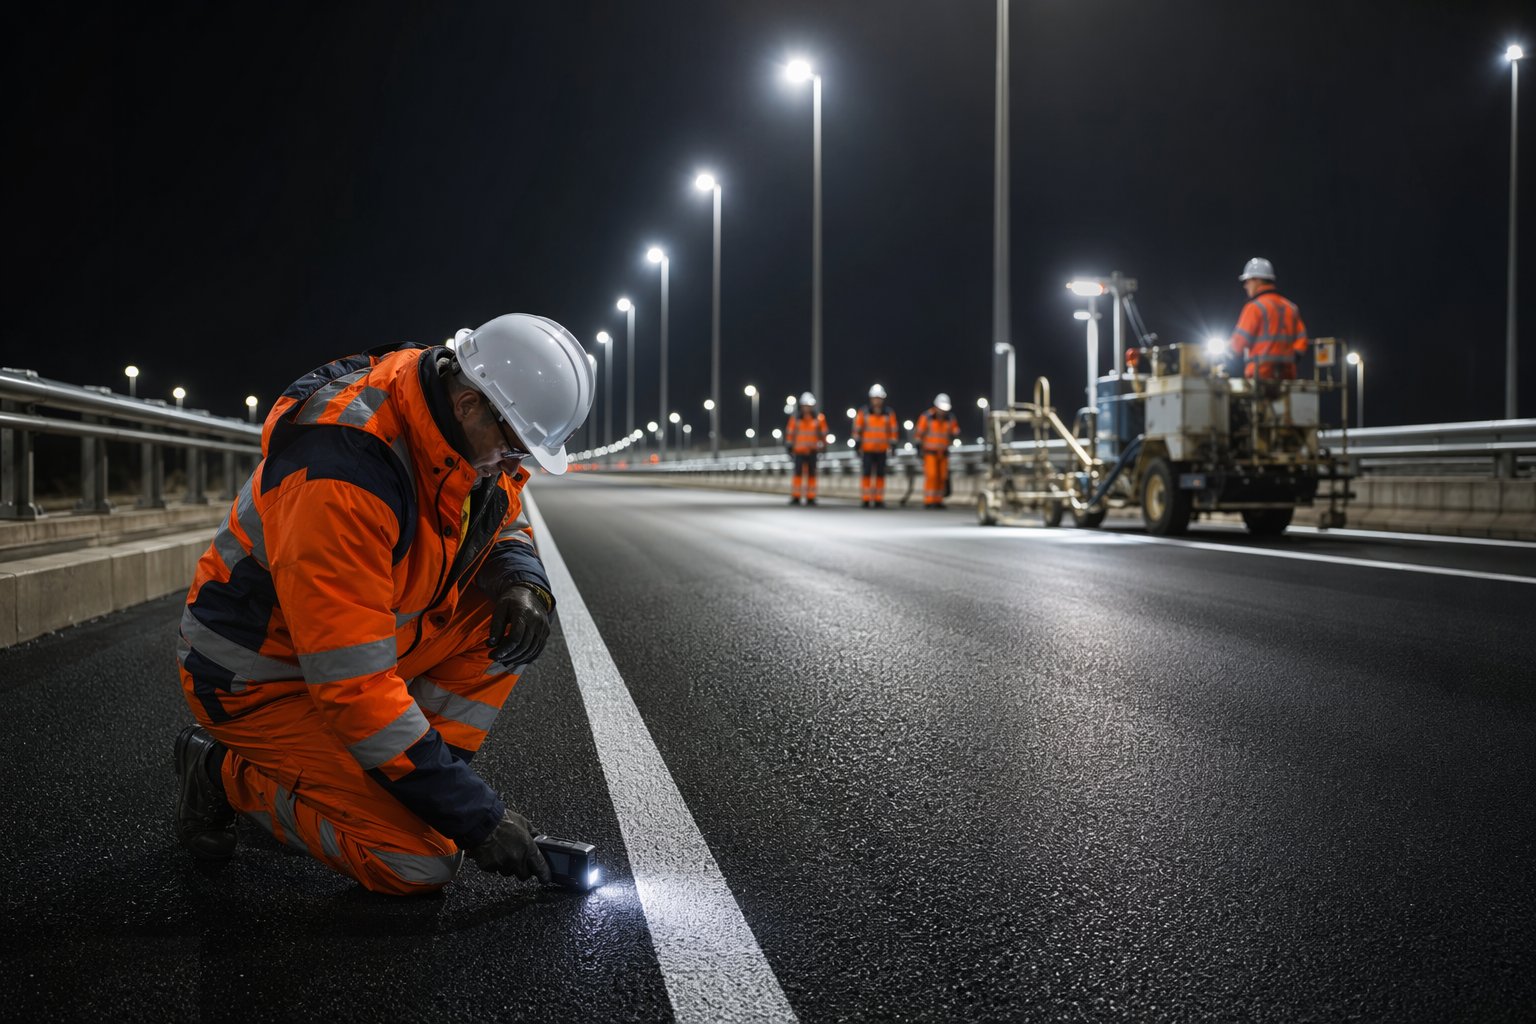
Verify the whole layer as a system: retroreflectivity readings on markings to BS EN 1436 classes, sign inventory checked face by face against the schedule, lighting survey filed, and skid resistance and texture confirmed where specified. Walk and drive the corridor day and night with the client or authority inspector — the night drive finds what no daytime inspection can. Only then does the temporary traffic management come down in its approved sequence, the road opens, and the as-builts, certificates and warranties go into the handover file that the next process (testing, commissioning and handover) formalises.
Plant and equipment
- Thermoplastic applicators: screed trolleys, extrusion and spray machines
- Preheaters and boilers for melting and holding thermoplastic
- Bead dispensers and retroreflectometers for quality checks
- HIAB cranes and MEWPs for columns, gantries and sign erection
- Cable pulling winches, rodding kit and jointing equipment
- Post drivers, augers and concrete for sign and column foundations
- Lux meters and lighting survey equipment; electrical test instruments to BS 7671
- Traffic management for live-corridor installation, day and night
Quality control checks
- Sign faces verified against TSRGD/RTA-approved designs before fabrication
- Marking thickness, width and bead coverage checked as applied; retroreflectivity readings filed
- Column verticality, foundation embedment and fixing torque inspected
- Electrical test certificates to BS 7671 for every circuit before energisation
- Lux/luminance and uniformity survey against the lighting design class
- Sign and marking inventory reconciled to the schedule — nothing missed, nothing extra
- Day and night inspections completed and recorded before opening
Safety considerations
- Hot thermoplastic at around 180–200 °C: burns PPE, splash control and burn first-aid on every gang
- Live-lane working under approved traffic management — markings and signs are installed metres from running traffic
- Overhead line clearance when raising columns and gantries — goalposts, exclusion and a dedicated signaller
- MEWP and lifting operations over live carriageways: permits, exclusion zones and tested tackle
- Electrical energisation by authorised persons under safe isolation only
- Night work throughout: task lighting, correct-class hi-vis and fatigue management
- Heat stress on Gulf night shifts — the material is hot even when the air is not
Common defects
- Markings applied to a dirty or damp surface — they peel within weeks, often in satisfying long strips
- Drop-on beads missing the melt — a line that is invisible in wet night headlights
- Sign faces not to the prescribed design — unenforceable and replaced at the contractor's cost
- Signs bagged late or unbagged early — unlawful instructions to live traffic
- Columns out of plumb or at wrong mounting height — a defect visible from a mile away
- Lighting below design lux or with dark spots from a swapped lantern type
- Thermoplastic flowing or tracking in Gulf heat — the formulation was wrong for the pavement temperature regime
- As-built duct and chamber records missing — the first cable fault becomes an archaeological dig
Best suited for
- The legal information layer that turns asphalt into a usable road
- Markings, studs and signs to the governing standards
- Lighting columns and the electrical infrastructure behind them
- Final inspections and snagging ahead of opening to traffic
How long does Road Markings, Signage & Lighting take?
Typical duration: Typically 1–3 weeks per corridor section after final surfacing, with energisation and authority inspections often dictating the opening date more than the installation itself..
Related processes
- Subgrade Preparation & Capping
- Sub-base & Base Construction
- Asphalt Surfacing — Binder & Surface Course
- Kerbs, Footways & Road Furniture
- Testing, Commissioning & Asset Handover
- Corridor Access & Enabling Works
- Survey Control & Ground Investigation
- Bulk Earthworks — Cuttings & Embankments
- Drainage & Utility Corridors
- Roads & Highways sector guide
- Transport Infrastructure group