Damp Proofing — DPC, DPM and Cavity Trays
Damp-proof courses, membranes, cavity trays and weep holes — plus honest diagnosis: rising damp, penetrating damp and condensation are three different problems with three different fixes.
Last updated 2026-07-28 by the BuildPedia Editorial Team.
What is Damp Proofing — DPC, DPM and Cavity Trays?
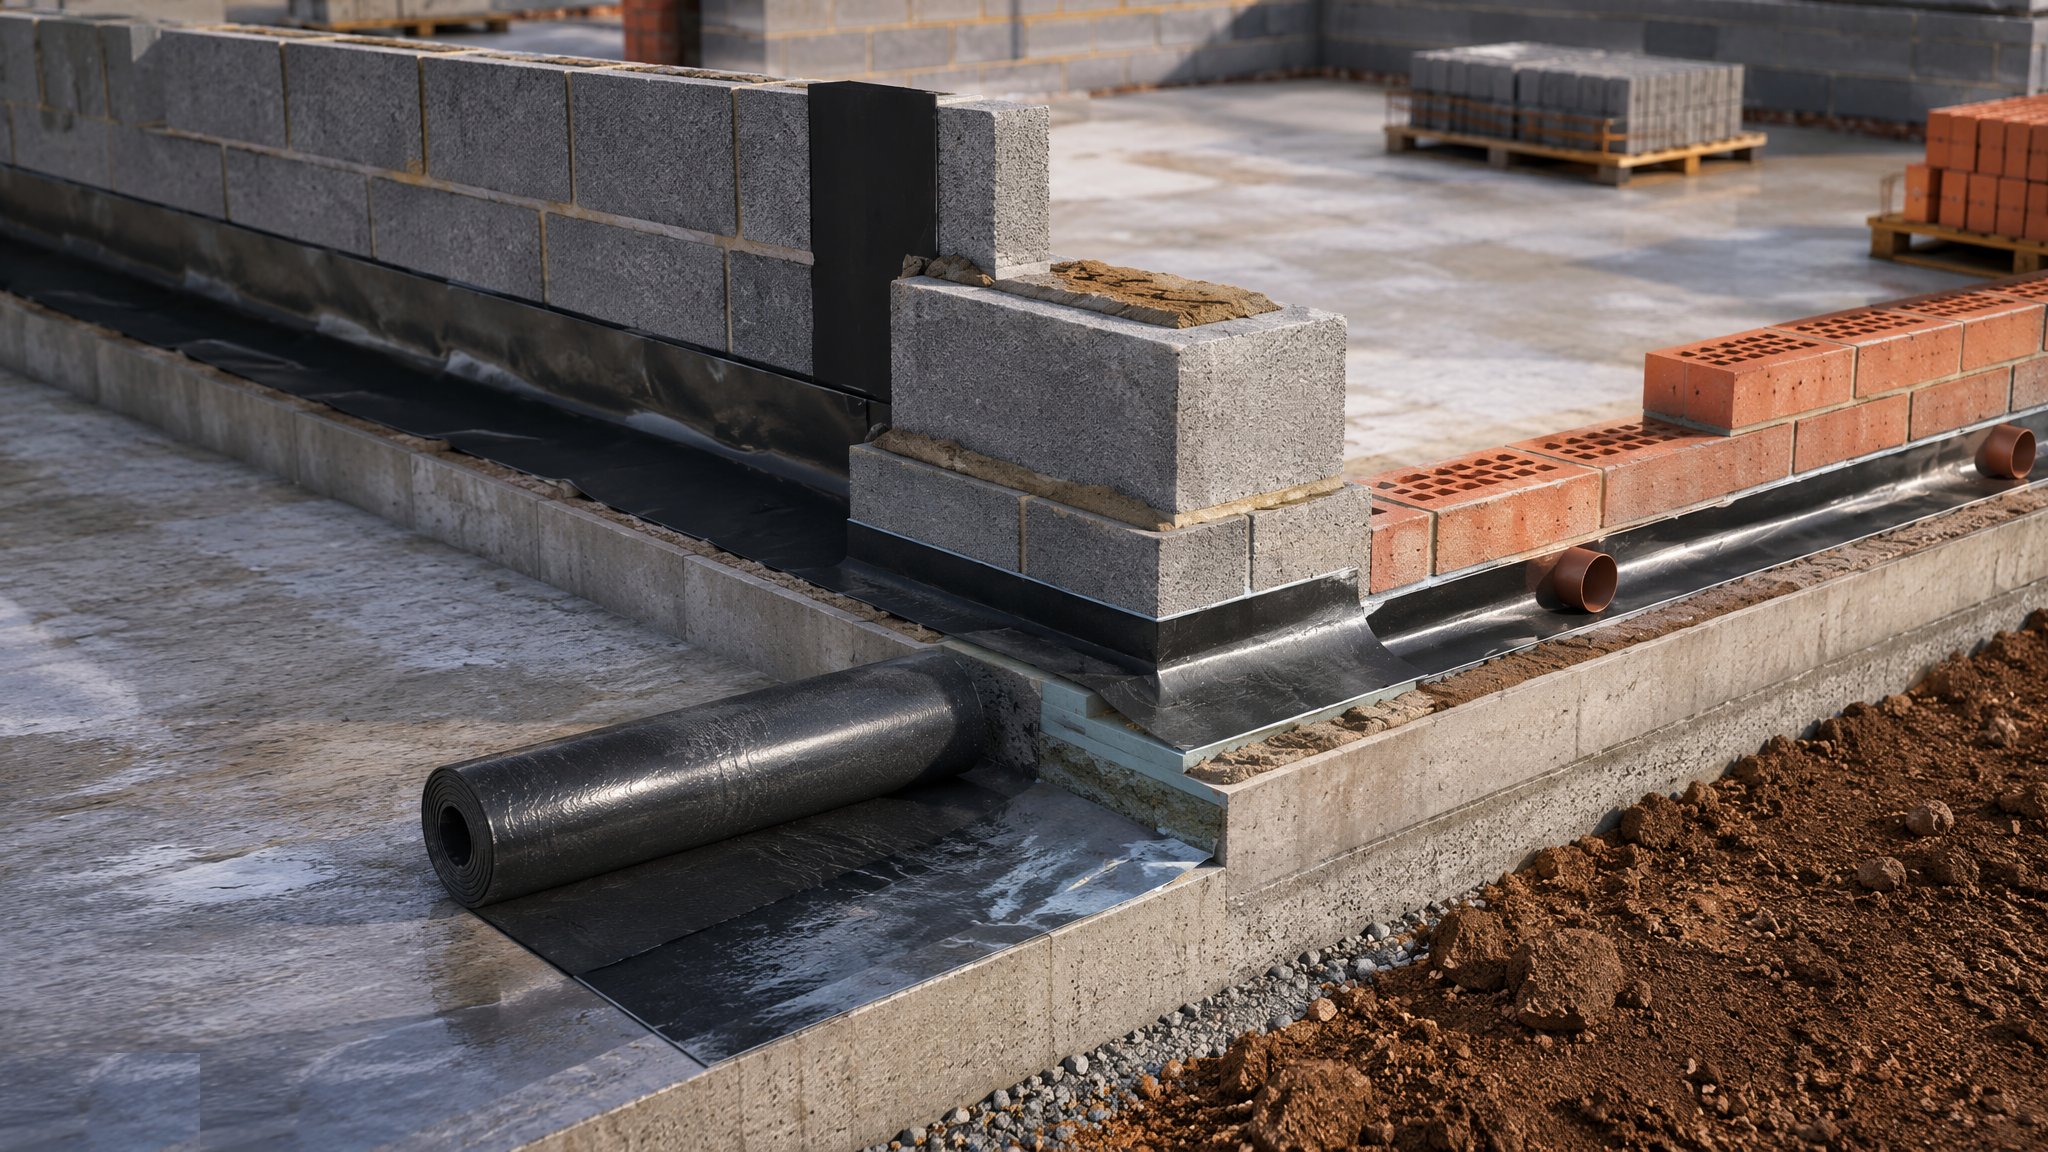
Damp proofing is a system of thin, cheap lines that have to be continuous: the DPC in the wall, the DPM under the slab, the cavity trays over openings, the weep holes that let the cavity drain. None of them is expensive and none of them can be missing. The classic failure is not a failed material — it is a bridged line: render carried down over the DPC, a flower bed raised against the wall, a cavity tray with mortar droppings on it, a DPM that stops 100 mm short of the wall. Water finds the bridge and the diagnosis two years later is "rising damp", when the truth is usually a detail someone skipped.
Diagnosis comes before treatment, always. Rising damp is ground water drawn up the wall by capillary action — it shows as a tide mark and salts, rarely above a metre. Penetrating damp is rain coming through the envelope horizontally — localised patches that worsen in driving rain, traced to pointing, render cracks, bridged cavities or failed trays. Condensation is warm moist air meeting cold surfaces — black mould in corners, behind wardrobes, at cold bridges — and it is fixed by insulation, heating and ventilation, not by injecting anything into the wall. Treating condensation as rising damp has paid for a lot of unnecessary injected DPCs.
On retrofit, be honest about injected damp-proof courses: a chemical injection can form a useful water-repellent band in a genuinely rising-damp wall, but it does nothing for penetrating damp or condensation, it cannot fix a bridged cavity, and replastering with a salt-resistant (renovating) render is half the job — the salts already in the wall are hygroscopic and will keep showing damp through ordinary plaster. New-build, the DPC and DPM simply have to be there, lapped and joined, because retrofit is always the poorer option.
When and why is Damp Proofing — DPC, DPM and Cavity Trays used?
The DPC goes in with the first courses of masonry and at every opening and junction as the walls rise; the DPM goes down with the oversite before the slab; cavity trays and weep holes are built in at lintels, abutments and stepped foundations as the work passes them. Retrofit injection comes after diagnosis, drying-out investigation and only where genuine rising damp is confirmed. In the UAE, ground damp is a lesser driver than in the UK, but slab DPMs, saline ground and splashback at render plinths still matter, and air-conditioned buildings suffer condensation on cold bridges instead.
Types of Damp Proofing — DPC, DPM and Cavity Trays
Damp-proof course (DPC)
A continuous horizontal barrier in the wall — polymer, bitumen or engineering brick/slate in older work — at least 150 mm above external ground level, lapped at joints and linked to the DPM and trays.
Damp-proof membrane (DPM)
A polyethylene sheet (typically 1200-gauge) under or over the ground slab, joints lapped 150 mm and taped, turned up to lap with the wall DPC so ground moisture has no path into the floor or wall.
Cavity trays and weep holes
Preformed or site-formed trays over lintels, at roof abutments and stepped DPCs that catch water in the cavity and discharge it through weep holes to the outside face.
Retrofit injected DPC
Cream or fluid injected into drilled mortar beds to form a water-repellent band in an existing wall — effective only for genuine rising damp, and only alongside salt-resistant replastering and removal of the bridging cause.
Damp Proofing — DPC, DPM and Cavity Trays: step by step
Step 1: Diagnose before you treat
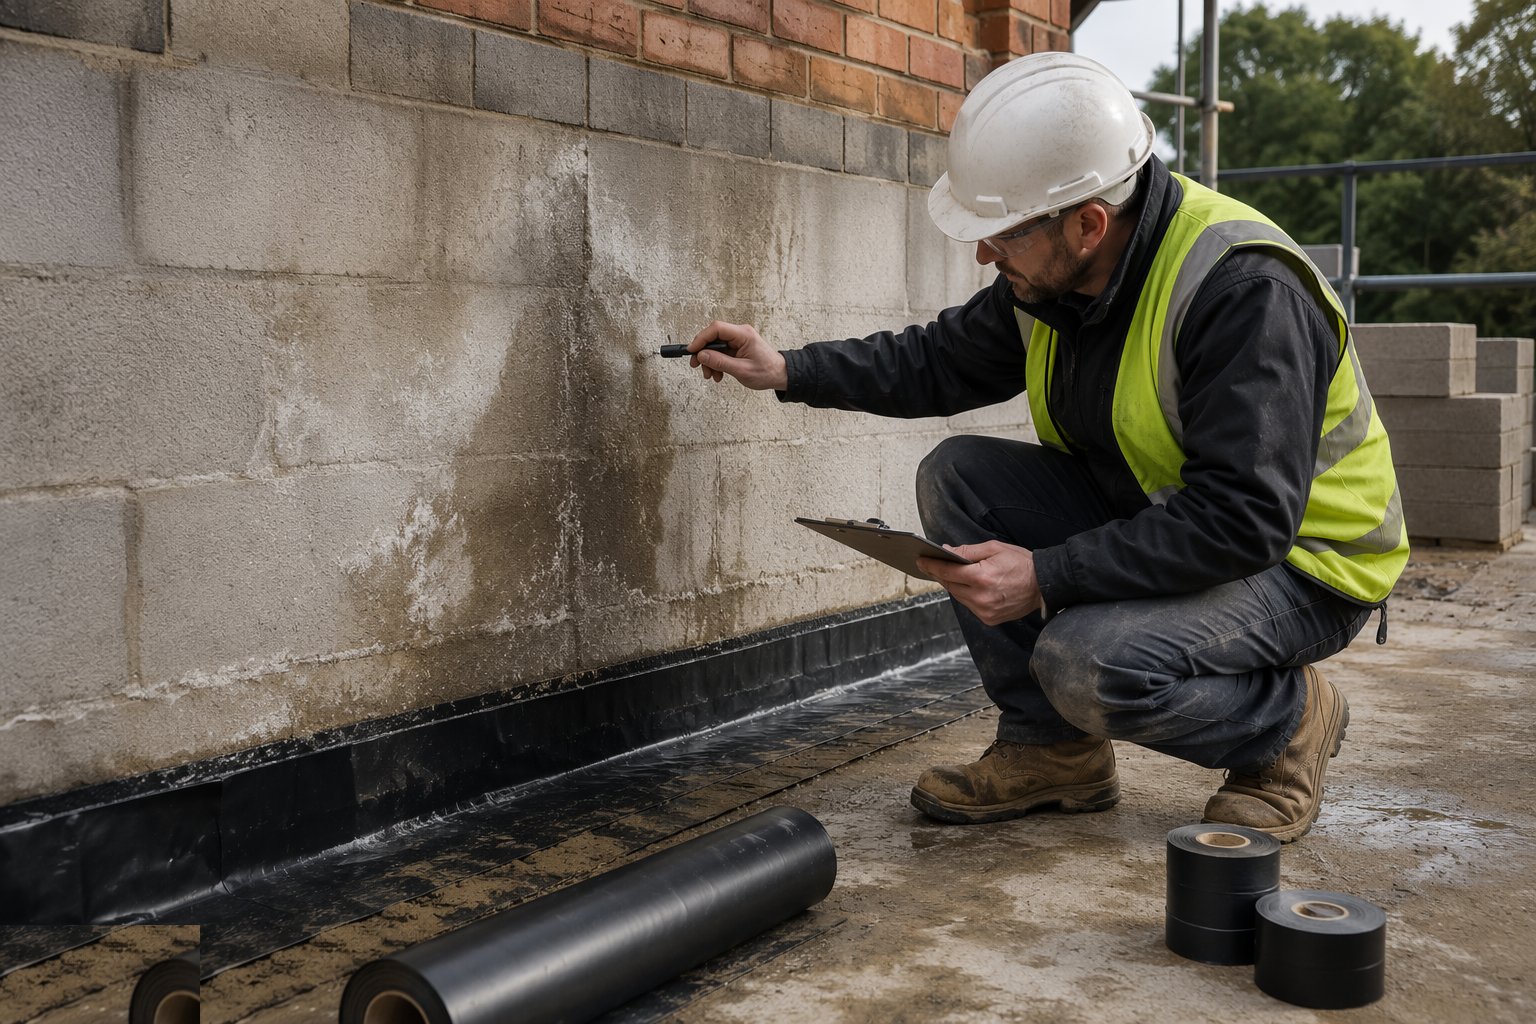
Map the damp: height and pattern of the staining, salts on the surface, when it worsens. Tide mark and salts below a metre point at rising damp; patches that track driving rain point at penetration; mould in corners and behind furniture is condensation. Check the obvious bridges first — ground level, render plinths, blocked cavities — and use a moisture meter as a survey tool, not a verdict: meters read salts as wet.
Step 2: Lay the DPM and turn it up at the edges
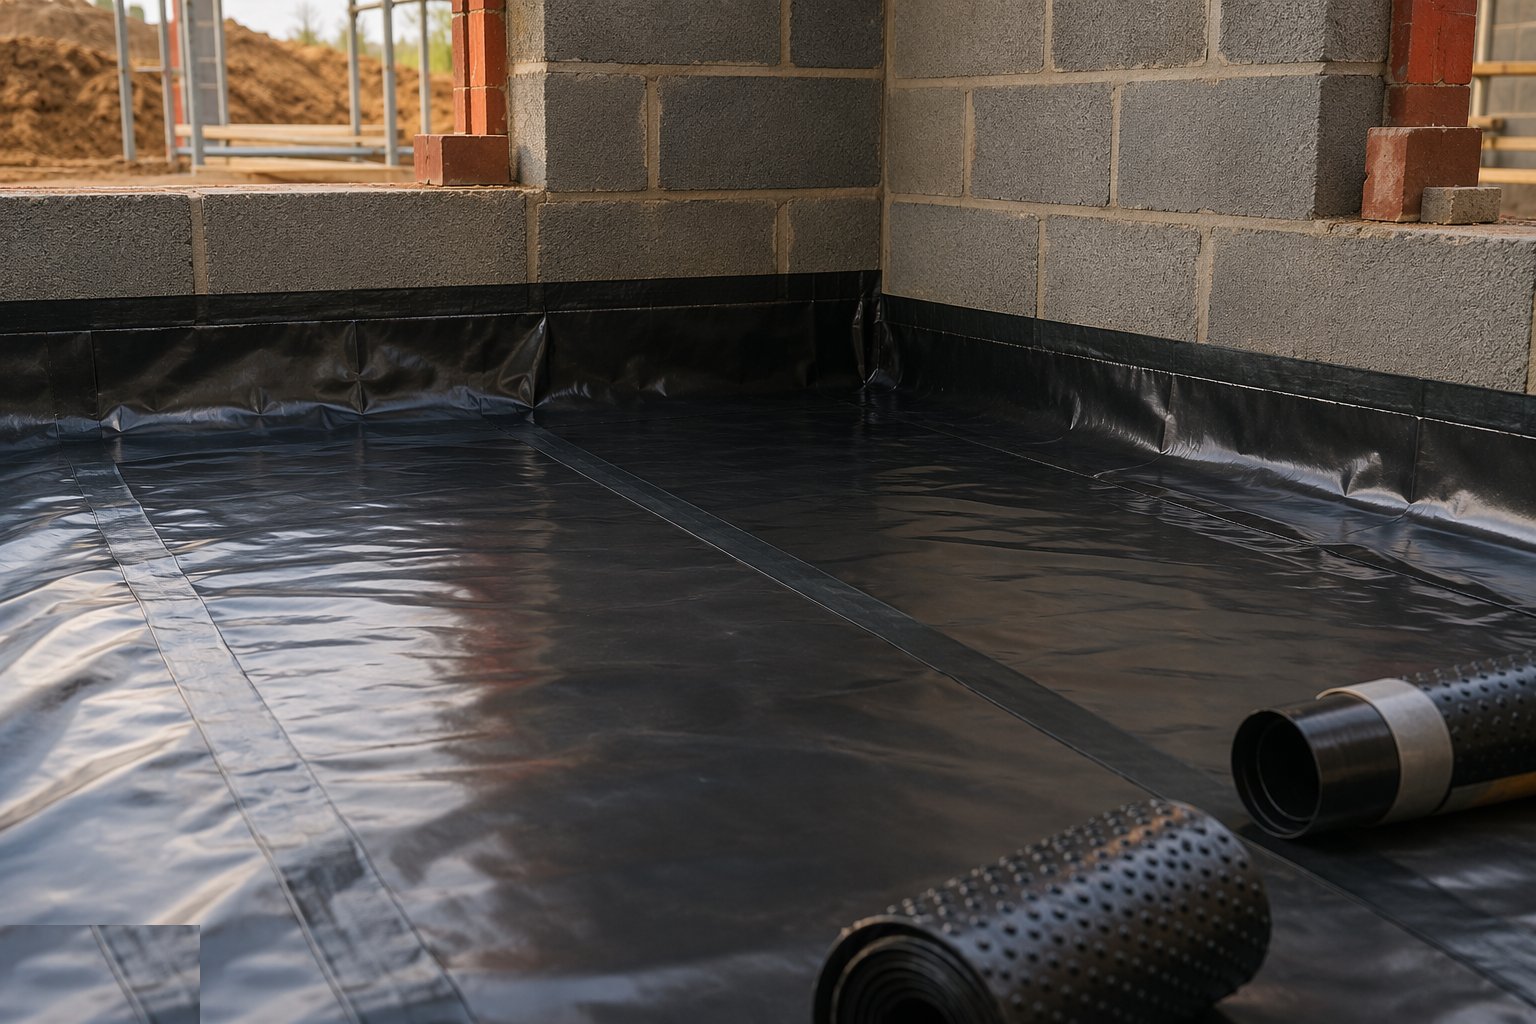
Over the blinded hardcore or the slab, lay the 1200-gauge membrane without punctures, lap joints 150 mm and tape them, and turn the membrane up at every edge so it laps with the wall DPC — this junction is the whole point. Around service entries use preformed top-hats or taped collars. Any puncture from reinforcement spacers or careless barrows gets patched before concrete, because there is no access afterwards.
Step 3: Bed the DPC level, lapped and visible
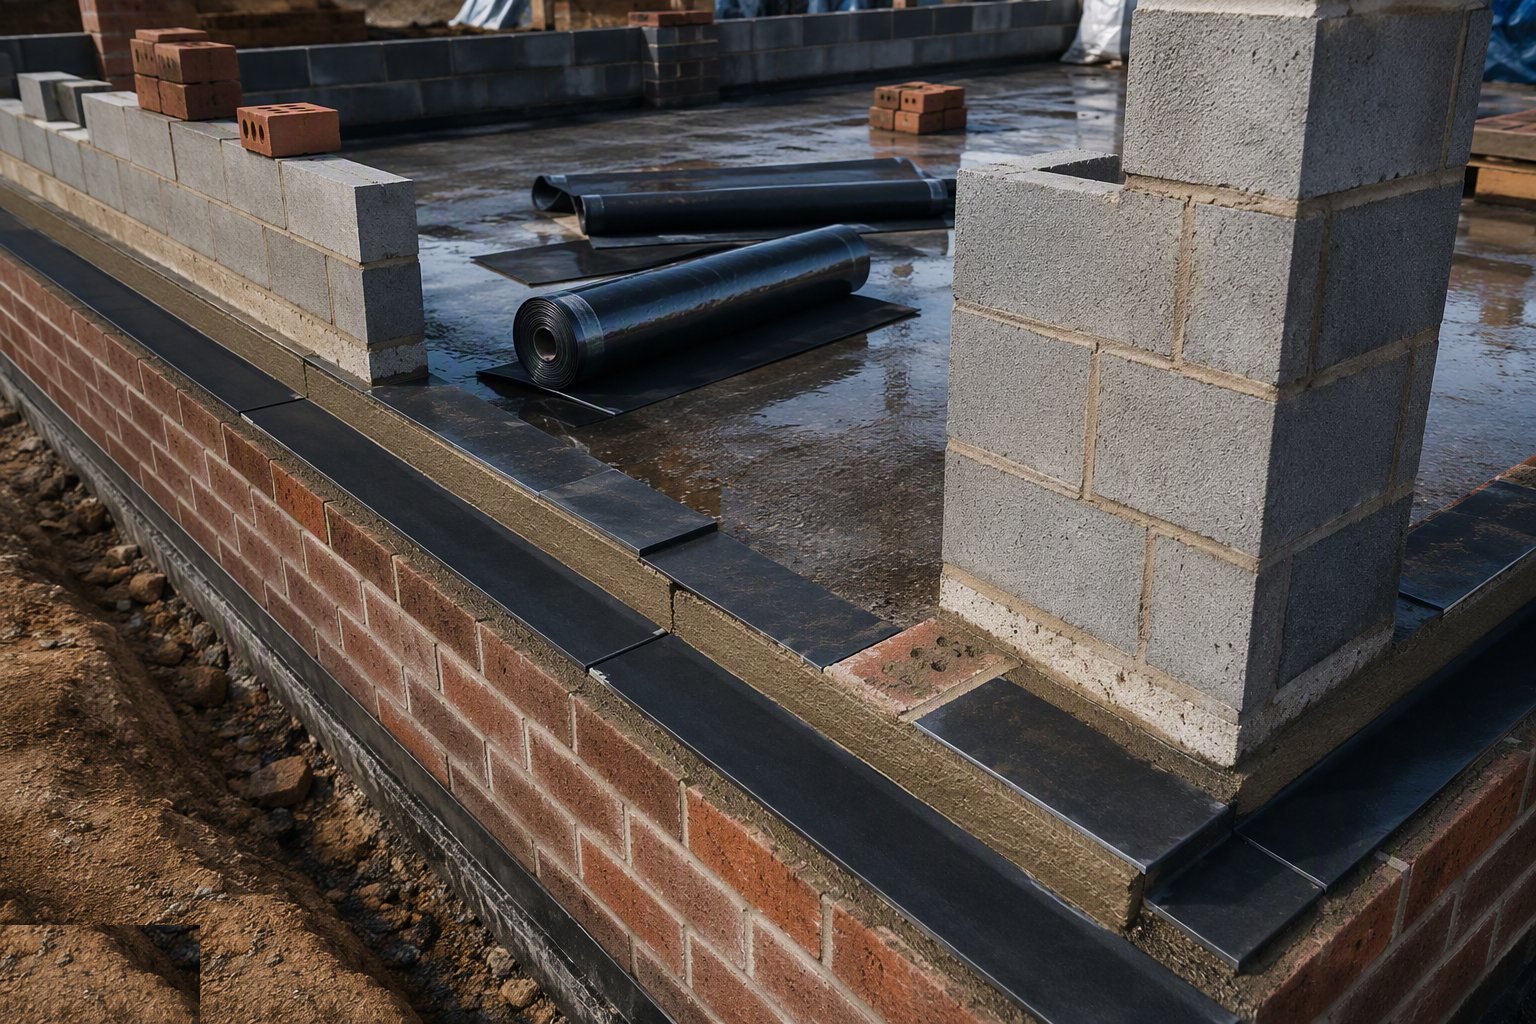
The DPC beds on a full mortar bed both faces, continuous through every junction, with 100 mm laps and sealed joints, and projects slightly or sits flush so it can be inspected — never buried behind render. Keep it at least 150 mm above finished ground level, and check the paving, planters and soil levels on the drawings stay below it; the most common DPC failure is a landscape design that bridges it on day one.
Step 4: Build in cavity trays with stop ends and weeps
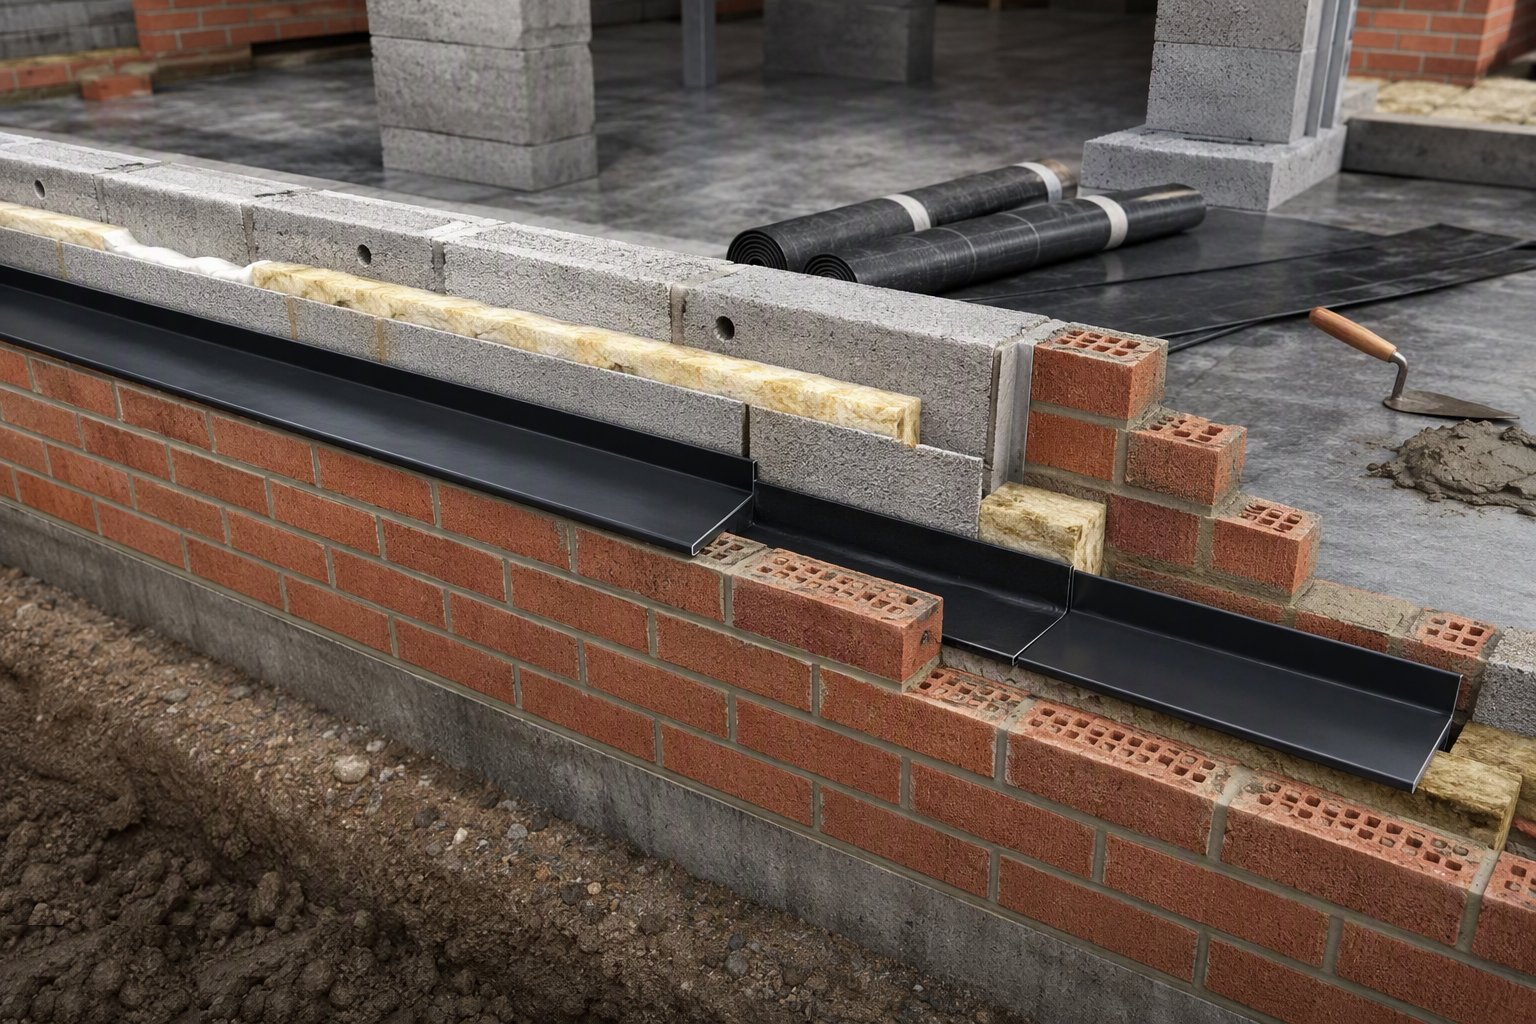
Over every lintel, at every roof or balcony abutment and at stepped foundations, the tray goes in with an upstand against the inner leaf, stop ends at both ends, and weep holes every fourth perpend (around 900 mm) directly above. Keep mortar droppings off the tray as the courses rise — a tray full of droppings discharges into the cavity instead of out of it. Rake out and check every weep before scaffold comes down.
Step 5: Detail the junctions and thresholds
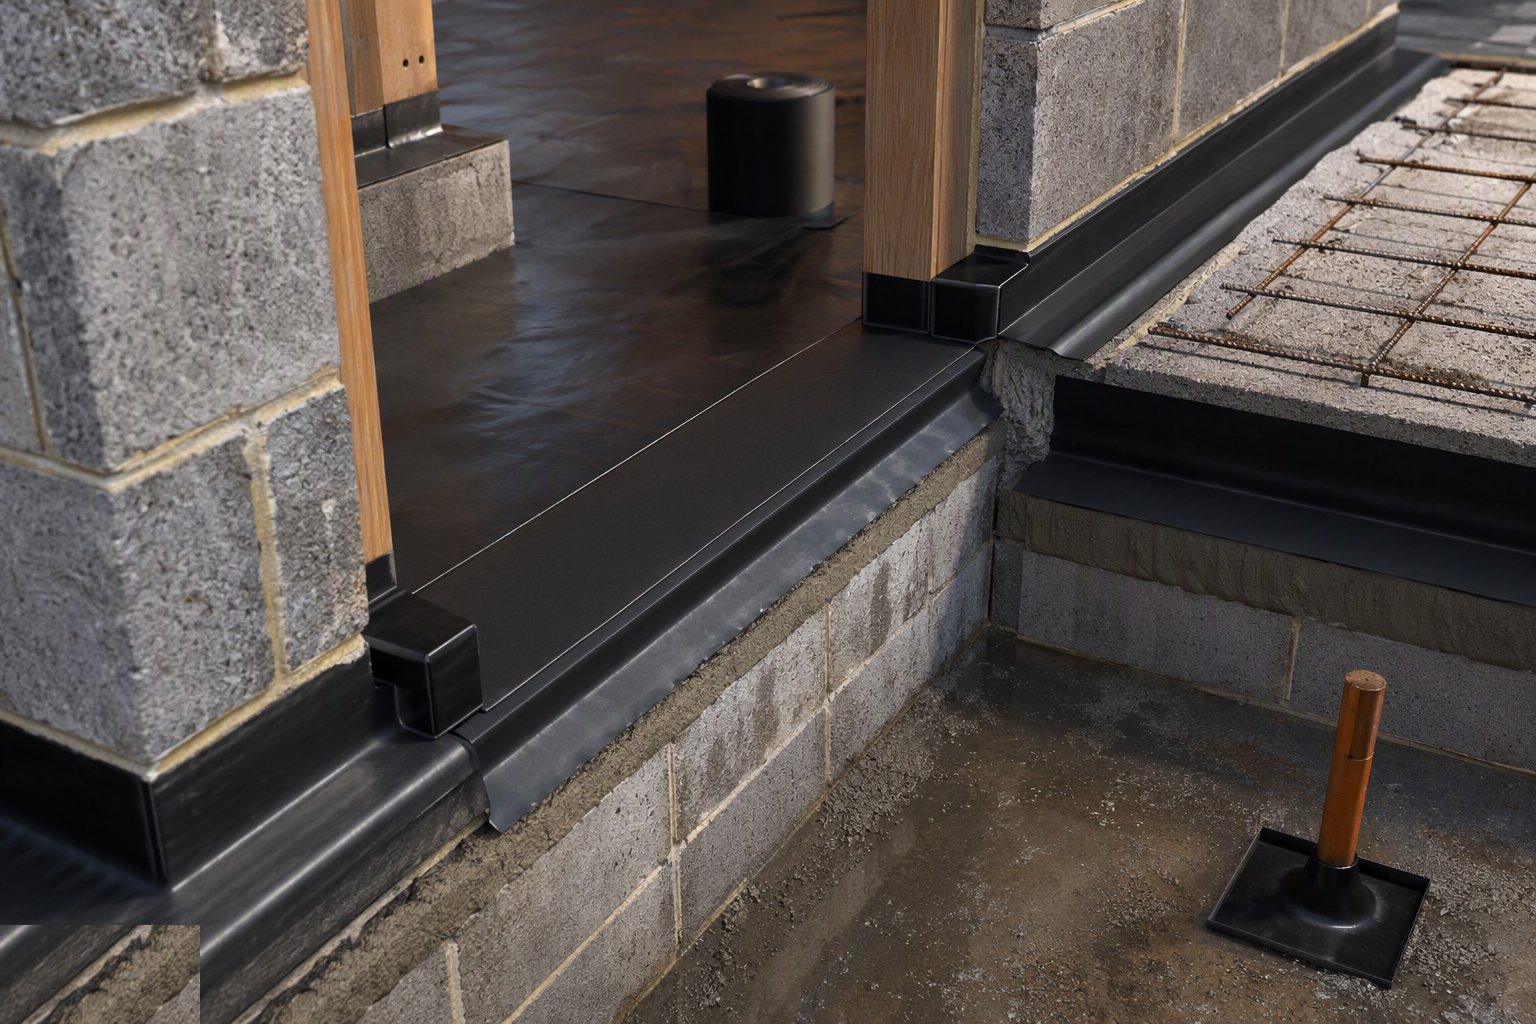
At door thresholds, balconies and level-access details the DPC line has to step, lap and still drain — use the preformed cloaks and corner units rather than site-folding miracles. At party walls and reveals, cavity closers with a DPC face close the loop. Every one of these junctions gets photographed before the next course covers it.
Step 6: Retrofit: remove the bridge and prepare the wall
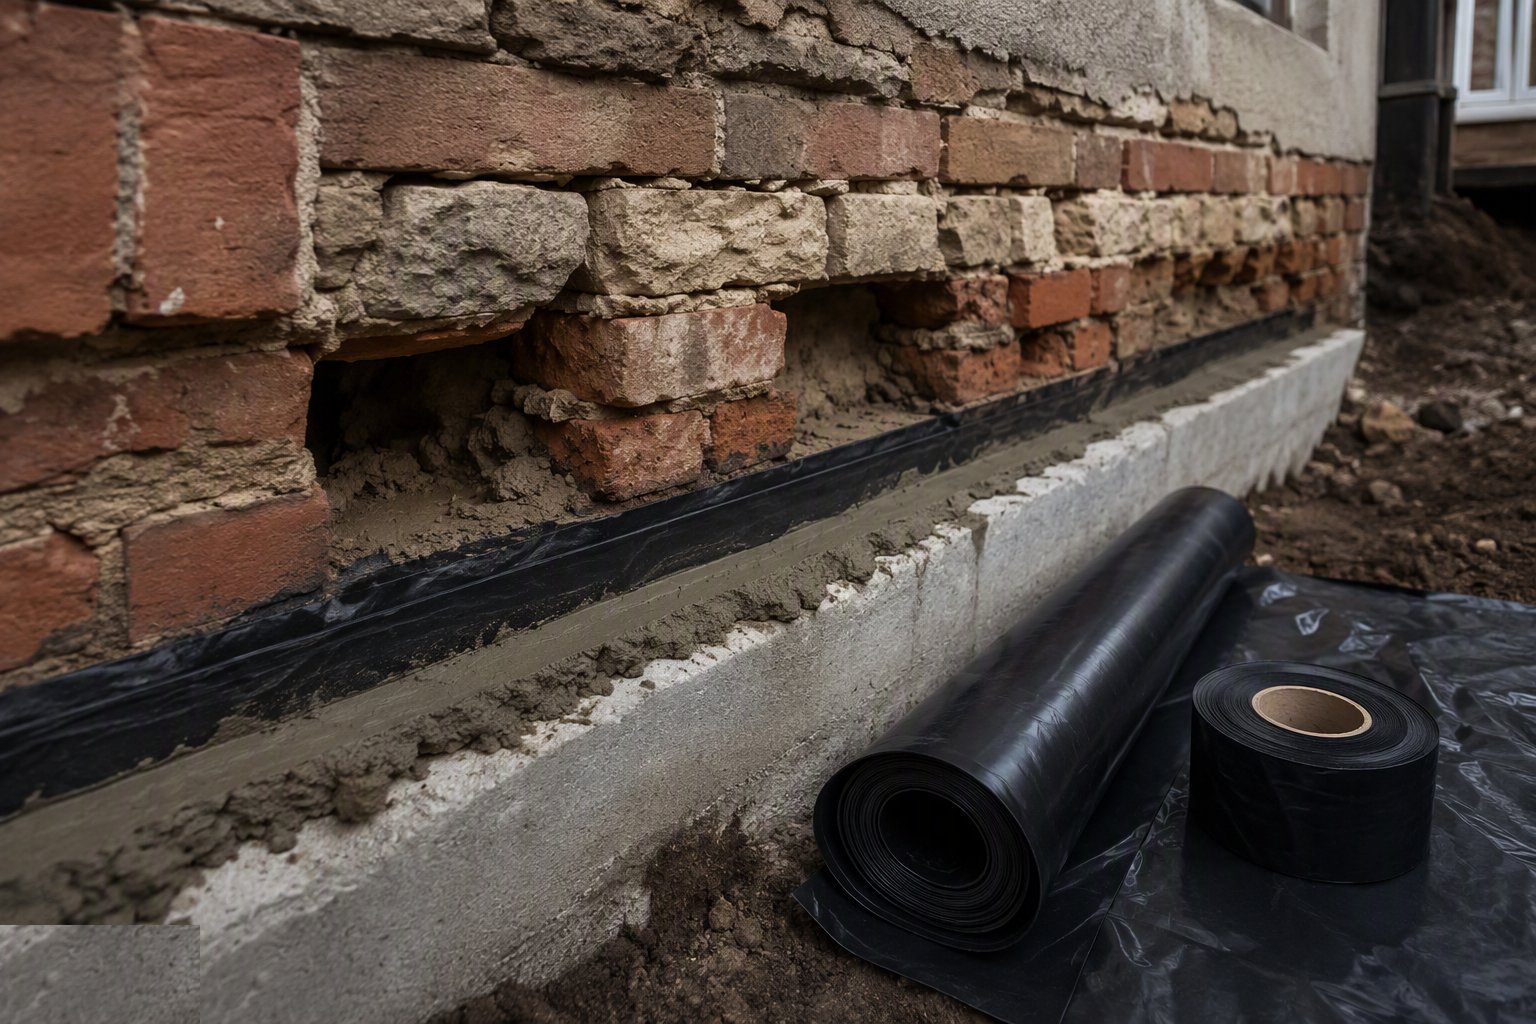
On an existing building, fix the causes first: lower external ground levels or cut a French drain, hack off bridging render to expose the original DPC, clear blocked cavities and failed pointing. Strip internal plaster to at least 300 mm above the visible damage line, back to sound masonry, and let the wall start drying — salts in the old plaster keep showing damp regardless of any injection.
Step 7: Retrofit: inject and replaster honestly
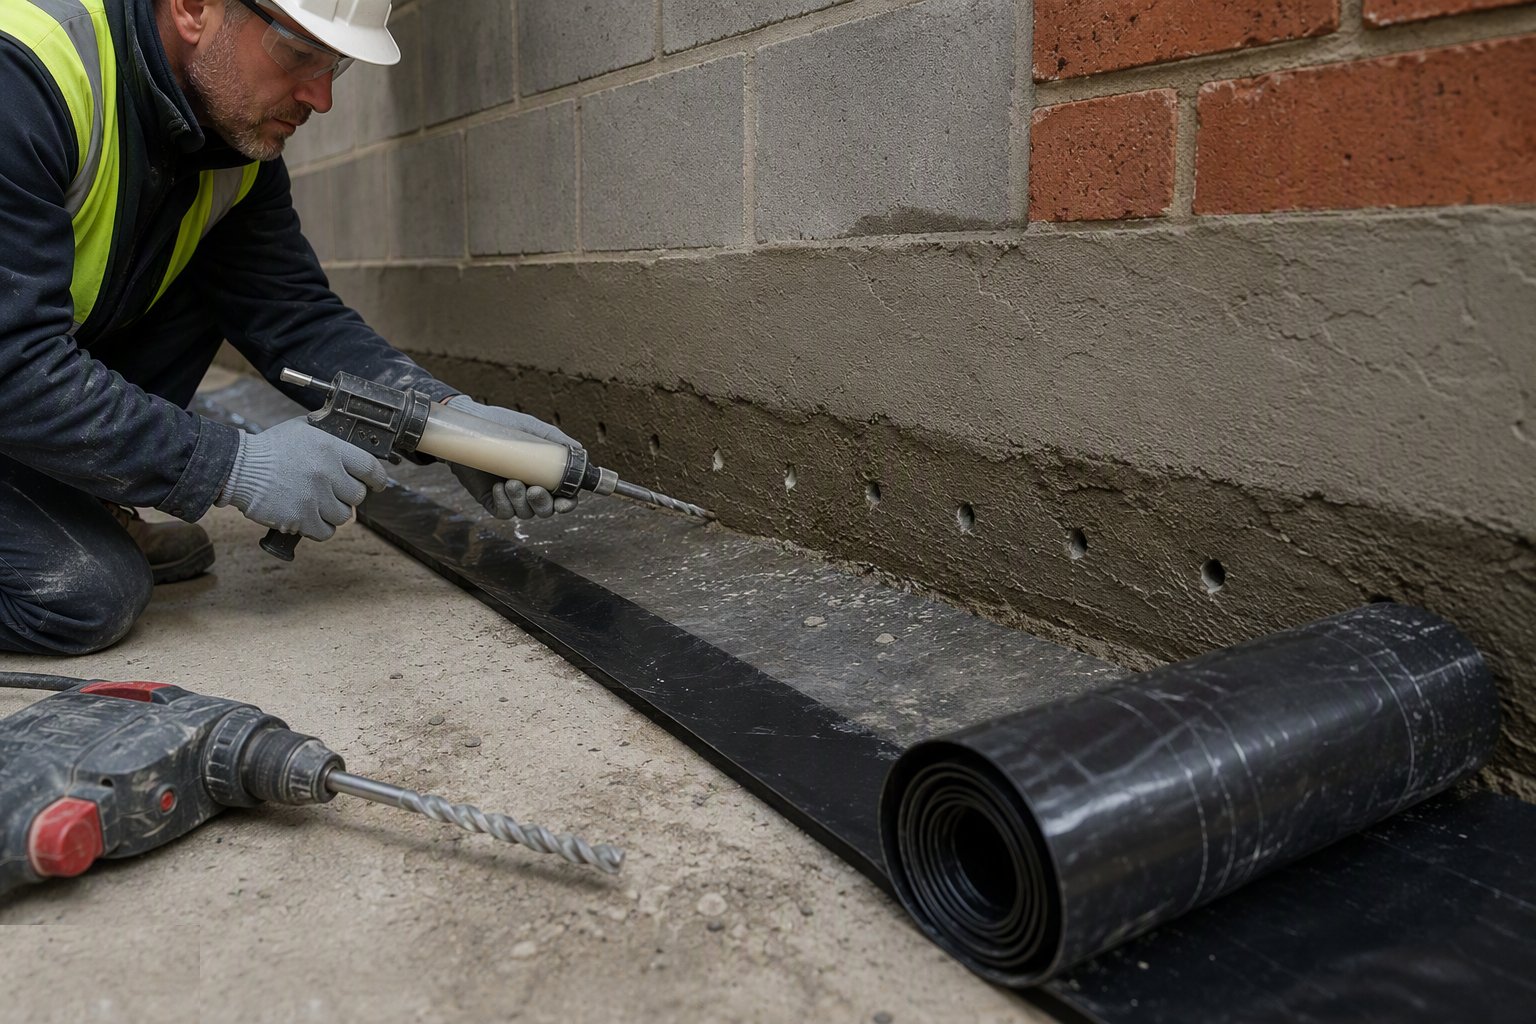
Drill the mortar bed at the specified centres and depth, inject the cream or fluid to the manufacturer's dose rate, and record the holes per elevation. Replaster with a renovating (salt-retardant) specification — lightweight renovating plaster or a waterproof render backing with a skim — because ordinary gypsum over a salty wall will bloom within a year. Tell the client the drying truth: a wet wall can take a month per 25 mm of thickness to dry down.
Step 8: Inspect, ventilate and verify
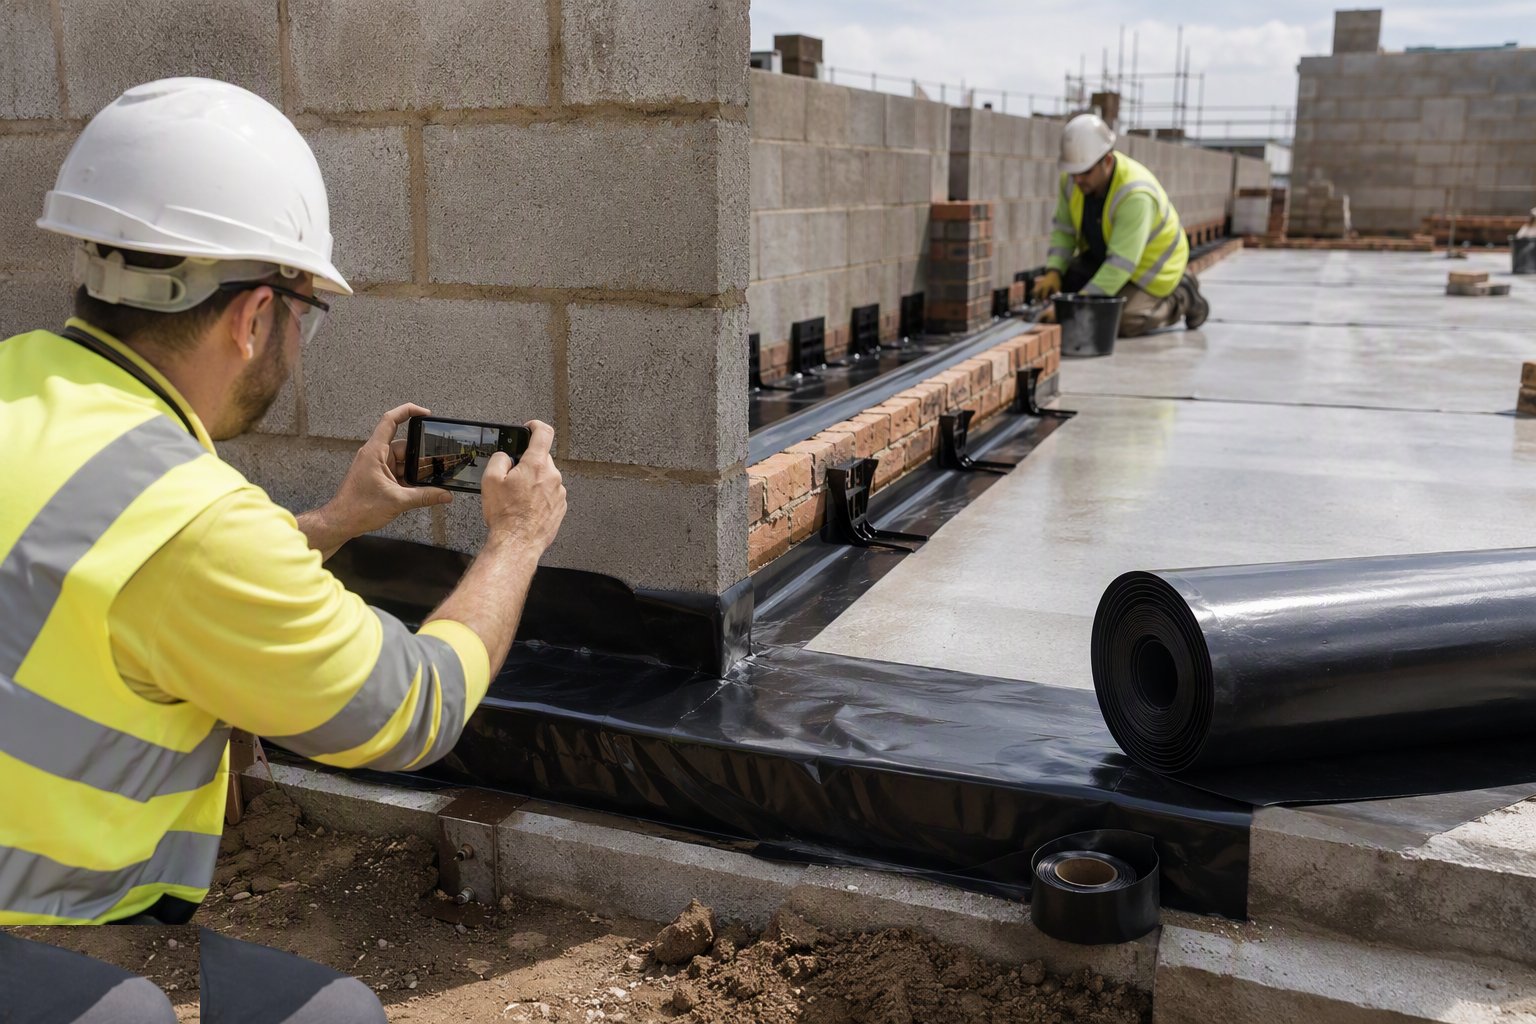
New work: photograph DPC, DPM laps, trays and weeps at every stage for the handover file and Building Control. Retrofit: monitor moisture over months, not days, and check condensation control is in place — trickle vents, extraction in kitchens and bathrooms, and insulation at cold bridges. The verification of damp proofing is a dry wall through a wet winter, and the paperwork to prove why.
Plant and equipment
- DPM laying kit — tape, knives, top-hat collars and patching sheets
- Mortar boards and small tools for DPC and tray bedding
- Weep-hole formers, cavity battens and inspection mirrors
- Injection drill rigs, injection guns/lances and cream pumps (retrofit)
- Moisture meters, salt-analysis kits and hygrometers for diagnosis
- Breakers and scabblers for render removal
- Dehumidifiers and fans for drying verification
Quality control checks
- DPC level, laps and continuity inspected and photographed per run
- DPM laps taped 150 mm, punctures patched before the pour — photographed
- Tray upstands, stop ends and weep positions checked per opening
- External ground and paving levels verified against the 150 mm rule
- Retrofit: diagnosis recorded (moisture profile, salts, bridges) before treatment
- Injection dose rate and hole spacing recorded per elevation
- Replastering specification confirmed as salt-resistant before application
Safety considerations
- Cement and render burns — gloves, barrier cream, eyewash
- Silica dust from chasing, drilling and render removal — suppression and RPE
- Injection chemicals under COSHH — eye protection and ventilation
- Working below ground level for ground reduction — excavation support and barriers
- Manual handling of membrane rolls and plaster bags
Common defects
- Bridged DPC — raised soil, paving or render taken over the line
- DPM lapped short, punctured or stopped clear of the wall junction
- Cavity trays missing, flat, without stop ends, or buried in droppings
- Weep holes blocked, absent, or pointing into the cavity
- Condensation misdiagnosed as rising damp and injected pointlessly
- Retrofit injection without removing the bridge or the salty plaster
- Trays over lintels omitted on the inner leaf of party-wall junctions
Best suited for
- DPC/DPM continuity — every new masonry build, UK housing as standard
- Cavity trays and weeps — openings, abutments, gable steps and parapets on cavity construction
- Diagnosis-led retrofit — older solid-wall housing with genuine rising damp
- Ventilation and cold-bridge treatment — condensation, the most common "damp" complaint of all
- Slab DPMs and plinth details — UAE villas where saline ground and irrigation splash attack the base of walls
How long does Damp Proofing — DPC, DPM and Cavity Trays take?
Typical duration: DPC and DPM land with the masonry and oversite programme — no separate duration. Trays and weeps add minutes per opening if the pack is on the scaffold. Retrofit injection and replastering on a house: 3–7 days plus months of drying..
Related processes
- Brick Wall Construction
- Block Wall Construction
- Concrete Structural Walls
- Firestopping and Passive Fire Protection
- Chasing & First-Fix Cutting for Services
- MEP — Plumbing (First & Second Fix)
- MEP — Electrical (First & Second Fix)
- Ventilation & Air Conditioning
- Below-Ground Drainage Installation
- Sanitary Installation
- Windows & Doors Installation
- Flooring & Floor Finishes
- Private Swimming Pool Construction
- CCTV & Security Systems Installation
- TRVs & Heating Controls
- Soft Landscaping & Gardens (Homes & Villas)
- Carpentry — First & Second Fix
- Building Trades & Methods sector guide
- Buildings group