Firestopping and Passive Fire Protection
Compartmentation, penetration seals, cavity barriers and linear gap seals — the hidden work that decides whether a fire stays in one room, plus the certification and golden-thread records that prove it was done.
Last updated 2026-07-28 by the BuildPedia Editorial Team.
What is Firestopping and Passive Fire Protection?
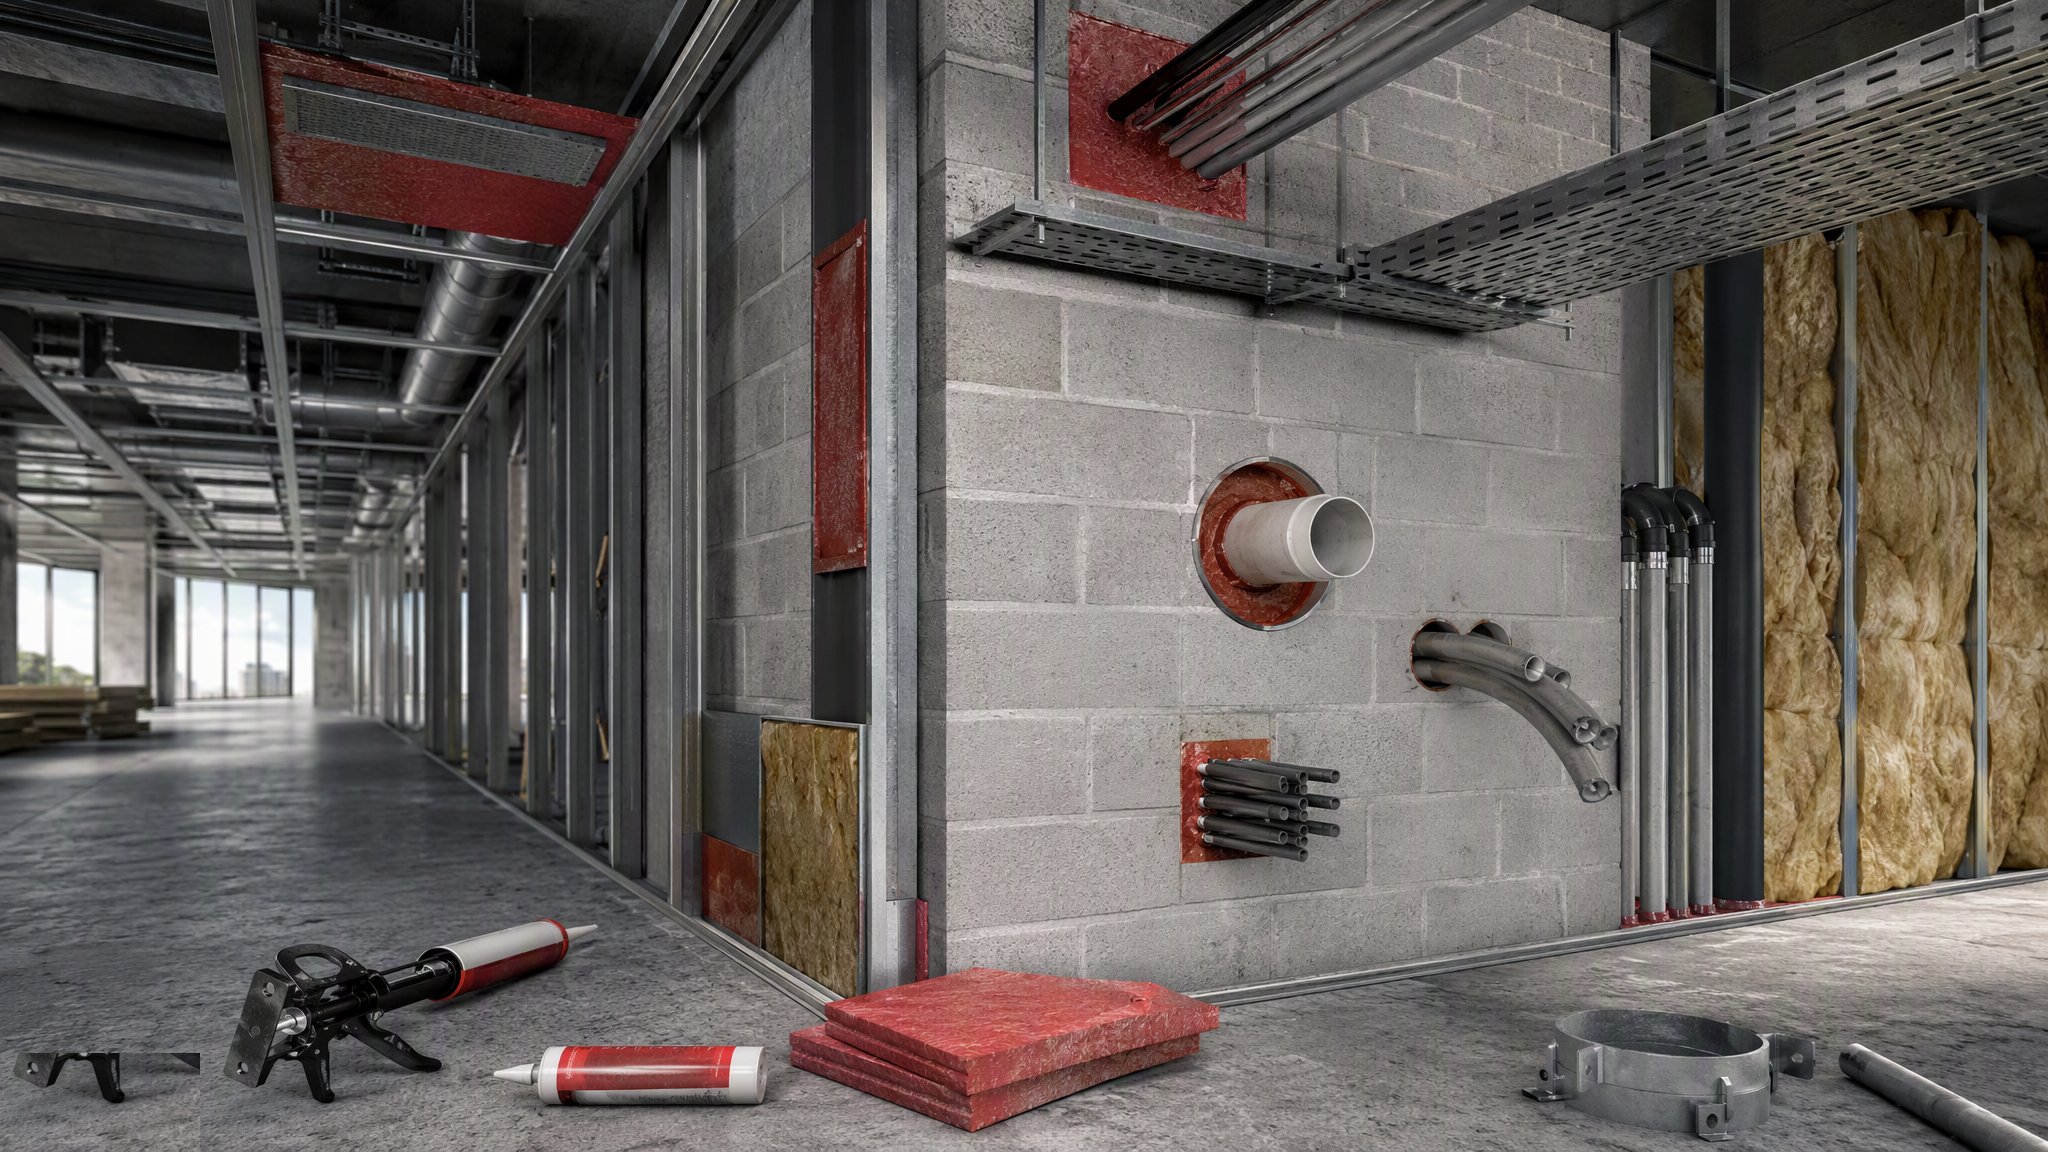
Passive fire protection is the building's built-in fire plan: walls, floors and doors that divide the building into compartments, and the seals that keep every hole in those compartments closed. The active systems — alarms, sprinklers — get the attention, but when they fail or are overwhelmed, compartmentation is what keeps a flat fire a flat fire. Every cable, pipe, duct and damper that passes through a compartment line is a potential breach, and on a residential tower there are thousands of them. The work is small, cheap per unit and utterly unforgiving: one unsealed 100 mm pipe sleeve can fail a floor.
Post-Grenfell, this trade has changed character in the UK. The Building Safety Act 2022 makes higher-risk buildings accountable from design through occupation, dutyholders must demonstrate competence, and the golden thread requires a digital, auditable record of every fire-stopping decision and installation — what product, what test evidence, what substrate, what penetration size, who installed it, who inspected it, with photographs before closing. Building Control and the Building Safety Regulator will sample it. The era of a tube of pink mastic and no questions is over: products must be third-party certified (for example under FIRAS or BM TRADA schemes), installers trained for the specific system, and every seal traceable to its test or assessment evidence.
In the UAE, DCD approval governs: firestop materials and systems must be listed and approved, Civil Defence inspects penetration sealing at completion, and the Fire and Life Safety Code sets the compartmentation and barrier requirements. The practical lesson everywhere is the same — firestopping is not a mastic gun at the end of the job, it is a coordinated design decision at every penetration, made before the services go in.
When and why is Firestopping and Passive Fire Protection used?
Firestopping runs throughout first and second fix: cavity barriers rise with the walls and facades, penetration seals follow each service as it crosses a compartment line, and linear gap seals go in at wall heads and edges as partitions complete. It is required by Building Regs Part B in the UK (and the Fire and Life Safety Code in the UAE) wherever compartmentation is drawn — which on flats, towers, hospitals, schools and hotels is essentially everywhere. It earns its keep in the event nobody wants: the fire that stays in its compartment.
Types of Firestopping and Passive Fire Protection
Service penetration seals
Collars, wraps, batts, sealants and mortars around pipes, cables, cable trays, ducts and dampers where they pass through compartment walls and floors — each matched to the service type, size and substrate.
Cavity barriers
Closures in concealed cavities — wall cavities, roof voids, raised floors, ceiling voids and behind cladding — that subdivide the hidden space so fire and smoke cannot run unseen through the building.
Linear gap seals
Flexible seals at the junctions between compartment elements — wall heads under slabs and roofs, wall-to-wall and wall-to-floor edges, and around fire-resisting glazing — that maintain the rating through movement.
Fire-resisting doors, dampers and structural protection
The adjacent passive package: fire doorsets and closers, fire/smoke dampers in ductwork at compartment lines, and board or intumescent protection to steel and structure — coordinated with, not instead of, the sealing work.
Firestopping and Passive Fire Protection: step by step
Step 1: Map the compartment lines and the penetrations

Start from the fire strategy drawings: every compartment wall and floor is marked on the builders' work and services drawings, and every service crossing is a penetration that needs a designed seal. Walk the routes with the MEP coordinator before first fix — it is far cheaper to sleeve, collar and frame an opening correctly than to seal a chaotic cluster of cables through a ragged hole afterwards. Record the schedule of penetrations; on a higher-risk building this is the start of the golden-thread record.
Step 2: Select the certified system for each condition
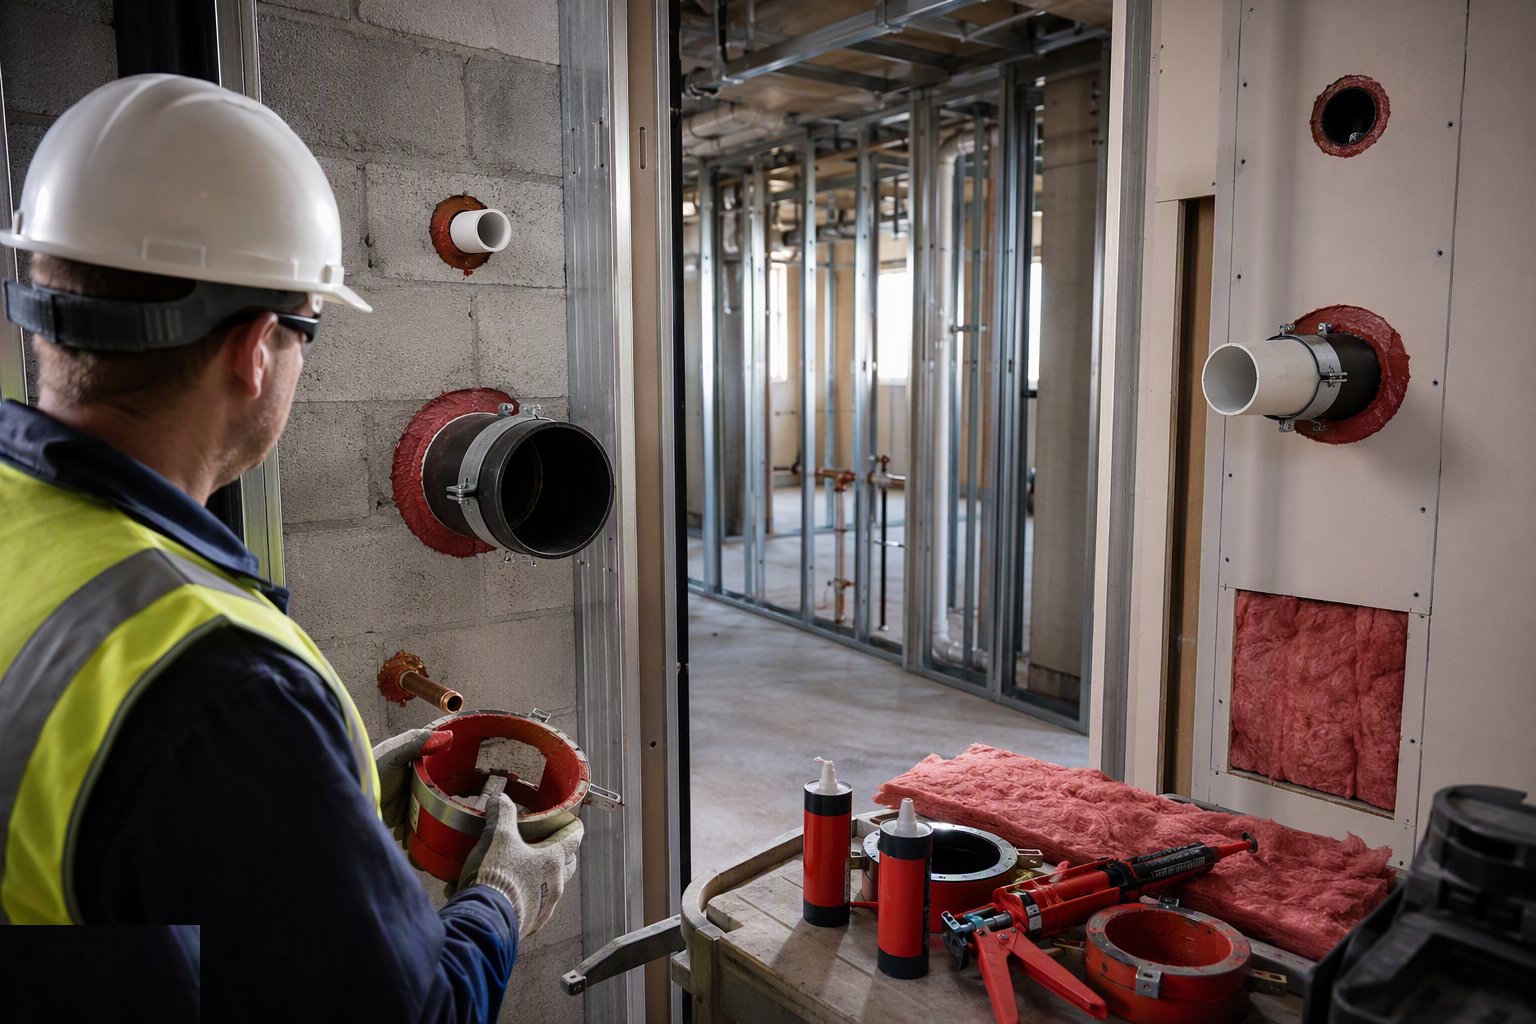
Every seal is a tested system, not a material: a collar rated for a 110 mm plastic soil pipe in a blockwork wall is not automatically rated for a 160 mm pipe in a plasterboard shaft. Pull the test evidence or assessment for the actual combination — service, size, wall/floor type, thickness, annulus — and where there is no evidence, get an engineering judgement from the manufacturer or a fire engineer. File the evidence reference against each seal type.
Step 3: Form the openings correctly as work rises
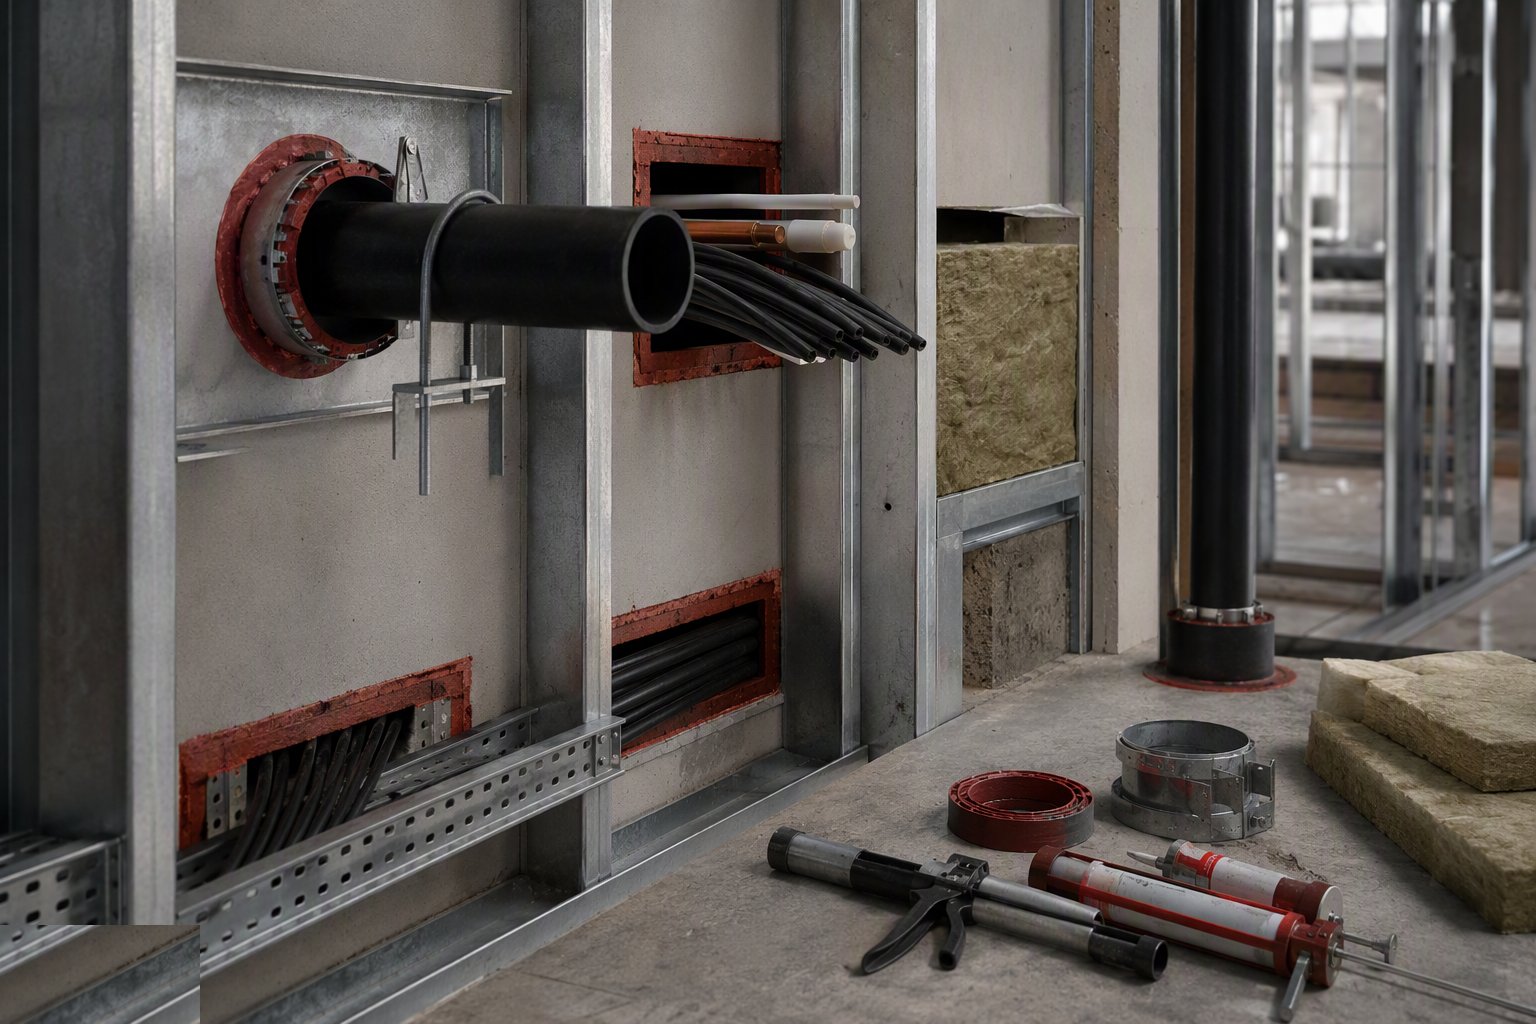
Build openings to the tested dimensions: sleeves and frames where the system needs them, annular gaps within the tested range (often 10–30 mm — not 80 mm of fresh air), and enough space around services to actually install the seal. Oversized holes filled with unstated mortar are the single most common non-conformance found in inspections. Damper openings get their tested installation detail, with access panels for maintenance.
Step 4: Install penetration seals as each service passes
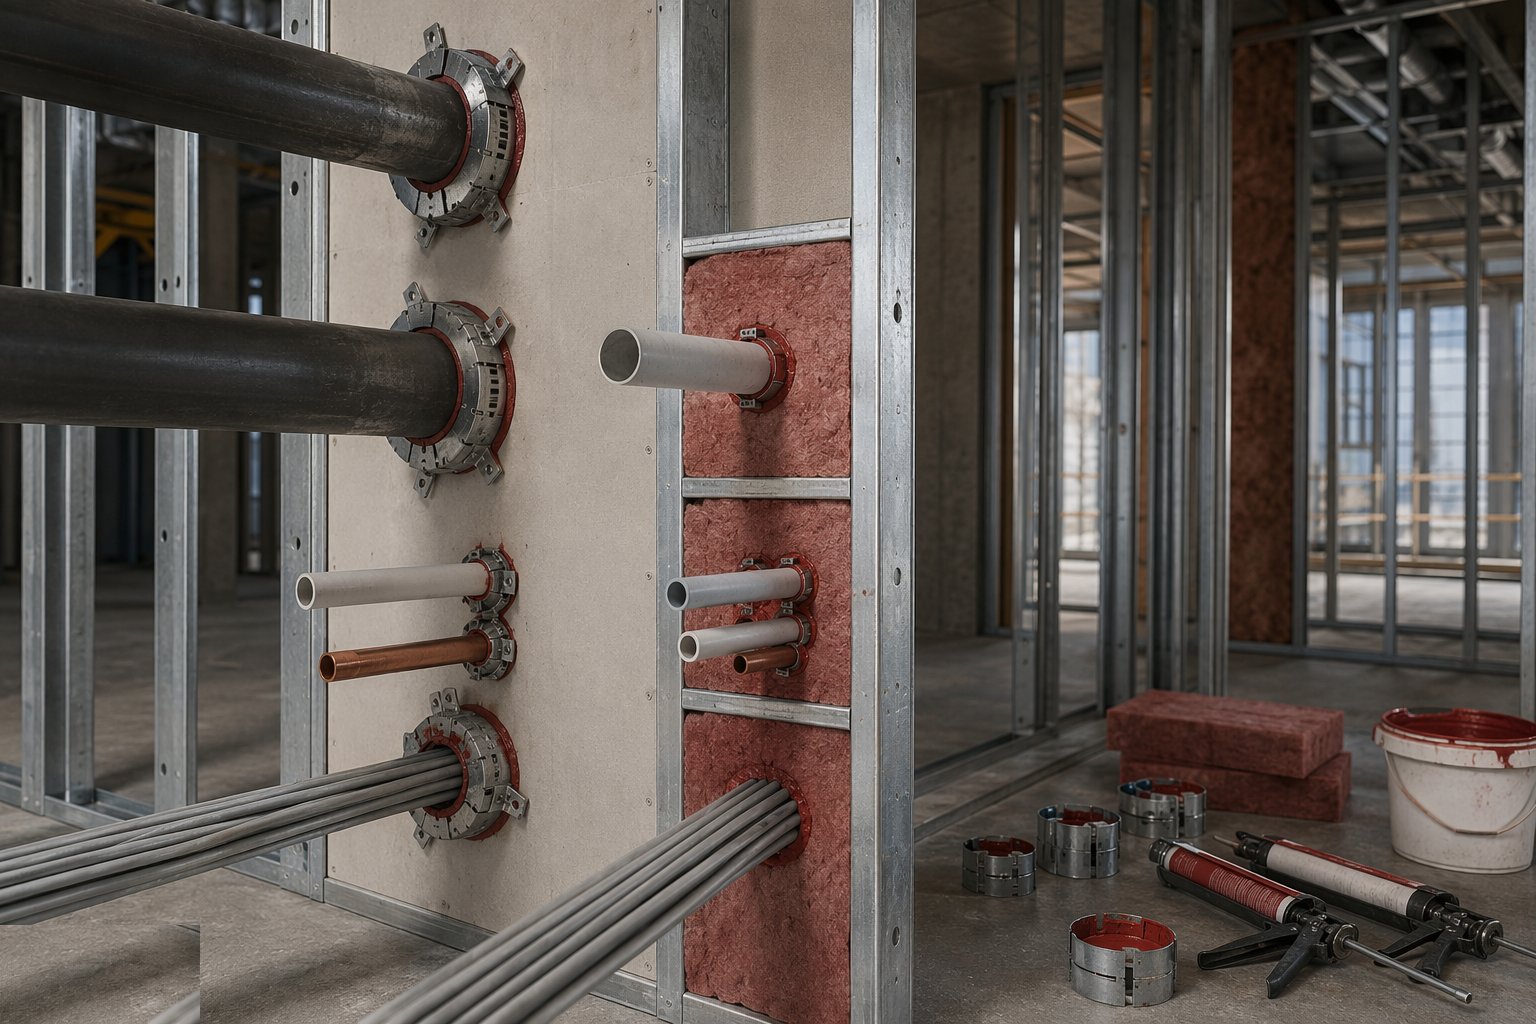
Collars and wraps fixed at the specified centres, batts friction-fitted, cut tight and coated on all edges, sealant to the specified depth over backing, mortars trowelled to full depth — all per the system sheet, and all before the services above make the wall unreachable. Cable trays get their own system because cables get added later; many tested systems include a retrofit path, use it rather than smearing mastic over new cables.
Step 5: Fit cavity barriers as cavities close
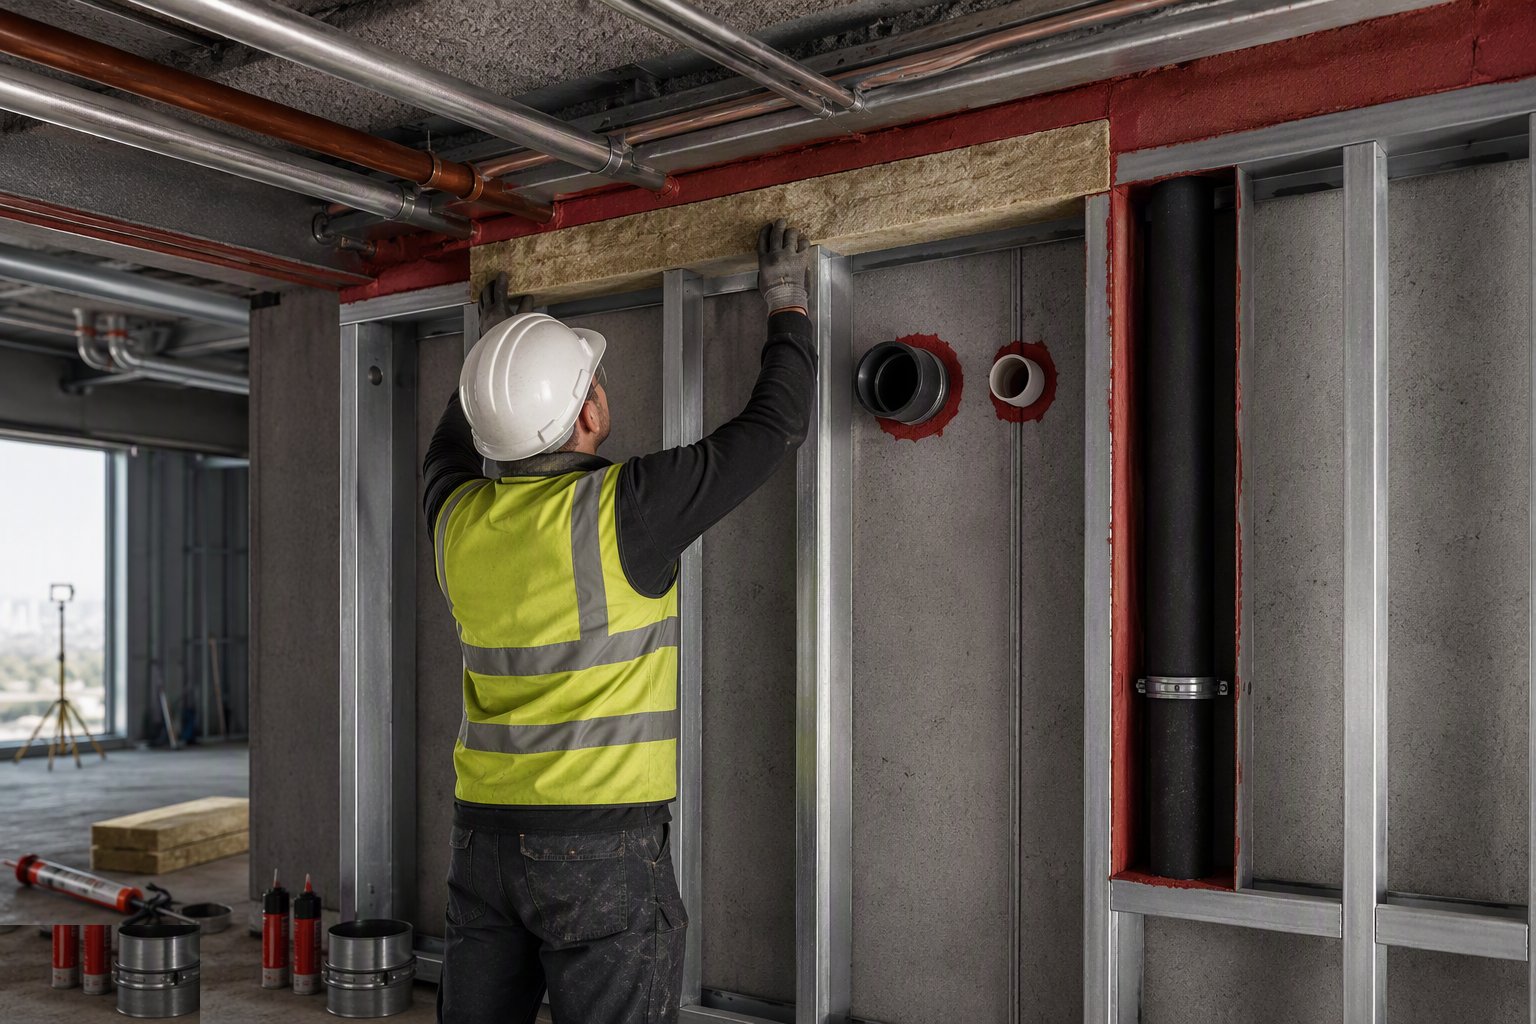
Cavity barriers go in at compartment lines, around openings, at eaves and at the edges of floor and ceiling voids — fixed to the substrate, compression-fitted or mechanically fixed per the product, with joints butted and corners detailed. On cladding and facade cavities the barrier layout is part of the approved facade design and is inspected before the rainscreen closes it forever. Photograph every run before cover.
Step 6: Seal the linear gaps at heads and edges
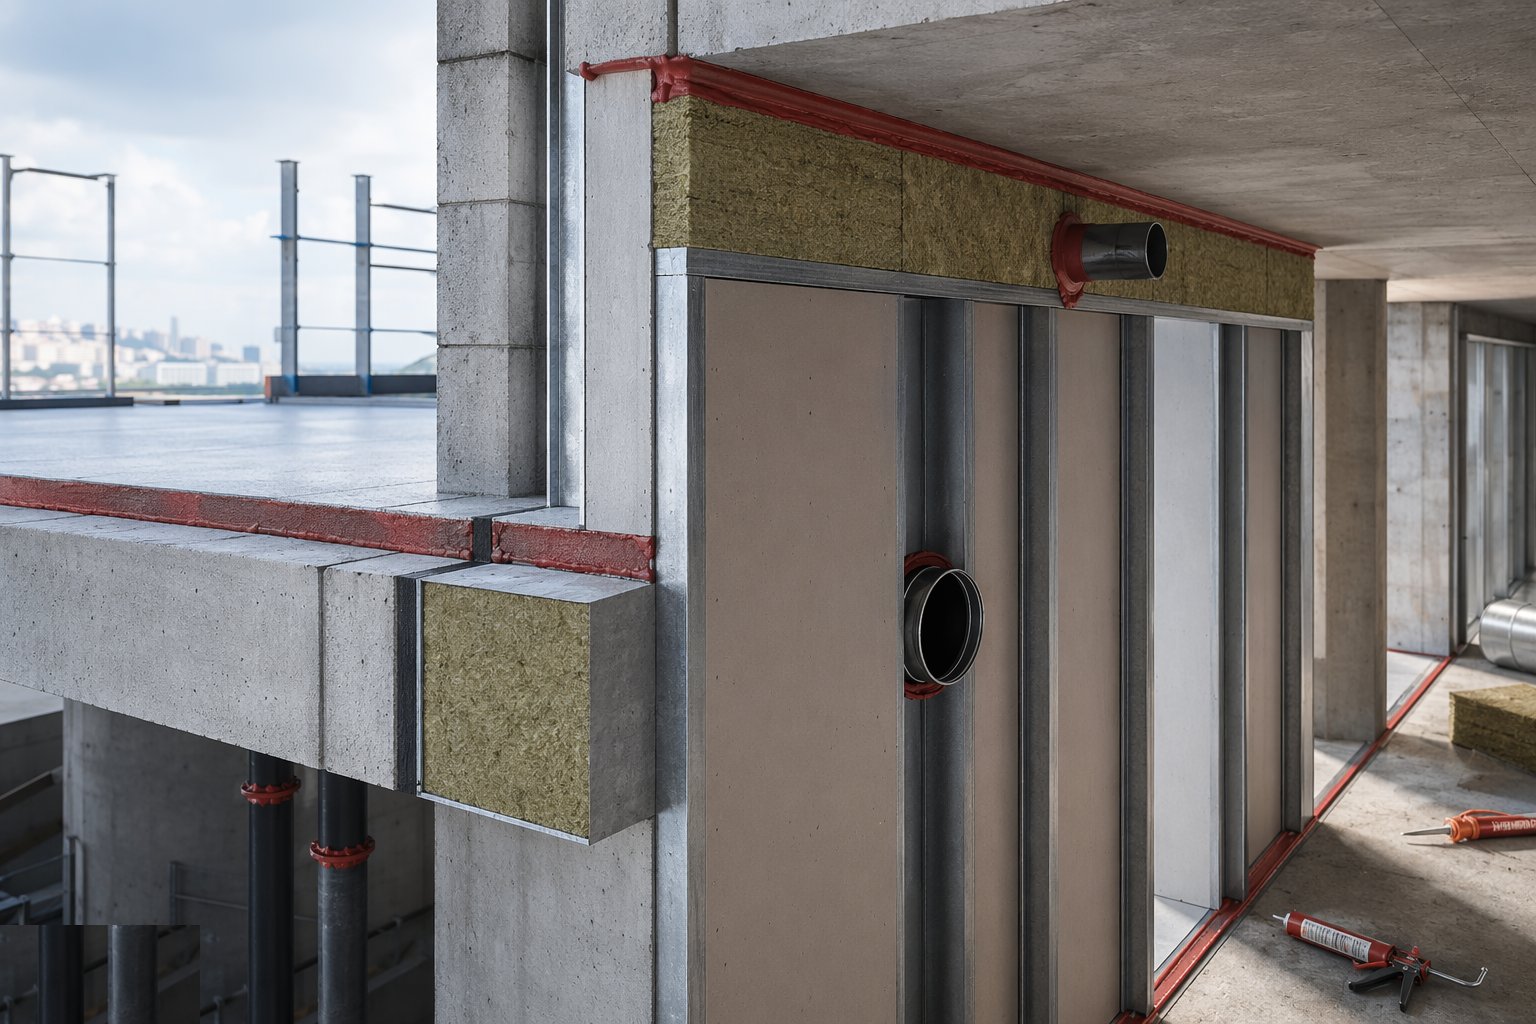
Partition heads under slabs and roofs, the edges of compartment floors at facade lines, and movement joints on compartment lines all need their rated seals — typically a tested sealant over mineral wool or a preformed flexible strip, sized for the movement. The head-of-wall detail must allow slab deflection without tearing the seal; check the deflection gap on the partition drawings matches the seal's tested movement capability.
Step 7: Label, photograph and log every seal
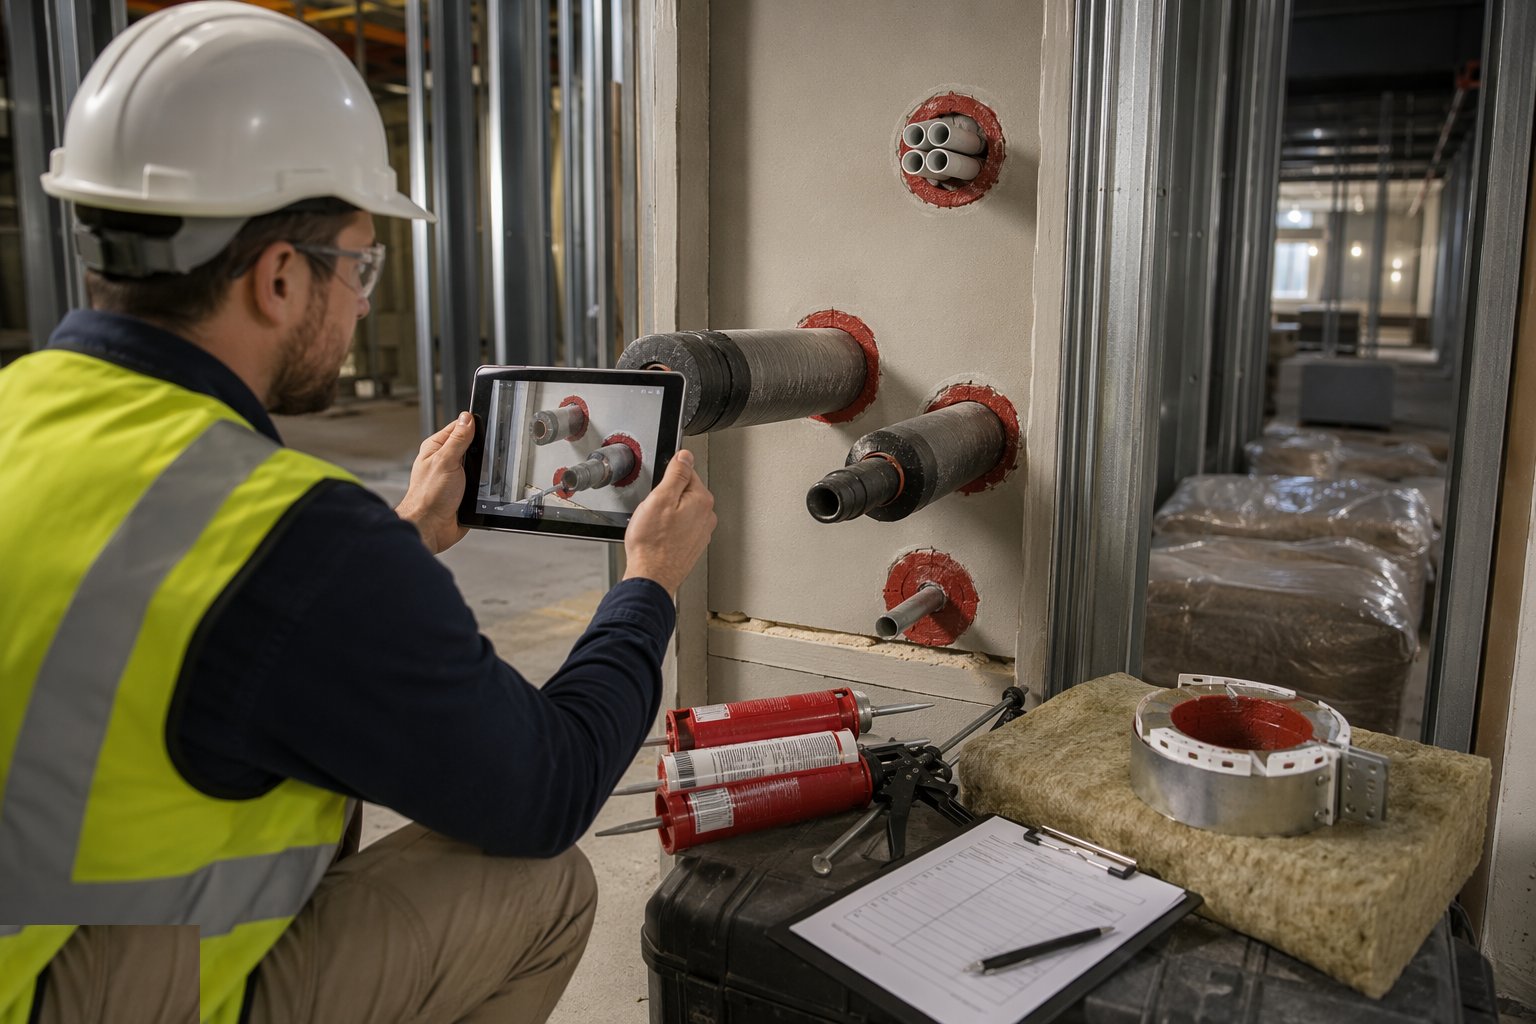
Each seal gets a label or a location on the register: product, batch, installer, date, photographic record before closure. On higher-risk buildings this feeds the golden thread and must survive to occupation — hand it over in the digital format the accountable person requires. The register is also how the building gets maintained: every future plumber who cores a hole needs to know what to reinstate and with what.
Step 8: Inspect, certify and remediate
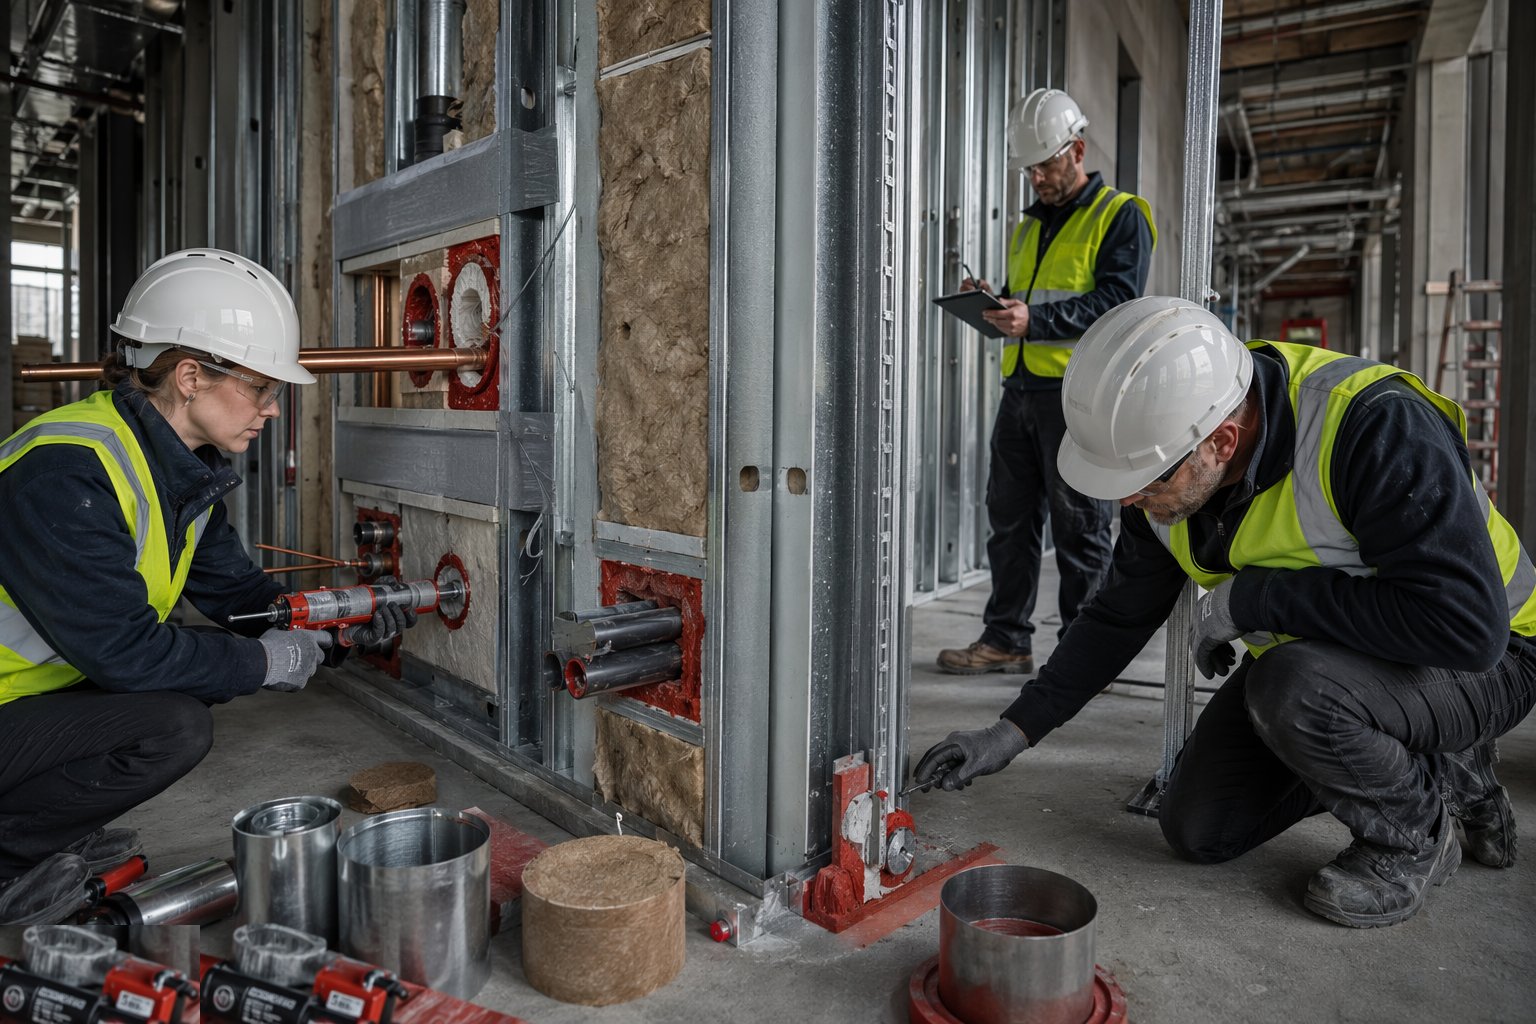
Third-party certified installers (FIRAS, BM TRADA or equivalent) inspect their own work, and the principal contractor or clerk of works samples independently — visual checks against the system sheets, destructive checks on a sample of seals where specified. Non-conformances get cut out and redone, not patched. In the UAE, DCD inspection signs off the penetration sealing at completion; in the UK, Building Control and, for higher-risk buildings, the gateway process sample the records. Incomplete records are treated as incomplete work.
Plant and equipment
- Sealant guns, bulk loaders and dispensing tools
- Core drills and saws for formed openings and remediation
- Batts, collars, wraps, pillows and mortars per system
- MEWPs, podiums and tower scaffolds for void and riser work
- Labelling, registers and photo-logging tablets for the golden thread
- Inspection mirrors, boroscopes and test kit for void verification
Quality control checks
- Fire strategy and compartment drawings current on site — penetrations scheduled before first fix
- Test/assessment evidence on file for every seal configuration used
- Third-party installer certification (FIRAS/BM TRADA or equivalent) verified per operative
- Every seal labelled and photographed before closure — register maintained live
- Independent sampling inspection against system sheets; destructive checks where specified
- Non-conformance log with cut-out and redo records
- UAE: DCD-approved materials and completion inspection records filed
Safety considerations
- Intumescent products, sealants and mortars under COSHH — gloves, ventilation in risers and voids
- Dust from cutting batts and coring — suppression and RPE
- Work in ceiling voids, risers and shafts — fragile surfaces, falls, permits where confined
- Hot works adjacent to combustible cavity materials — fire watch
- Working around live services and over occupied areas on remediation
- Manual handling of batts and bagged mortars in confined routes
Common defects
- Unsealed or partially sealed penetrations hidden above ceilings and in risers
- Oversized openings packed with unstated mortar or expanding foam of no rating
- Correct product, wrong configuration — no test evidence for the actual size and substrate
- Cavity barriers missing at compartment lines or crushed during facade closure
- Seals destroyed by follow-on trades adding cables and never reinstated
- No labels, no photos, no register — the golden thread broken at handover
- Mastic smeared over gaps with no backing and no tested depth
Best suited for
- Flats and residential towers — compartmentation between dwellings and around stairs and risers
- Hospitals, schools and hotels — sleeping-risk and evacuation-strategy buildings
- Offices and mixed-use — floor-by-floor compartmentation and tenancy separations
- Retrofit and remediation — existing buildings with legacy unsealed service routes
- UAE towers — DCD-approved sealing systems coordinated with facade and riser design
How long does Firestopping and Passive Fire Protection take?
Typical duration: Cavity barriers and formed openings ride on the masonry and drylining programme. Penetration sealing on a typical residential floor: 2–5 days spread across first and second fix. Remediation of a legacy riser: days per riser, plus access and making good..
Related processes
- Brick Wall Construction
- Block Wall Construction
- Concrete Structural Walls
- Damp Proofing — DPC, DPM and Cavity Trays
- Chasing & First-Fix Cutting for Services
- MEP — Plumbing (First & Second Fix)
- MEP — Electrical (First & Second Fix)
- Ventilation & Air Conditioning
- Below-Ground Drainage Installation
- Sanitary Installation
- Windows & Doors Installation
- Flooring & Floor Finishes
- Private Swimming Pool Construction
- CCTV & Security Systems Installation
- TRVs & Heating Controls
- Soft Landscaping & Gardens (Homes & Villas)
- Carpentry — First & Second Fix
- Firestopping and Passive Fire Protection in Commercial & Workplace
- Firestopping and Passive Fire Protection in Healthcare
- Firestopping and Passive Fire Protection in Education
- Firestopping and Passive Fire Protection in Residential & Housing
- Building Trades & Methods sector guide
- Buildings group