Private Swimming Pool Construction
Villa and residential pools — excavation, shell, waterproofing, filtration and the wet-side finishes.
Last updated 2026-07-28 by the BuildPedia Editorial Team.
What is Private Swimming Pool Construction?
A private pool is a small water-retaining structure with a plant room attached, and it fails like one when it is treated like landscaping with water in it. The shell — usually sprayed concrete (shotcrete/gunite) or cast in situ reinforced concrete, sometimes blockwork rendered and tanked on simpler jobs — must hold water in and ground water out; the waterproofing must survive thermal cycling and chemical water; the pipework must be pressure tested before it is buried under a structure you cannot excavate gracefully. Around the shell sits the real estate of pool building: the balance tank or skimmer system, the plant room with pump, filter and dosing, and the finishes — mosaic or tile, coping, and the deck falls that keep dirty water out of the clean water.
In the UAE a villa pool is near-standard kit: municipal approval for the pool and its drainage, backwash discharged where the authority allows, fencing and safety rules where they apply, and water chemistry that fights 45 °C air temperature all summer. In the UK the same bones apply with planning and Building Regs interest in the structure and any enclosure. Either way, the test that matters is simple and brutal: fill it, mark the level, and watch it for a week before the finishes go on.
When and why is Private Swimming Pool Construction used?
Pool construction follows the villa structure or runs with the external works, early enough that the excavation and shell do not undermine finished work and late enough that the shell is not a silt trap for the whole build. It exists as a structure-plus-services package: the concrete holds the water, the plant keeps it alive, and the finishes make it a pool instead of a tank. Every stage gates the next — no finishes before the water-tightness test, no commissioning before the chemical regime is set.
Types of Private Swimming Pool Construction
Skimmer pools
The villa standard: water level below the coping, surface drawn through skimmer boxes to the plant. Simple, tolerant of level variation, and the default for private pools in both markets.
Overflow / deck-level pools
Water level with the deck, spilling to a perimeter channel and a balance tank sized for bather displacement. The hotel look at villa scale — beautiful, and intolerant of poor levelling: the channel fall is the whole aesthetic.
Shotcrete shell with tiled finish
Sprayed concrete over a reinforced cage, the premium shell method: monolithic, shaped freely, and demanding a specialist nozzleman. Finished in mosaic or tile over a waterproof render or tanking system.
Blockwork or liner pools
Rendered and tanked blockwork shells on simpler budgets, or panel-and-liner systems where the liner is the waterproofing. Faster and cheaper; the failure modes move from concrete to seams, render and liner welds.
Private Swimming Pool Construction: step by step
Step 1: Set out, approve and excavate
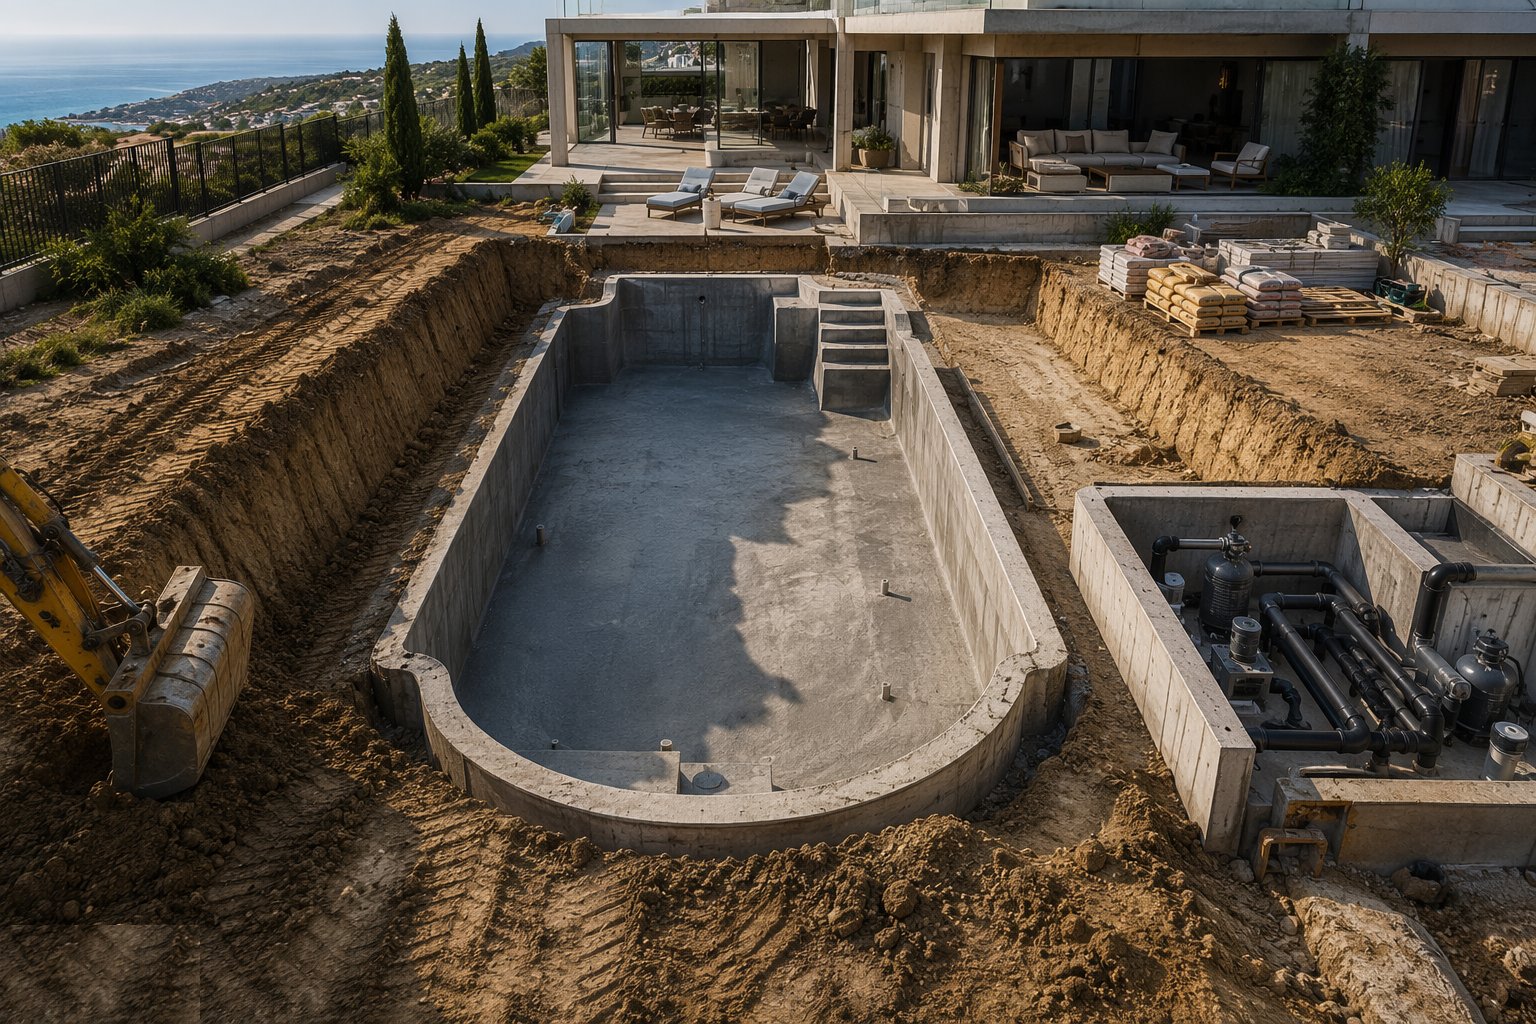
The pool position is set out with its clearances from foundations and boundaries, approvals in hand (municipality or planning as the market requires), and the excavation cut to profile with allowances for the shell thickness and working space. Ground water is assessed honestly — a high table changes the design, the drainage and the flotation risk of an empty shell.
Step 2: Form the base and the cage
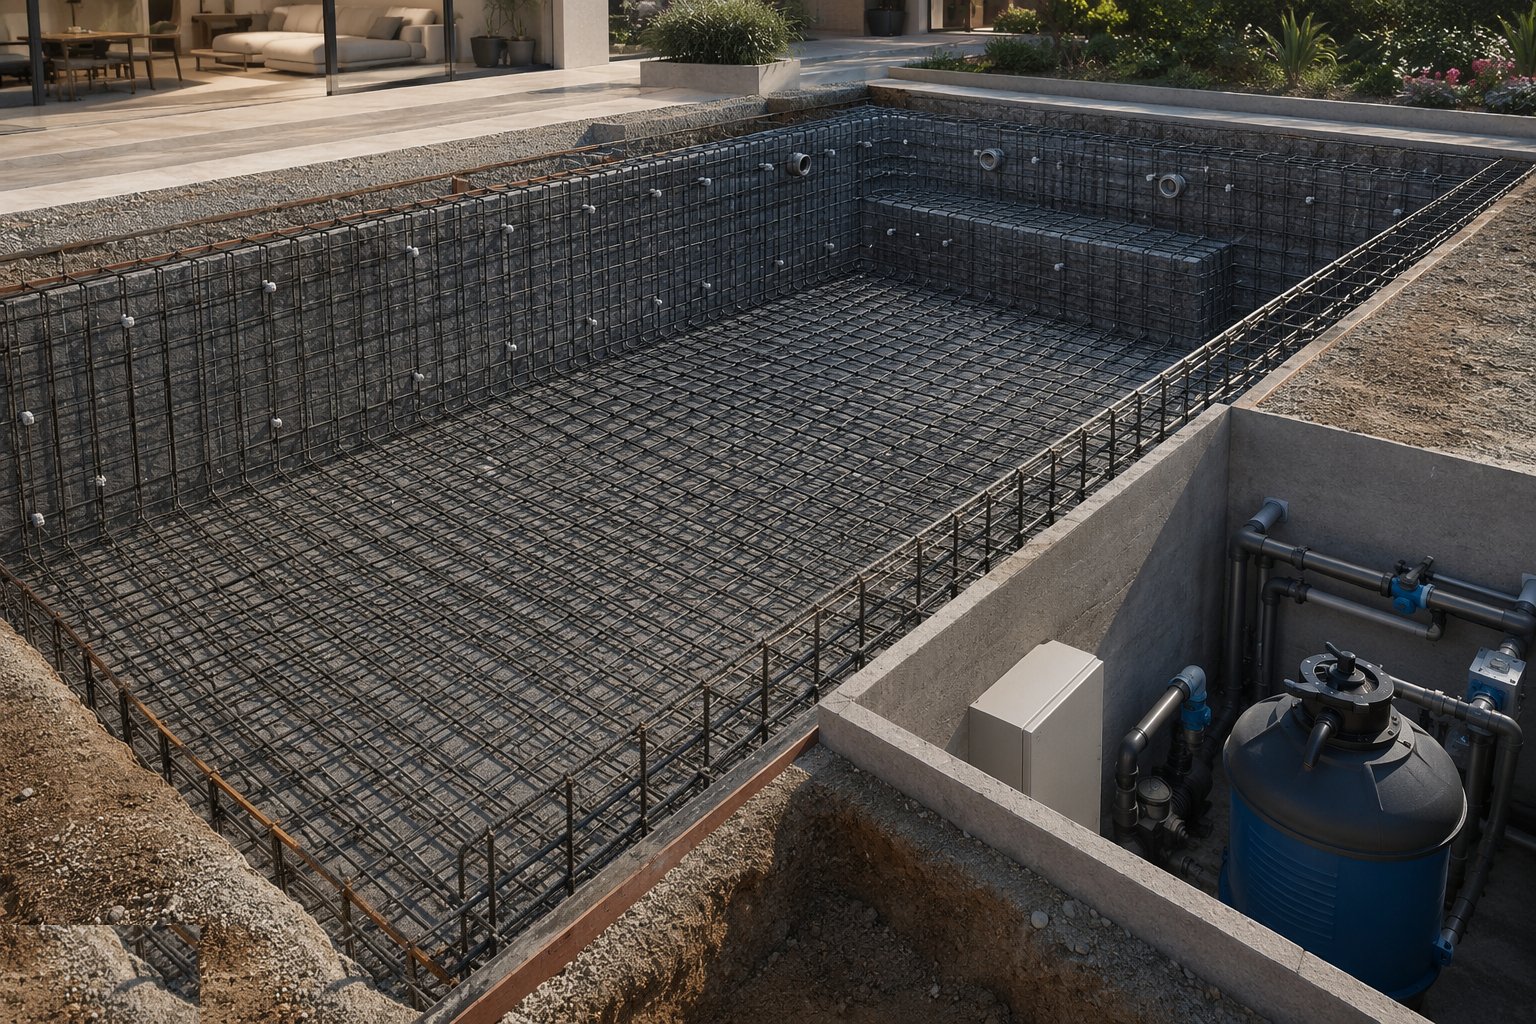
A blinding or structural base slab is cast with its reinforcement, and the wall cage is fixed to the design with cover spacers — the shell is a water-retaining structure and the steel schedule is not a suggestion. Cast-in items are fixed now: skimmer boxes, inlets, main drains, light niches and the overflow channel where it applies, all to the hydraulic design.
Step 3: Spray or cast the shell
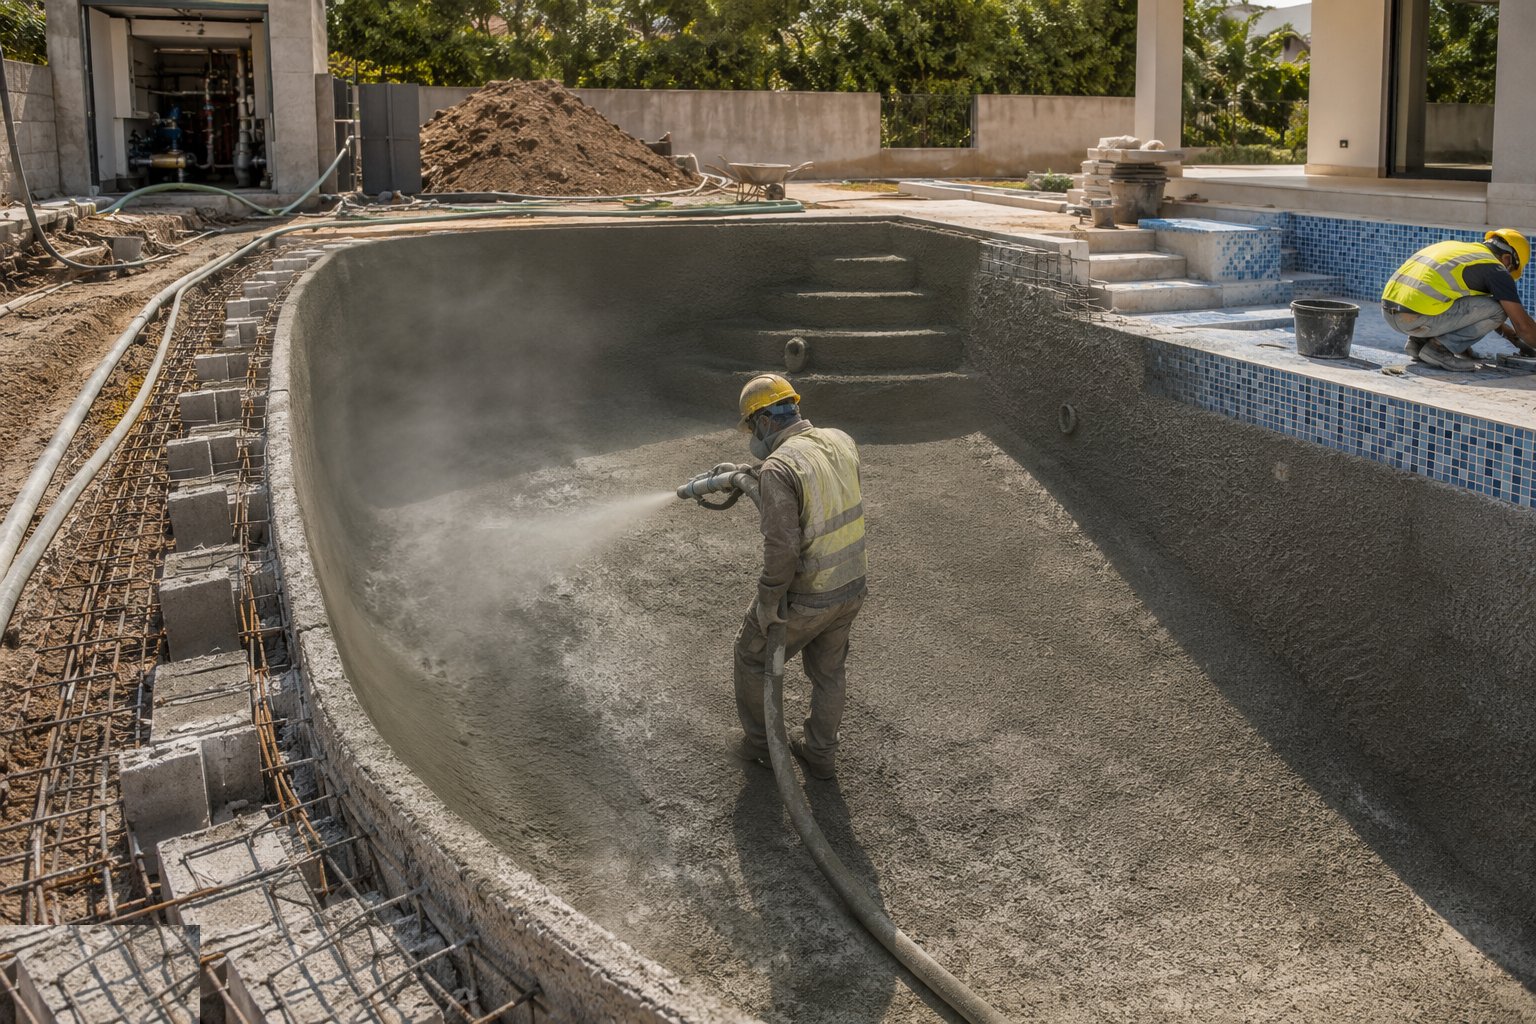
Shotcrete is applied by the specialist gang in layers to the profile, or the walls are cast in situ against formwork; either way the concrete class, cover and compaction are the water-resisting design. Construction joints get their waterbars. The shell cures properly — wet curing in Gulf heat is not optional — before anything loads it.
Step 4: Install the hydraulic pipework and plant base
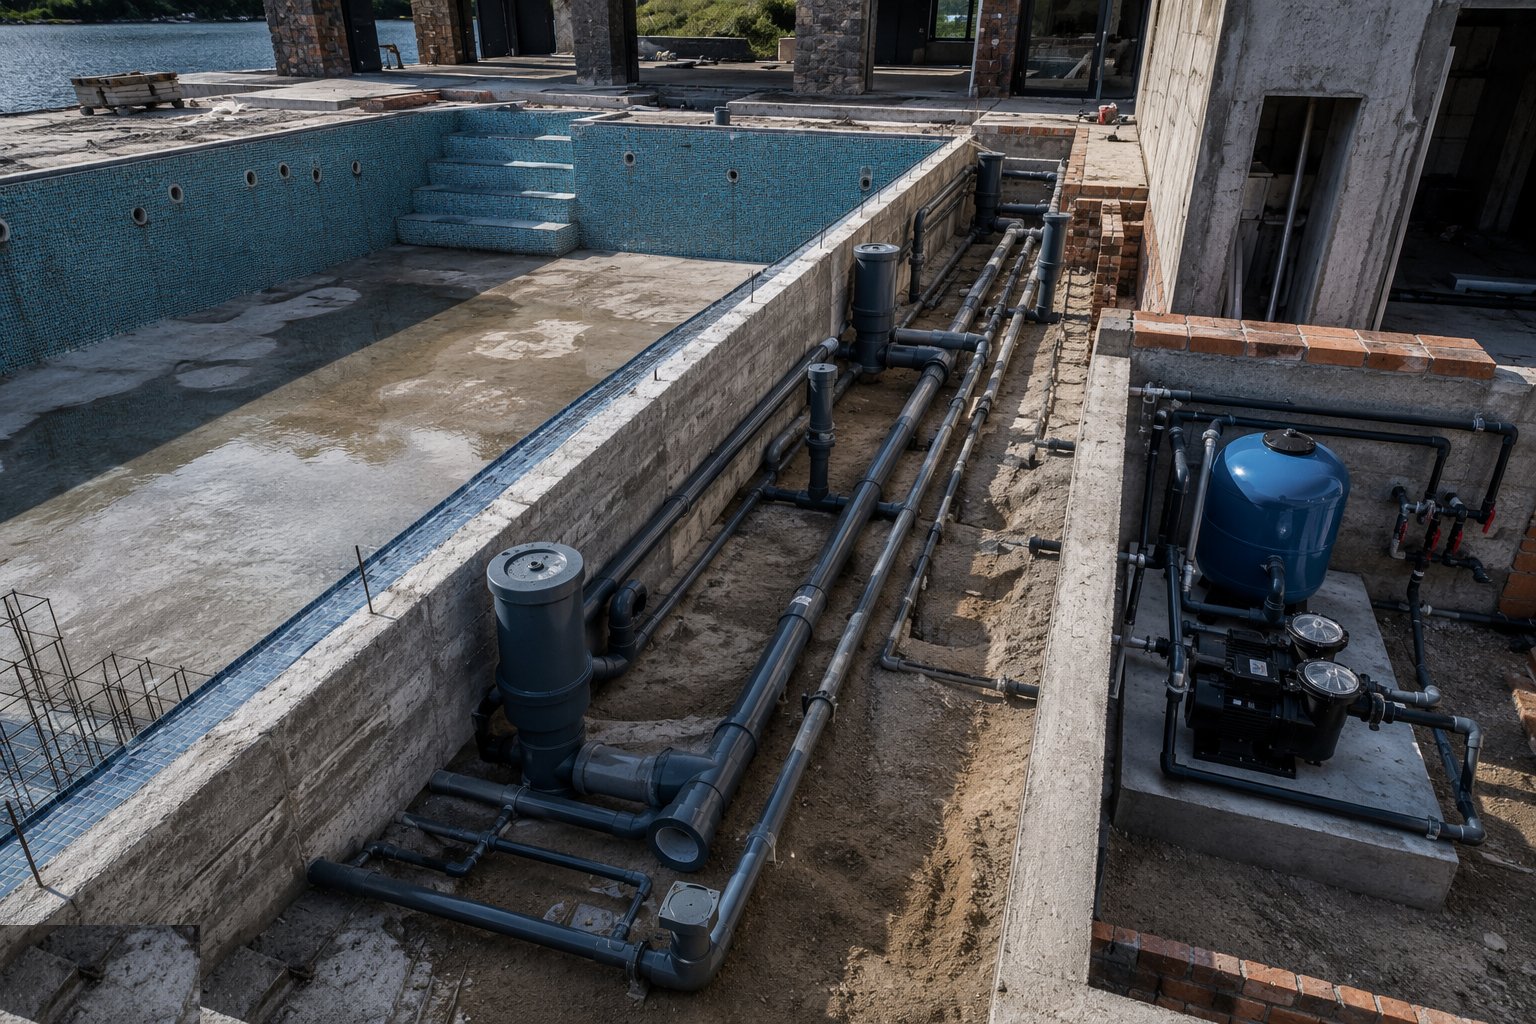
Suction, return, skimmer and drain lines run to the plant room position in pressure-rated pipe, every buried joint accessible-by-design or solvent-welded for life, and the whole system pressure tested before backfill. The plant room base, drainage and ventilation go in with the equipment positions set out.
Step 5: Waterproof and test the shell
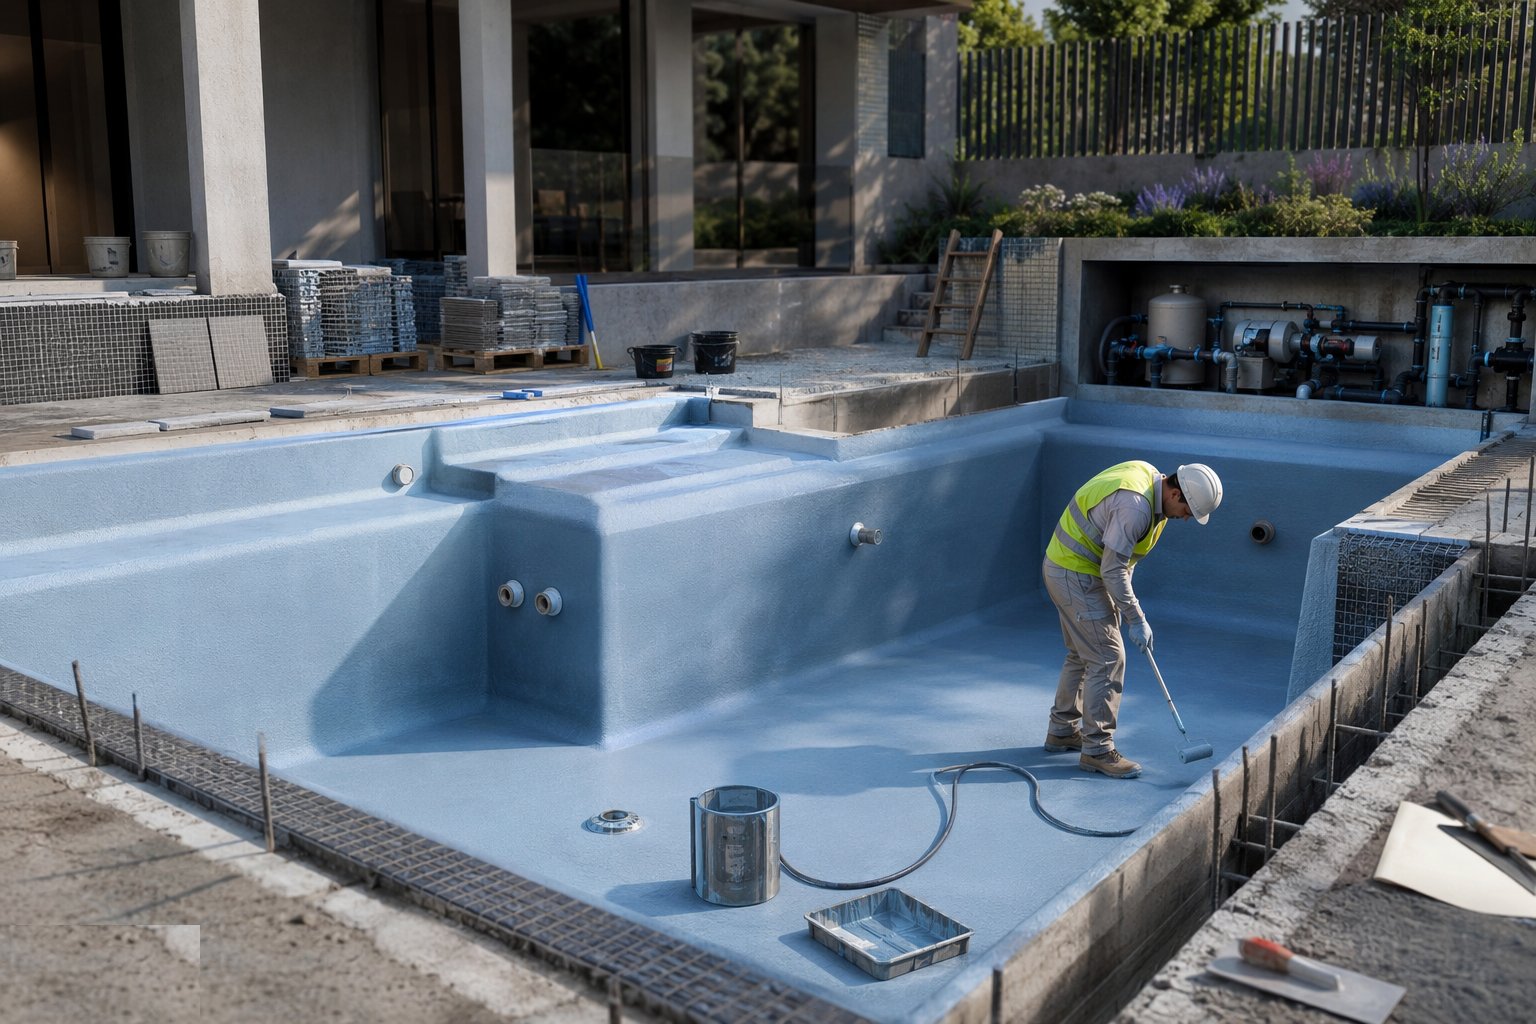
Tanking or waterproof render systems apply to the prepared shell with their certified details at every penetration. Then the test: fill the pool, mark the level, and monitor for days with evaporation allowance — a dropping level is a leak hunt now, while it is cheap, not after the mosaic. The test is recorded and witnessed.
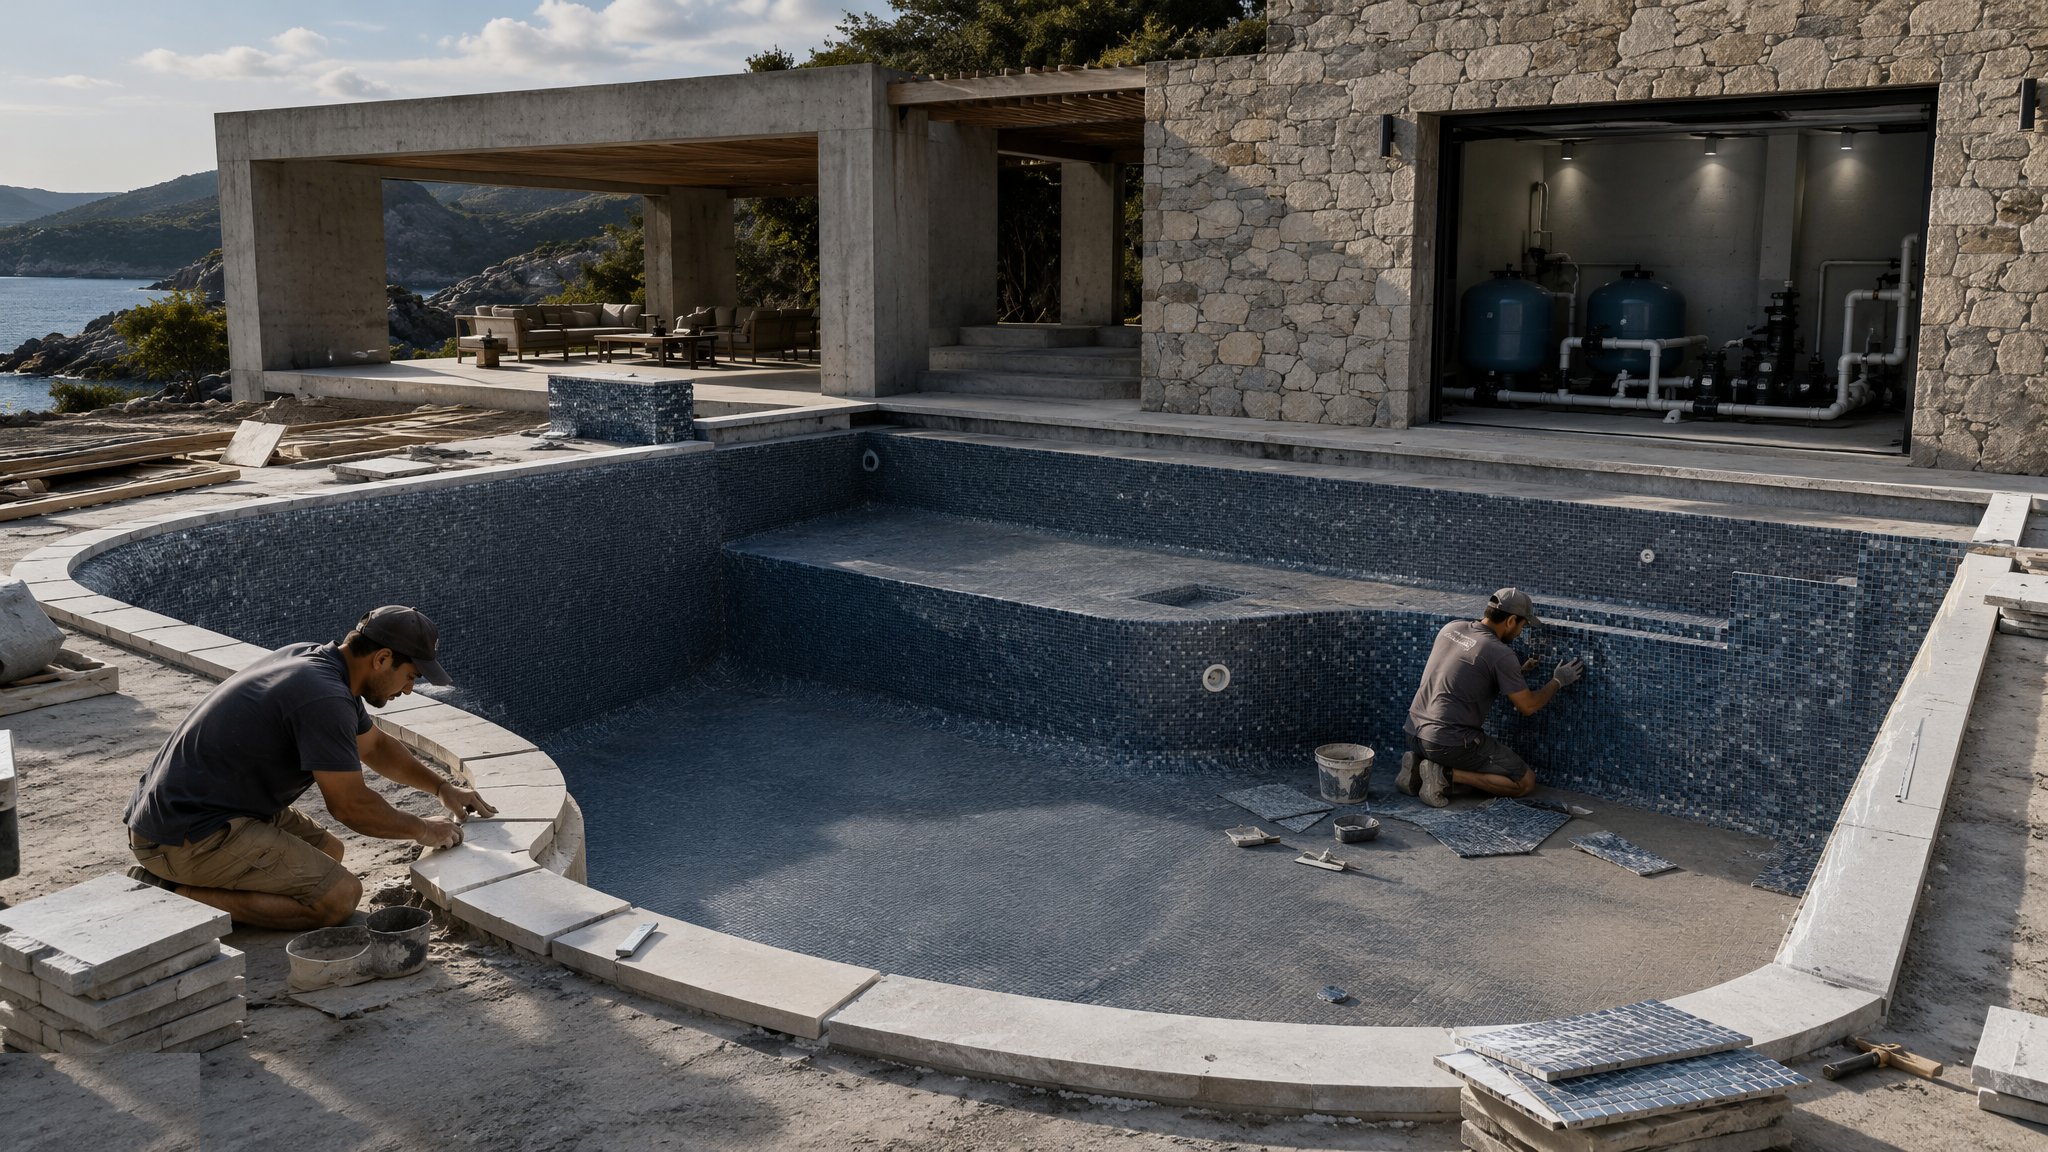
Step 6: Set the finishes — mosaic, coping and deck
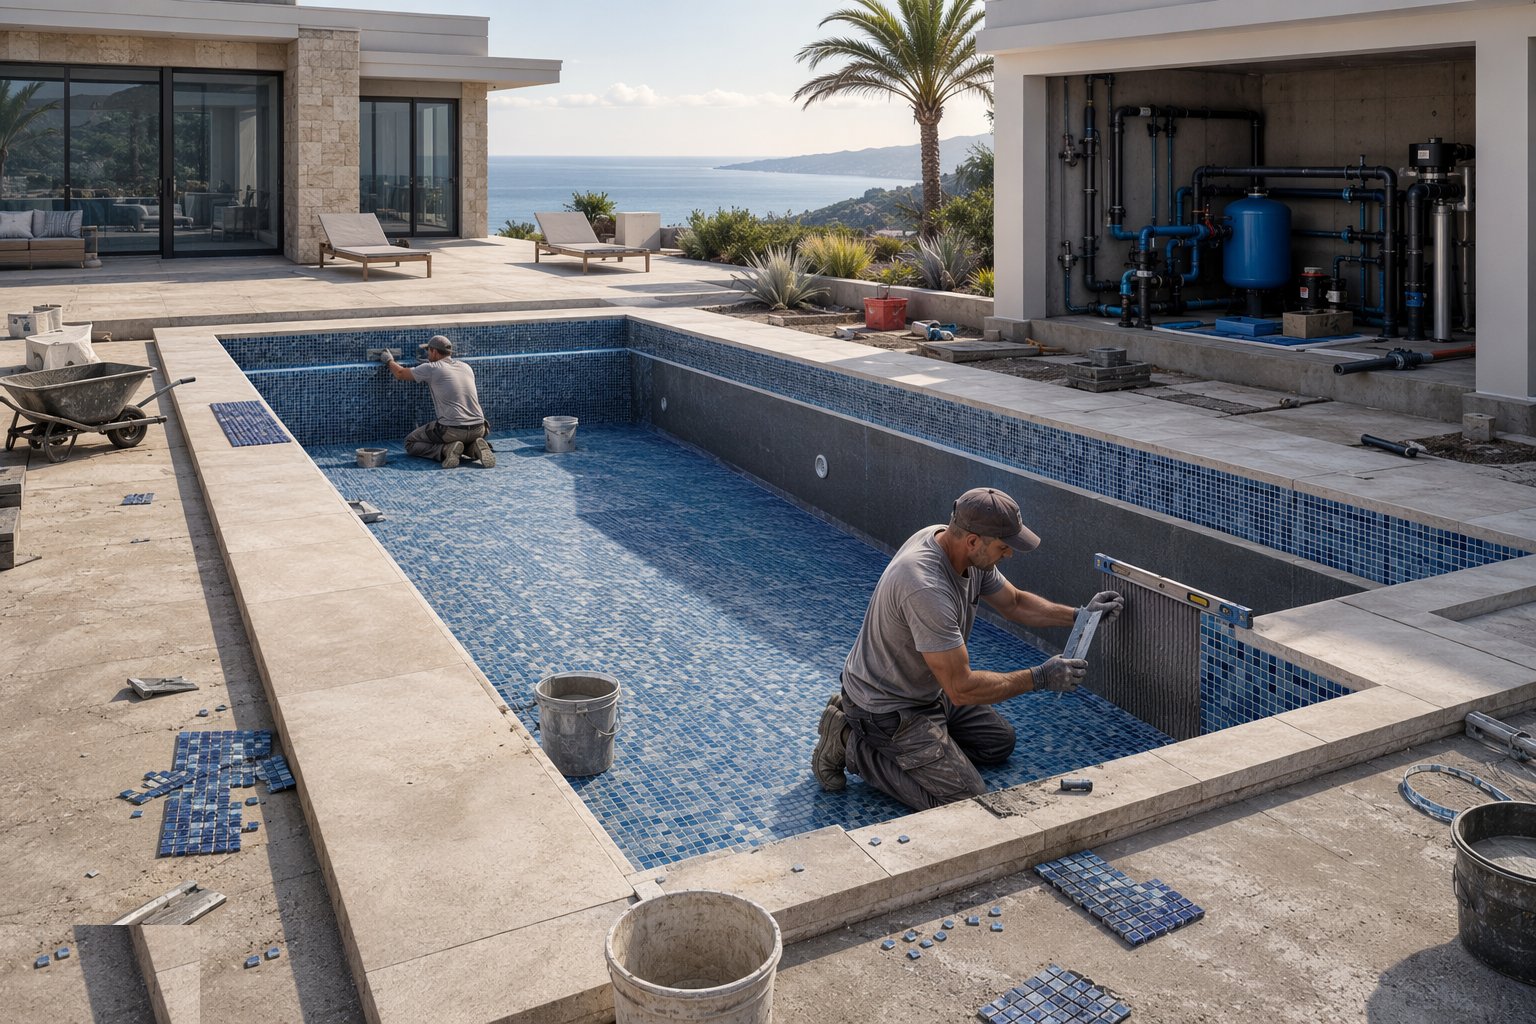
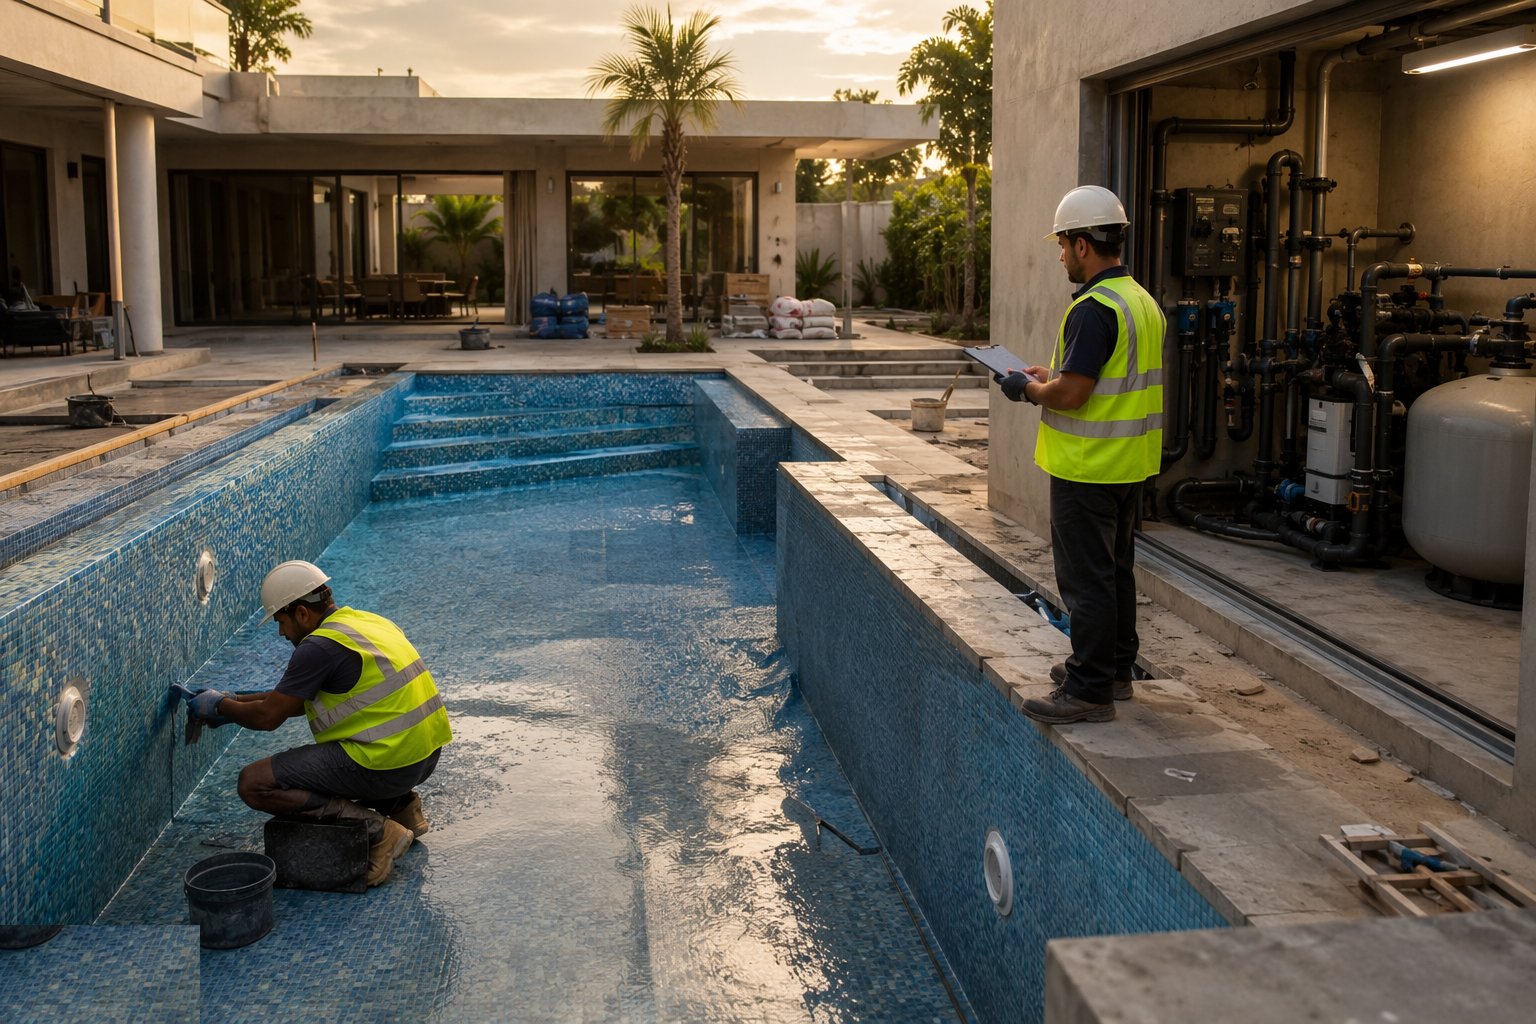
Mosaic or tile goes on over the waterproofing with pool-grade adhesive and grout, movement joints honoured, and the waterline tile set dead level because water is a spirit level that never lies. Copings bed with their falls and drips; the deck lays with falls away from the pool so rain and wash-down never run into the treated water.
Step 7: Install and commission the plant
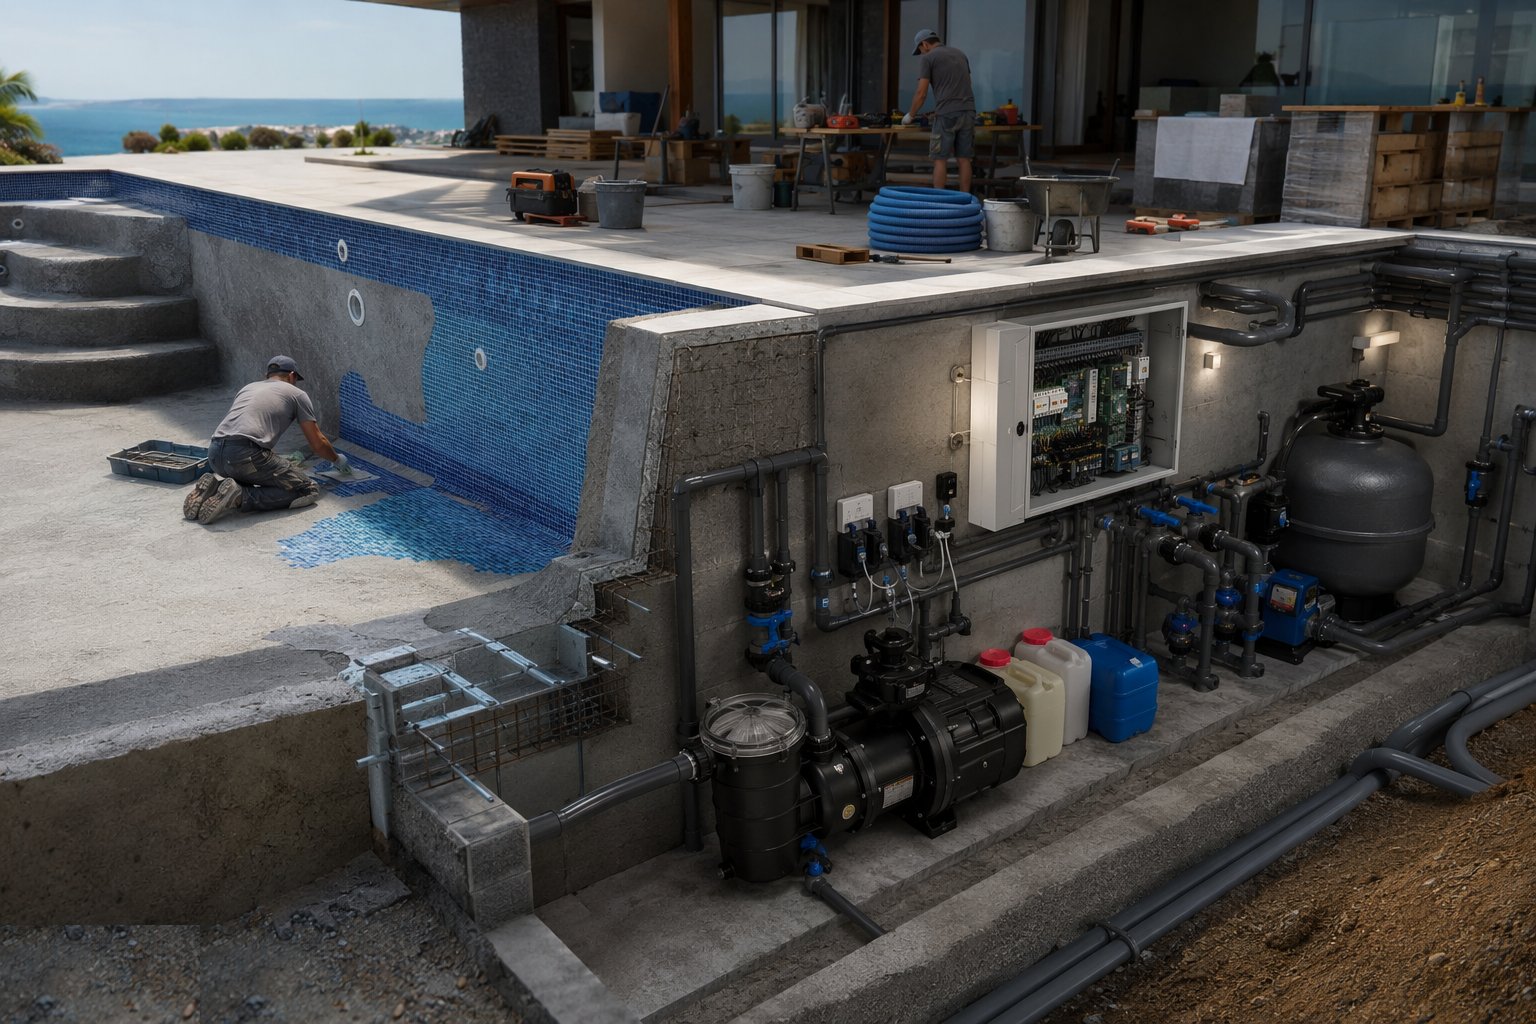
Pump, filter, dosing or salt chlorination, heating where specified and the control panel are installed, piped and wired; the system is filled, circulated, and balanced so every inlet moves water and the turnover rate meets the design. Chemical regime starts from the fill — pH, sanitiser, alkalinity — logged from day one.
Step 8: Handover — safety, chemistry and O&M
Safety items complete: fencing or covers where rules or prudence require, depth markers, and the electrical bonding certificate for everything metal in the wet zone. The owner gets the plant walkthrough, the chemistry log, the warranty set and the winter/summer regime — a pool handed over without its operating manual becomes a green pond with equipment attached.
Plant and equipment
- Excavator and muck-away for the dig
- Shotcrete rig and specialist crew, or formwork and pump for cast shells
- Rebar fixing kit and cover spacers
- Pressure test rig for the hydraulic pipework
- Tanking and waterproofing systems with their gauges
- Tile and mosaic cutting kit; levelling systems for waterline work
- Plant room kit: pumps, filters, dosing systems and test sets
Quality control checks
- Shell concrete class, cover and cube results per the water-retaining design
- Cast-in items checked against the hydraulic design before the shell closes
- Pipework pressure test certificates before backfill
- Water-tightness test recorded with levels, dates and evaporation allowance
- Waterline and channel levels verified to millimetre tolerance
- Commissioning records: turnover rate, chemical regime and bonding certificate
Safety considerations
- Excavation support and edge protection around an open pool dig
- Drowning and entrapment controls during filling and testing
- Electrical work in wet zones to the swimming-pool wiring regs, bonded and RCD-protected
- COSHH on pool chemicals — storage, dosing and never mixing
- Hot-weather working on shells and decks in the Gulf summer
- Confined space care in balance tanks and deep ends during finishing
Common defects
- Leaking shells where the water test was skipped to save a week
- Cracked render and tile lines from shell movement or missing joints
- Dead spots and algae farms from unbalanced inlets and wrong turnover
- Overflow channels that pond because the level was set by eye
- Buried pipe joints leaking under the deck — untested before backfill
- Green handovers: plant installed, chemistry regime never set or explained
Best suited for
- Villa and private residential pools in the UK and UAE
- Boutique hotel and residential amenity pools at small scale
- Deck-level statements where the levelling discipline exists to build them
- Renovation and re-tanking of tired shells
- Any pool where water-tightness is tested before it is trusted
How long does Private Swimming Pool Construction take?
Typical duration: A villa pool, dig to handover: 8–14 weeks with curing and test time in it. The water test alone is a week the programme must surrender..
Related processes
- Below-Ground Drainage Installation
- Sanitary Installation
- Windows & Doors Installation
- Flooring & Floor Finishes
- CCTV & Security Systems Installation
- TRVs & Heating Controls
- Soft Landscaping & Gardens (Homes & Villas)
- Carpentry — First & Second Fix
- Brick Wall Construction
- Block Wall Construction
- Concrete Structural Walls
- Damp Proofing — DPC, DPM and Cavity Trays
- Firestopping and Passive Fire Protection
- Chasing & First-Fix Cutting for Services
- MEP — Plumbing (First & Second Fix)
- MEP — Electrical (First & Second Fix)
- Ventilation & Air Conditioning
- Private Swimming Pool Construction in Residential & Housing
- Private Swimming Pool Construction in Hospitality & Tourism
- Private Swimming Pool Construction in Sports & Leisure
- Building Trades & Methods sector guide
- Buildings group