Insulation Systems
Cavity, EWI, internal wall, roof and floor insulation — continuity, cold bridging and the fire-classification decisions that decide what you are allowed to build with.
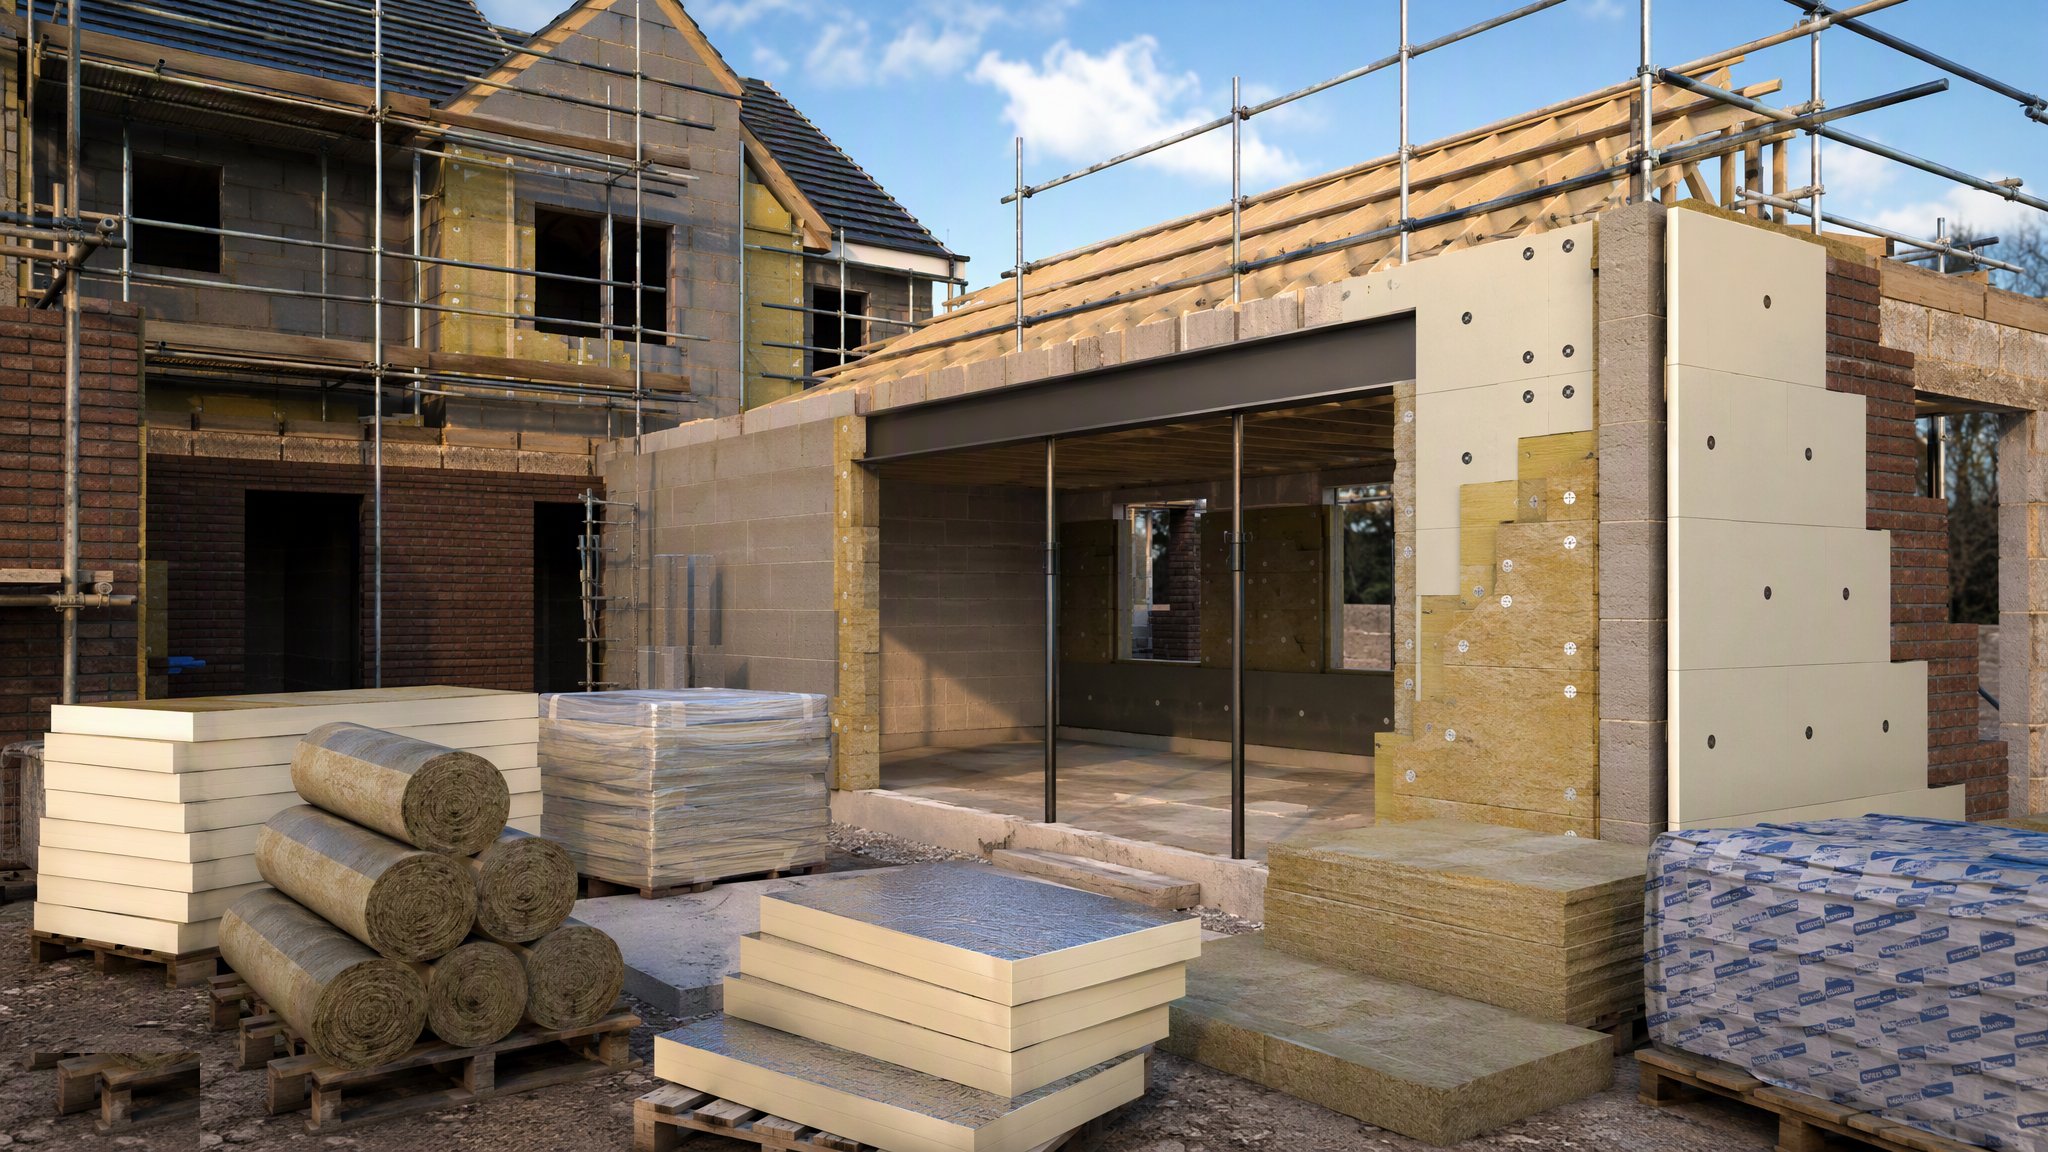
Last updated 2026-07-28 by the BuildPedia Editorial Team.
What is Insulation Systems?
Insulation only performs as a continuous layer. A wall insulated to a calculated U-value of 0.18 W/m²K with a 10 mm gap behind the boards, slumped cavity batts and an uninsulated lintel does not measure 0.18 — it measures whatever the weakest path through it gives, and thermal imaging will find every one of those paths in the first cold snap. The trade on site is not about the material in the pack; it is about joints taped, boards cut tight around penetrations, cavity barriers where they belong, and the hundred small junctions — eaves, reveals, floor edges, meter boxes — where the layer is most easily broken.
The material choice carries a second decision that now dominates UK work: fire classification. Since Grenfell and the 2018 and 2022 amendments to the Building Regulations, combustible cladding and insulation on the external walls of relevant buildings over 18 m is effectively banned — materials must achieve class A2-s1,d0 or better to EN 13501-1, and ACM panels with a polyethylene core are banned outright on any building. Below that height, limited-combustibility rules, cavity barriers and BS 8414 testing still shape what can go in a cavity or on a facade. In the UAE the same lesson was learned through a run of tower facade fires; the UAE Fire and Life Safety Code of Practice now requires third-party certified facade systems, DCD approval of materials, and restricts combustible cladding on buildings over 15 m.
In the Gulf the physics flips: the heat is outside trying to get in, the vapour drive runs from the hot humid exterior toward the cold conditioned interior, and putting a vapour control layer on the warm-in-winter (UK) position would trap condensation inside the wall. UAE thermal specs are driven by the municipality green building codes — DM/DDA in Dubai, Estidama in Abu Dhabi — with envelope U-values, solar heat gain limits and air-tightness targets that are inspected at handover, not just drawn.
When and why is Insulation Systems used?
Insulation follows the structure and runs through first fix: cavity and full-fill batts rise with the masonry, EWI goes on once the frame is weathertight, loft and roof insulation lands with or after the roof covering, and floor insulation goes in with the oversite or screed build-up. It is specified to hit Part L targets in the UK (or the relevant emirate's thermal code in the UAE), but the real reason it earns its place is comfort and running cost — a badly insulated envelope cannot be heated or cooled its way back to performance, whatever the plant size.
Types of Insulation Systems
Cavity wall insulation
Partial-fill boards held against the inner leaf with a residual drained cavity, or full-fill mineral wool or EPS batts built in as the wall rises. Retrofit blown fibre or bead fills existing cavities where exposure and cavity condition allow.
External wall insulation (EWI)
Insulation boards fixed to the outside of the wall and rendered — mineral wool or class-A rated systems on anything where the combustibility rules bite, EPS only where the height and use permit. The standard retrofit route for solid-wall housing and the default for many new rendered envelopes.
Internal wall insulation (IWI)
Insulated dry lining on the room side — used where the external face cannot be touched (conservation, facades worth keeping). Vapour control and the detail at floors, ceilings and party walls decide whether it works or grows mould.
Roof and loft insulation
Cold-loft mineral wool laid between and over ceiling joists, or warm-roof insulation at rafter line — between and over rafters, or above the deck on flat roofs. Eaves ventilation paths and the continuity over the wall plate are where these systems fail.
Floor and perimeter insulation
Rigid boards over or under the ground slab with the DPM lapped to the wall insulation, edge (perimeter) insulation at the slab-to-wall junction, and suspended-floor insulation netted between joists. The floor edge is one of the worst thermal bridges in the building if the upstand is missed.
Insulation Systems: step by step
Step 1: Confirm the build-up and the fire classification first
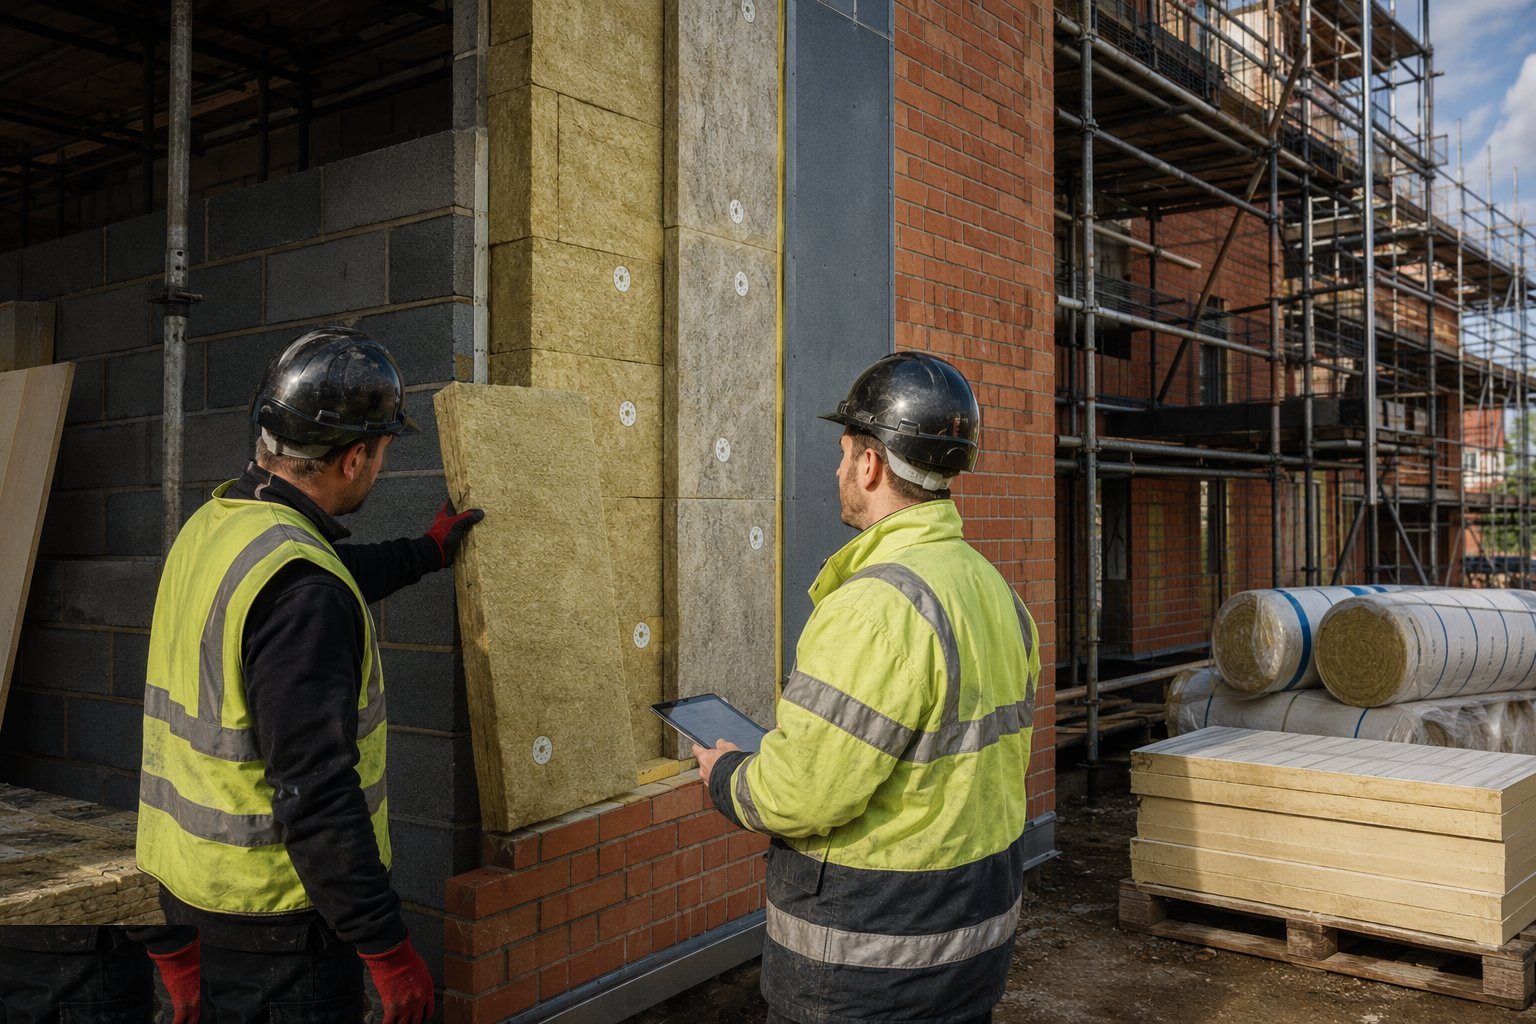
Before ordering a single board, check the approved thermal calculation against the fire classification of every layer — for UK external walls on relevant buildings over 18 m the insulation and cladding must be A2-s1,d0 or better, and polyethylene-core ACM is banned outright on any building. In the UAE, confirm DCD approval and the facade system certificate. If the value engineering swapped the material, the classification may have swapped with it.
Step 2: Survey the substrate and set the datum
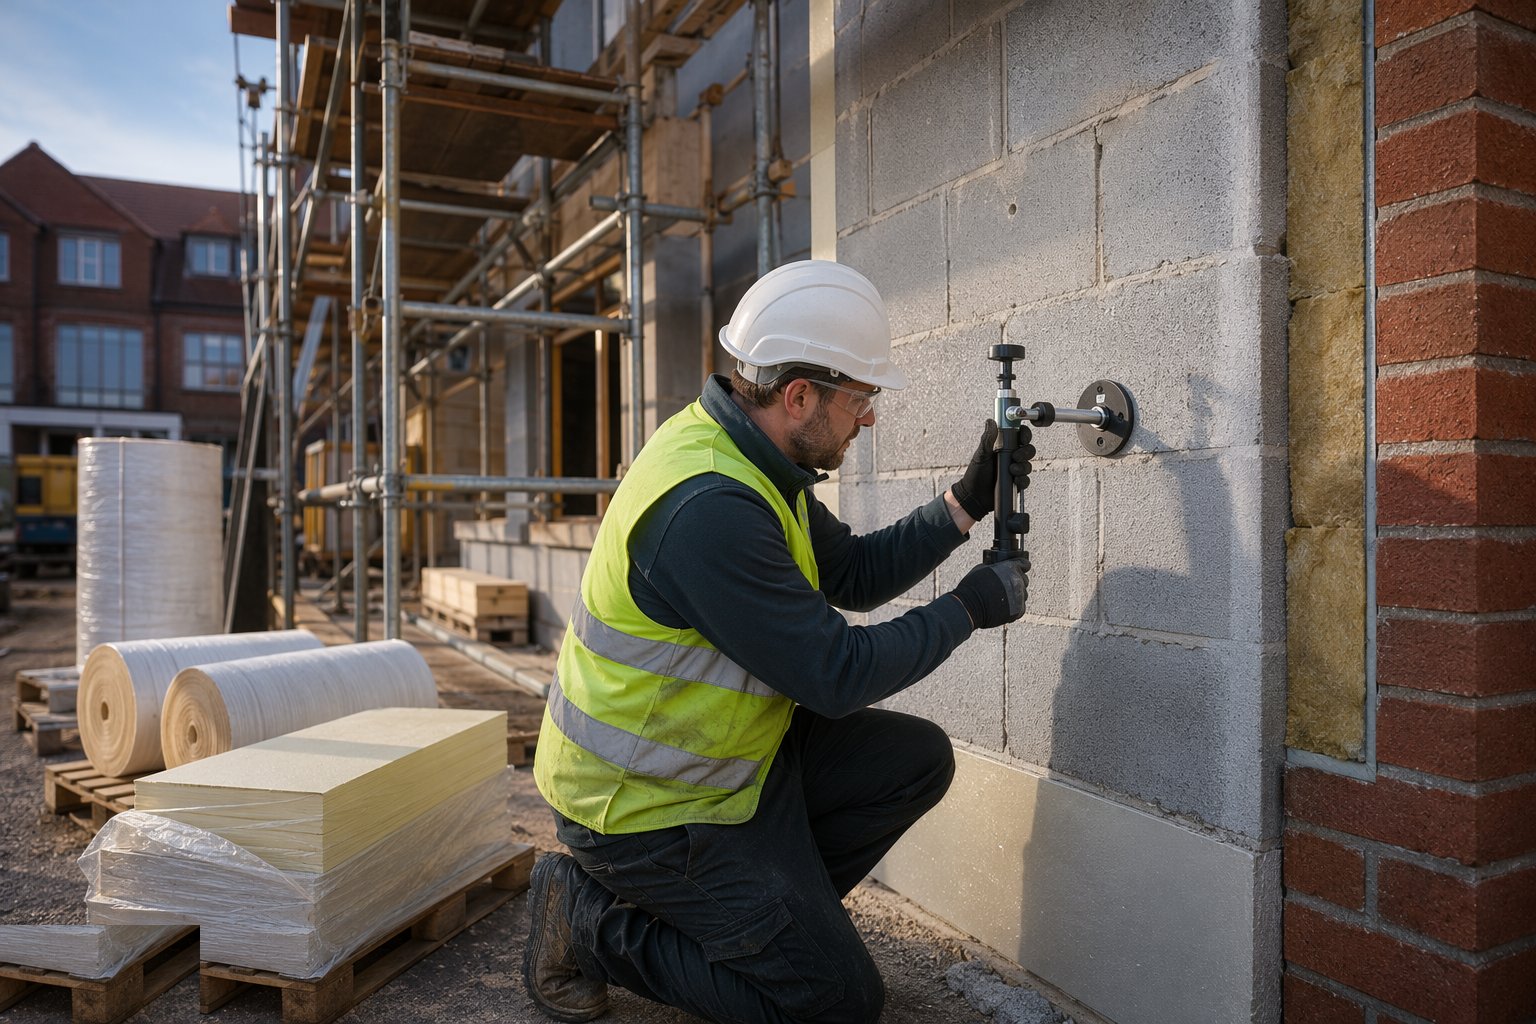
For EWI, check the wall is sound, flat and dry — pull-test the fixing substrate so board fixings are specified for the real wall, not the assumed one. For cavity work, check the cavity width against the design along the run. Set the datum line for the first row of boards or the first batt run; everything above copies this line.
Step 3: Build in cavity insulation as the wall rises
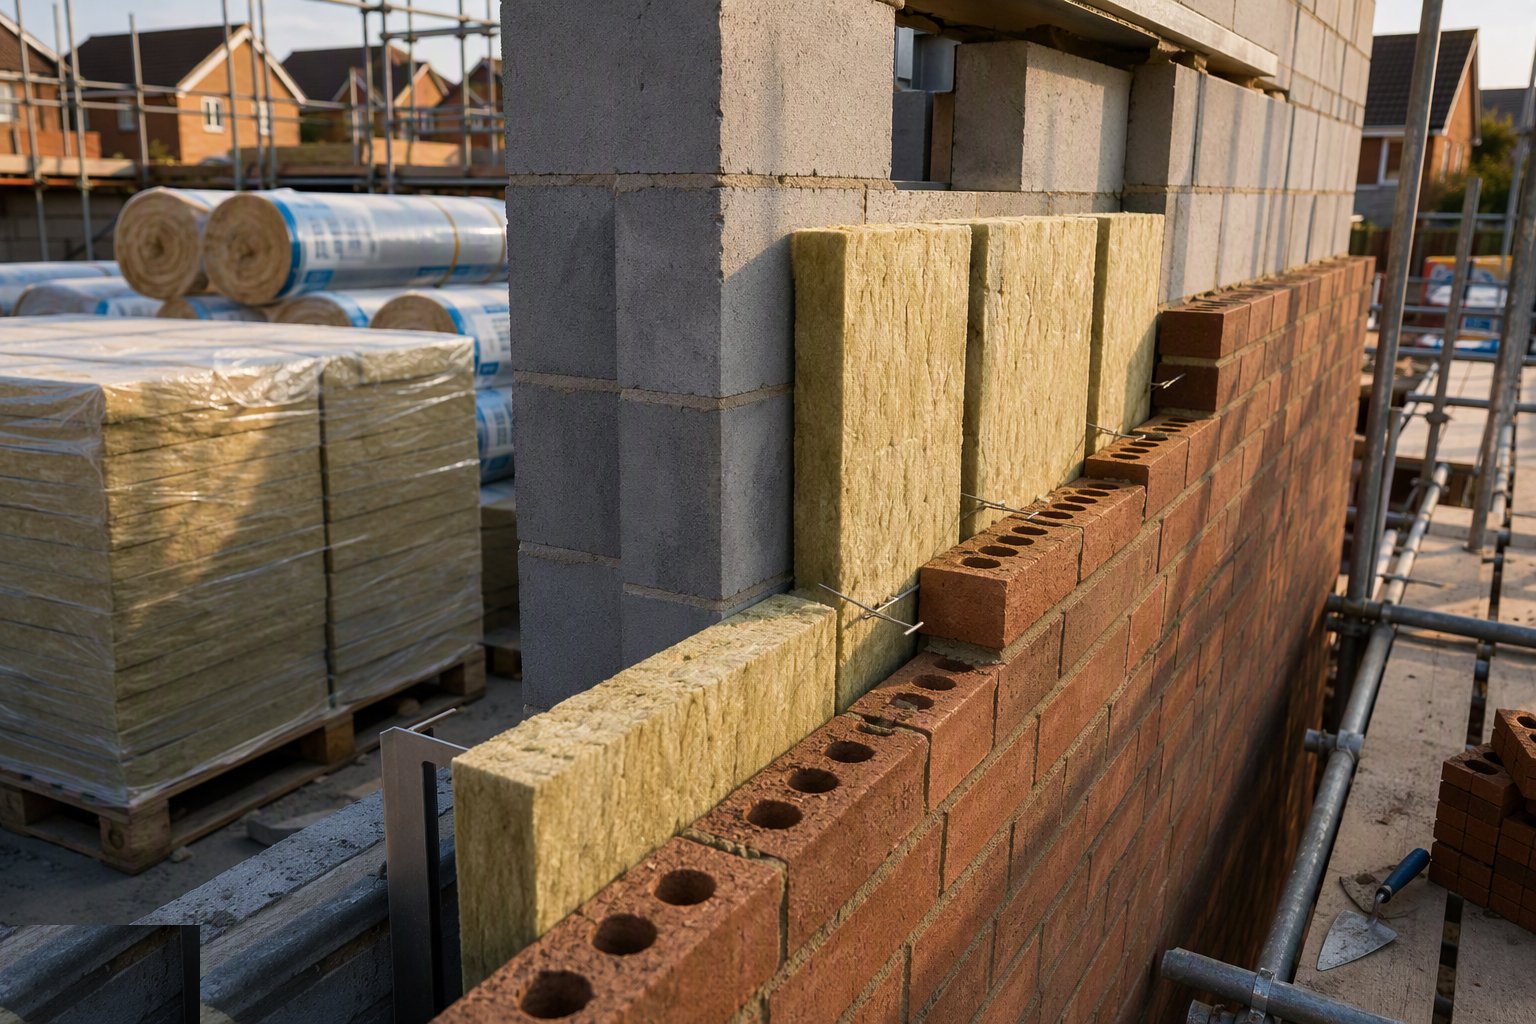
Partial-fill boards clip to the wall ties tight against the inner leaf — no gap behind the board, because a gap lets air loop behind the insulation and halves its value. Full-fill batts are built in butt-jointed, held back from the outer leaf, with ties bedded level and cleaned. Keep the residual cavity clear: mortar droppings on ties and at the base bridge water across and stain the inner leaf two winters later.
Step 4: Fix EWI boards and mesh
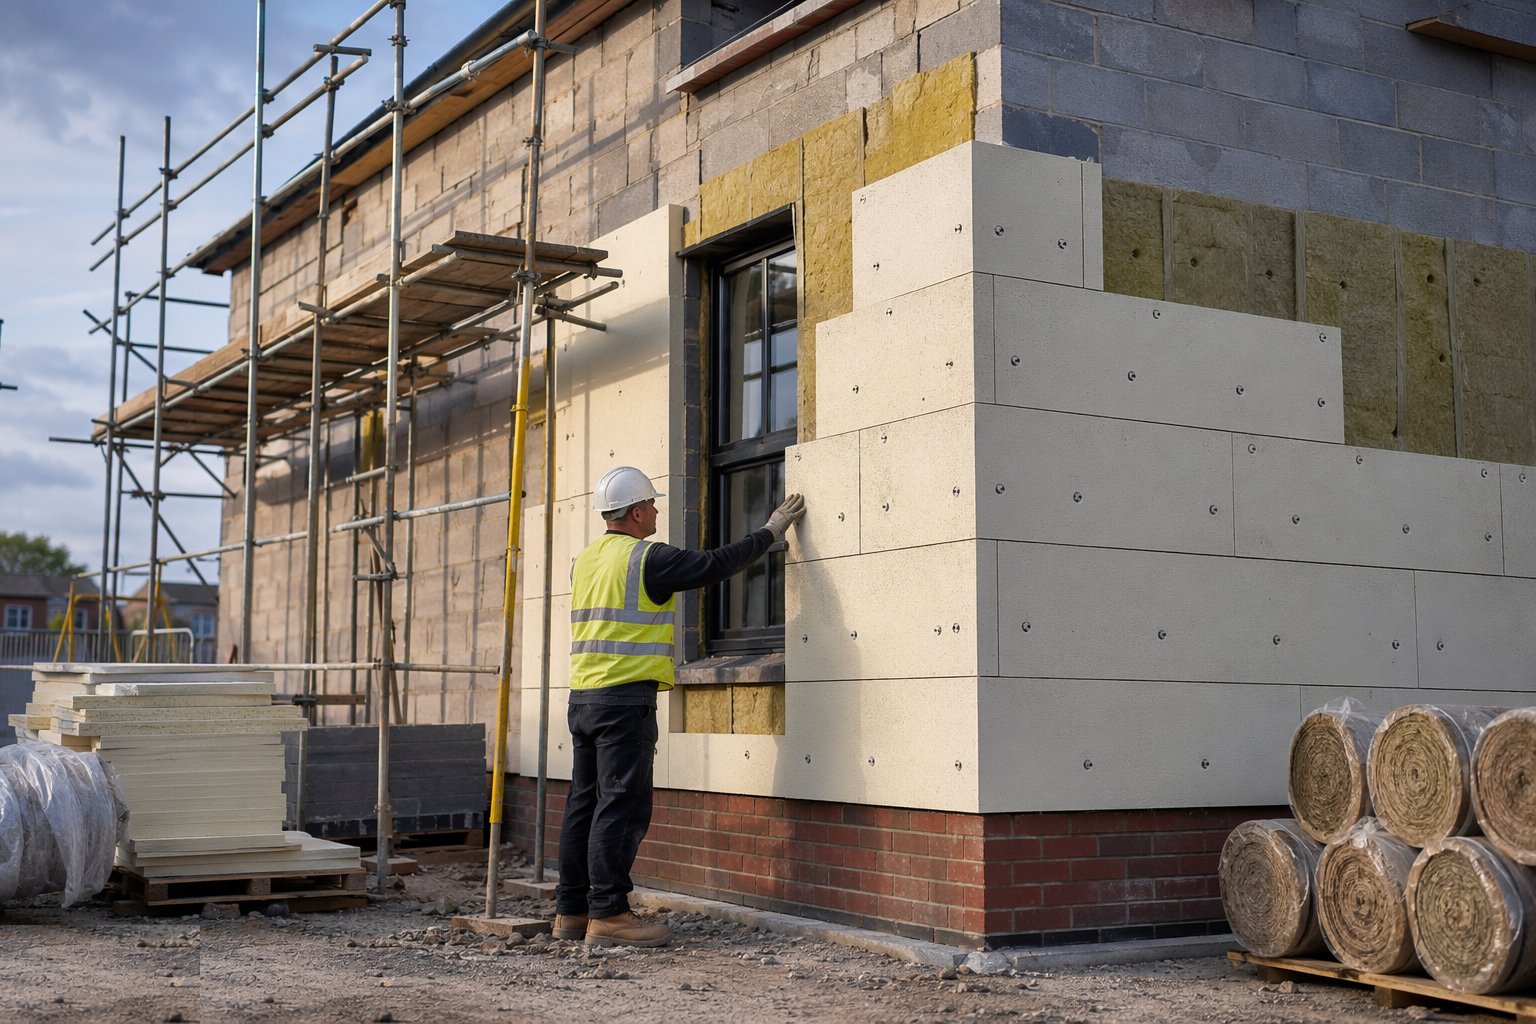
Boards go on with adhesive and mechanical fixings at the specified pattern, staggered joints, interlocked at corners and butted tight — a 5 mm gap between boards is a thermal stripe down the facade. Around openings, boards are cut to frame the reveal, never slivered. Reinforcement mesh is bedded in the basecoat with 100 mm laps, doubled at opening corners with diagonal patches, and fire barriers at compartment lines and around openings where the system certificate requires them.
Step 5: Detail the junctions — reveals, eaves, floor edges
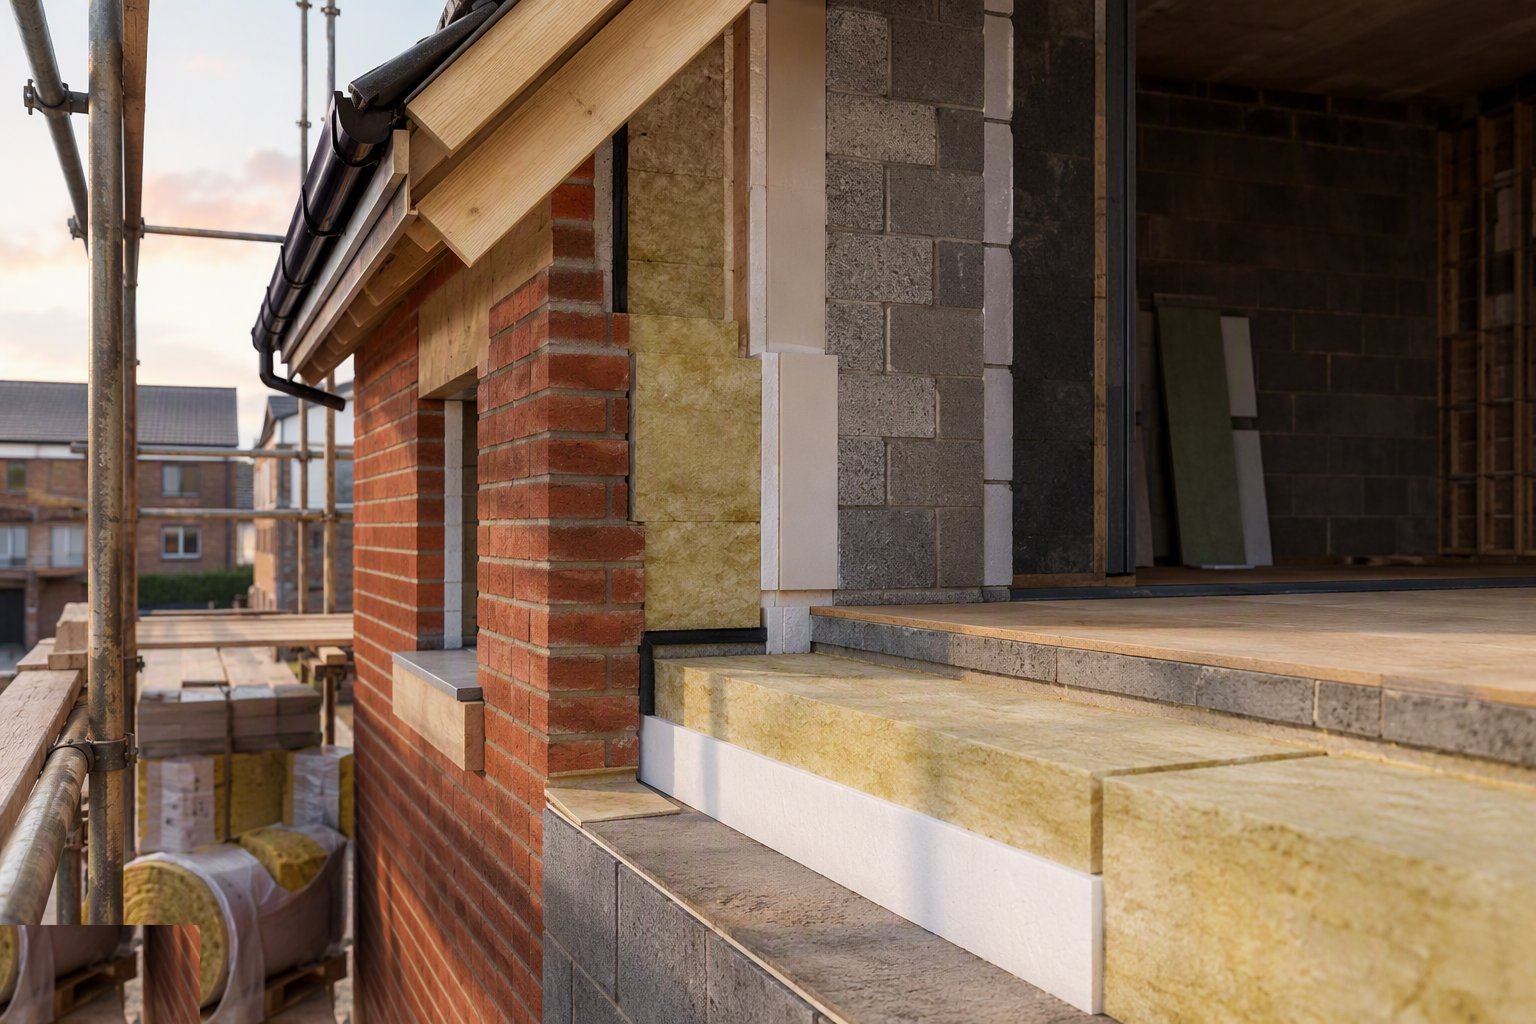
This is where the U-value is won or lost. Insulation returns around every window and door reveal to meet the frame; at the eaves the roof insulation must touch the wall insulation over the plate, not stop 300 mm short; at the ground floor the perimeter upstand breaks the slab-to-wall bridge. Work from the accredited details and photograph every junction before it is covered — Building Control and the SAP assessor will ask.
Step 6: Lay roof and loft insulation
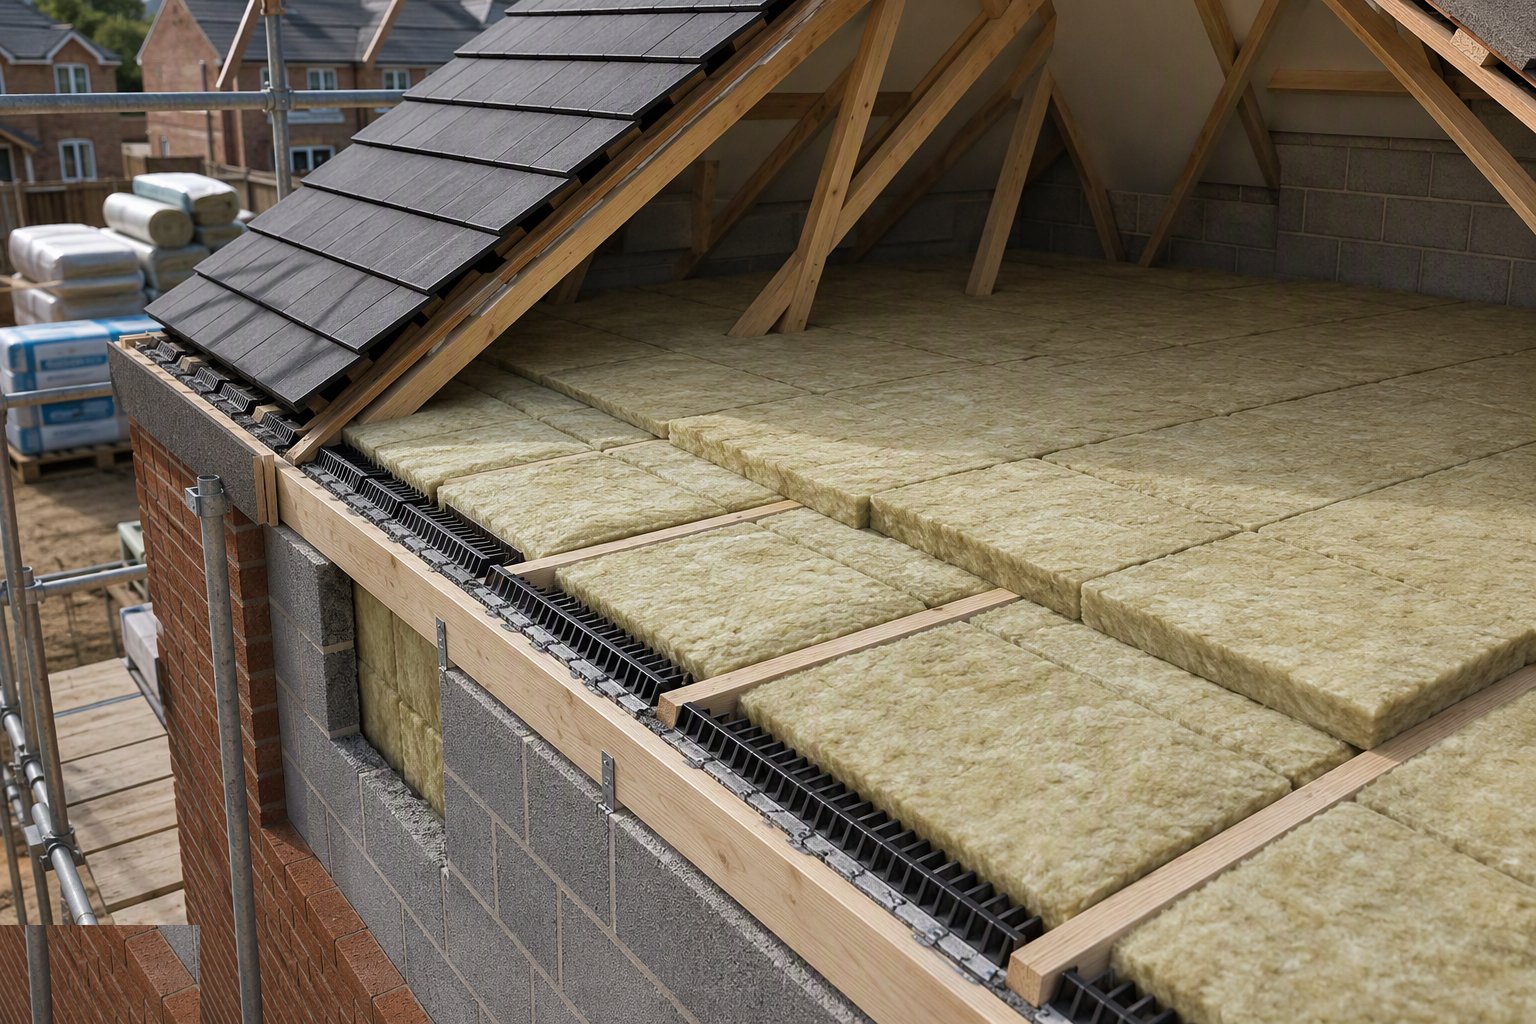
Cold loft: mineral wool between joists then a cross-layer over the top, taken right to the eaves but kept clear of the ventilation path with trays. Warm flat roof: boards laid staggered and fully supported on the vapour control layer, tapered schemes checked against the falls drawing. Over rafters, counter-batten and check the underlay drape; between rafters, leave the specified air gap where the system needs one.
Step 7: Install floor insulation with the DPM
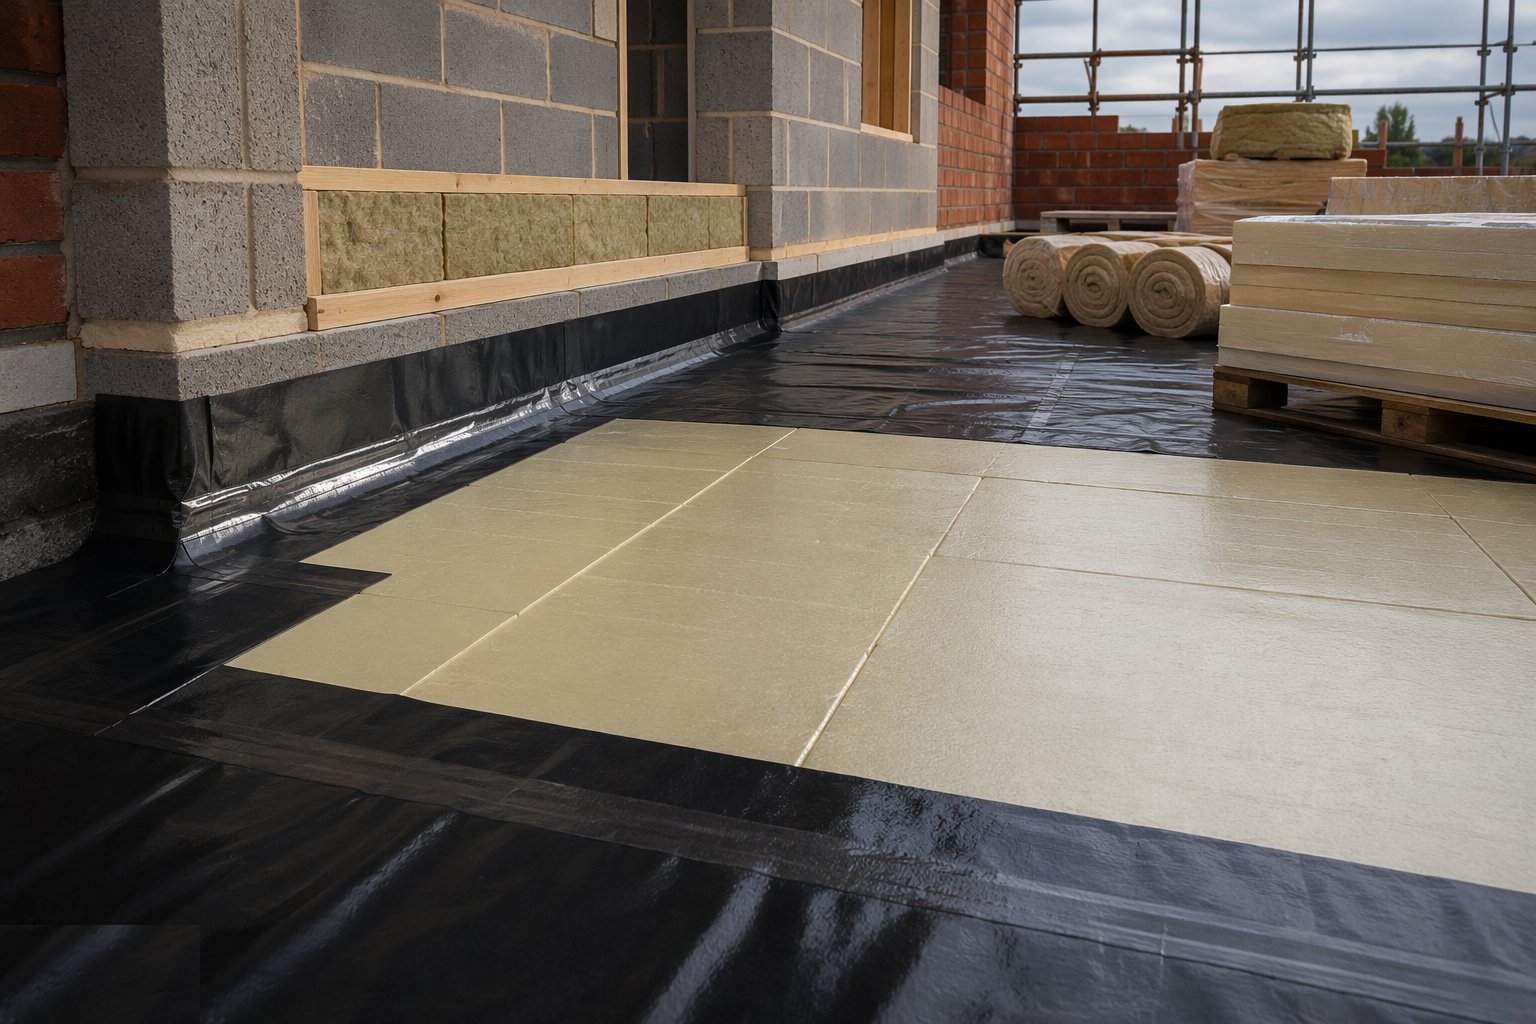
Boards over the slab go down on a level, blinded surface, joints tight, perimeter upstand in place, then the DPM lapped 150 mm and taped and turned up to meet the wall DPC — the insulation envelope and the damp envelope must both be continuous at this junction, and one taped lap usually serves both. Service ducts and pipe penetrations get cut collars, not torn holes.
Step 8: Seal the air layer and tape the joints
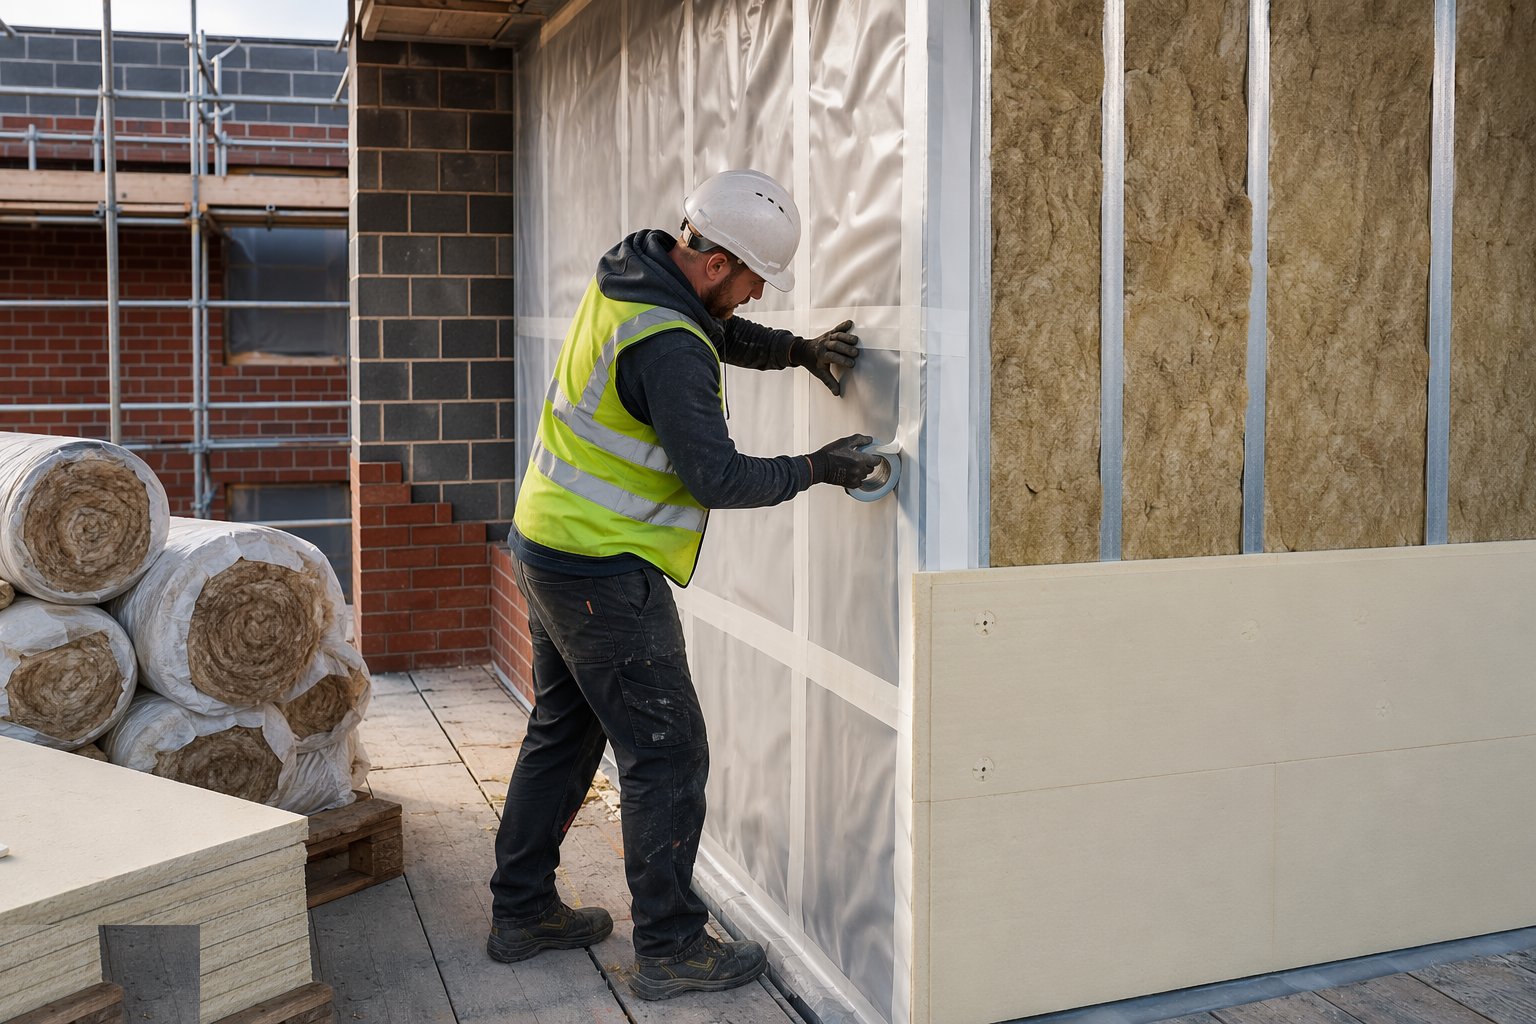
Thermal performance and airtightness are separate jobs done at the same time. Tape board joints where the system calls for it, seal the vapour control layer at every lap and penetration, and foam-seal the gaps at sills, thresholds and service entries. The air test at the end measures the quality of this step — chase the leaks with a smoke pencil before the test, not after.
Step 9: Inspect, photograph and record before covering
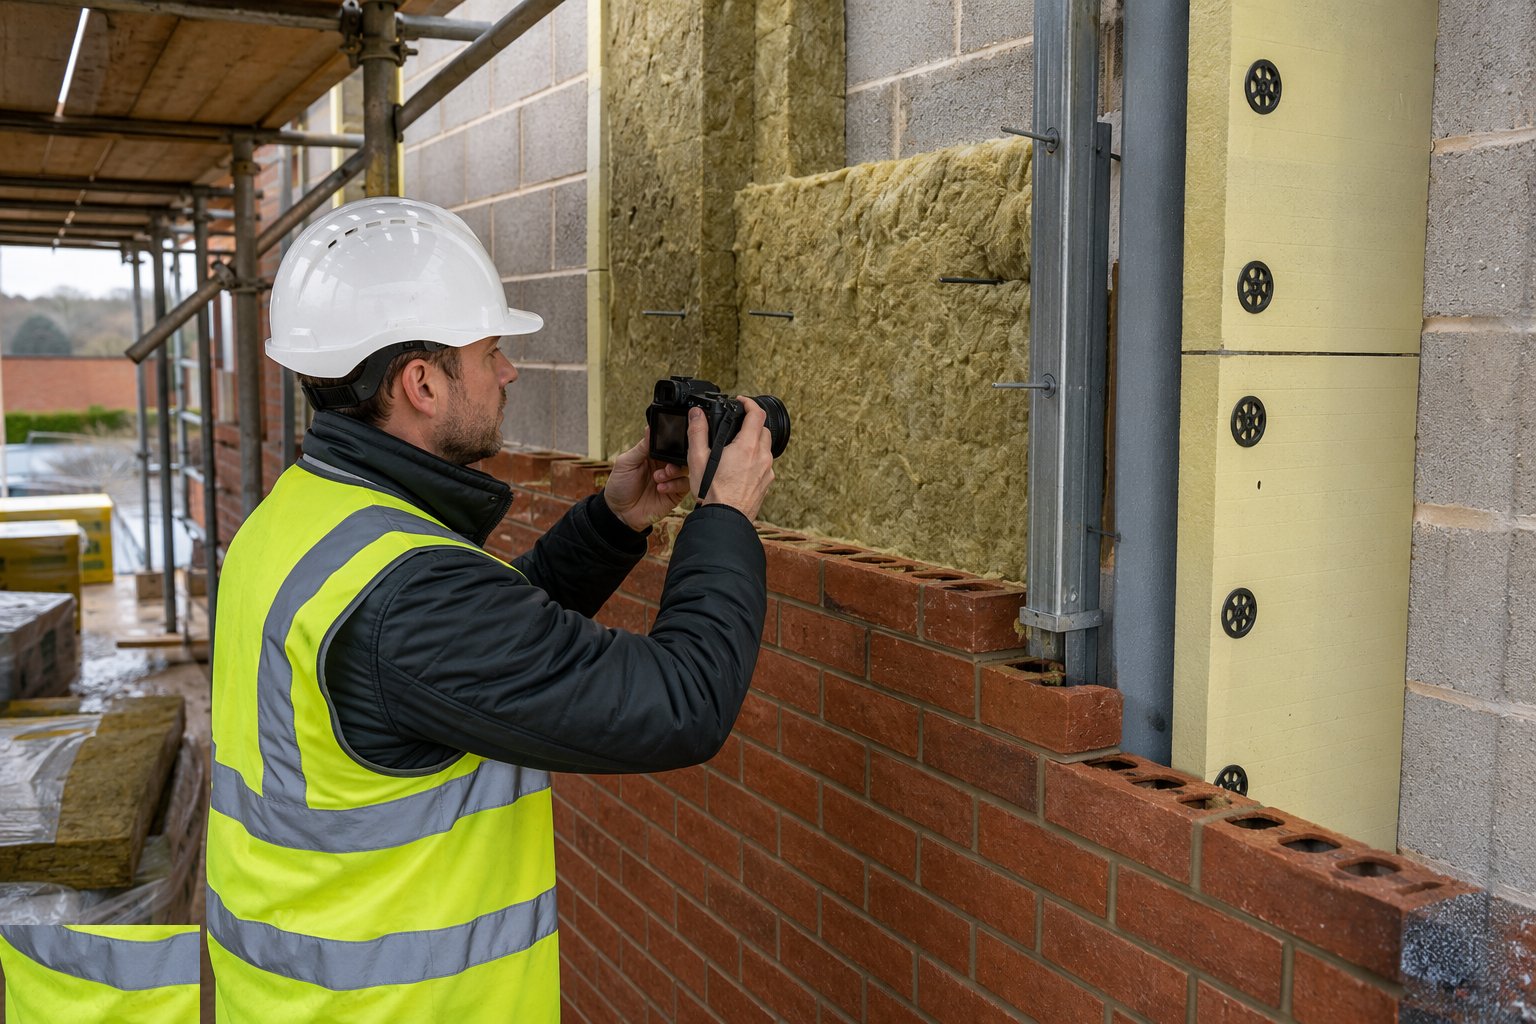
Every layer that is about to be hidden gets photographed with a tape or datum in shot: cavity batts before the outer leaf closes, EWI fixings before the basecoat, loft depth markers before the boards go down. Record fixings pull-tests, material batch numbers and fire classification certificates into the handover file — for higher-risk buildings this is golden-thread information, not optional paperwork.
Step 10: Verify performance at completion
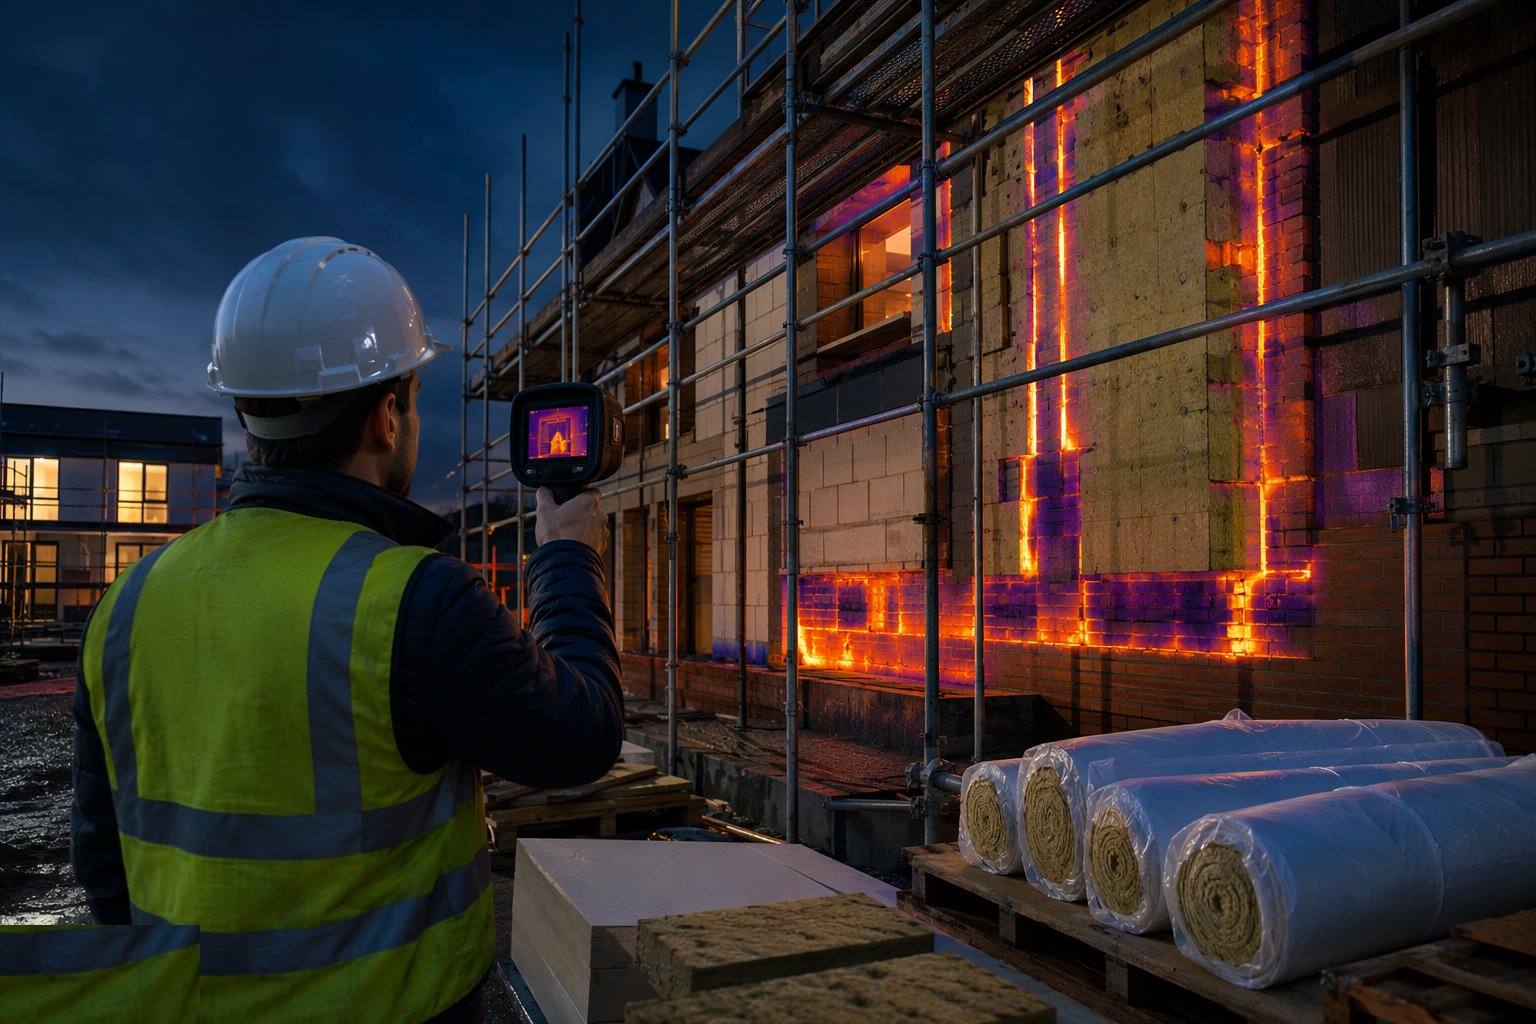
On completion, check the as-built against the calculation: thermographic survey on a cold night (or a hot afternoon in the Gulf) shows slumped batts, missing junctions and air paths as light streaks. Rectify before handover — after the carpets and furniture are in, nobody is coming back to open the eaves.
Plant and equipment
- Insulation saws, hot-wire cutters and long-blade knives
- Scaffold, mast climbers or MEWPs for EWI
- Board trolleys and lifting frames for loading out
- Fixing guns and pull-test equipment
- Basecoat mixers, mesh rollers and render tools (EWI)
- Blowing machine and hose rig for retrofit cavity fill
- Thermal imaging camera and smoke pencil for verification
- Loft crawlers, knee boards and temporary walkways
Quality control checks
- Material certificates checked on delivery — fire classification, lambda value, thickness against the approved spec
- Fixing pull-tests per substrate and per board type, recorded
- Cavity width, tie condition and cleanliness inspected before closing
- Junction continuity (reveals, eaves, floor edge) photographed before covering
- Airtightness test result against the design target, with pre-test smoke survey
- Thermographic survey at completion where specified
- UAE: DCD/municipality material approvals and facade system certificates filed
Safety considerations
- Fibre and dust: RPE and coveralls for mineral wool and cutting EPS, welfare for skin irritation
- Working at height on EWI scaffolds and MEWPs — harness anchor points and edge protection
- Adhesives and foams under COSHH — ventilation, gloves, eye protection
- Loft work: heat stress, fragile ceilings, boarding only on joists, lighting
- Hot-weather working in the UAE — adhesives and basecoats skin over fast; plan work around the sun face
- Manual handling of board packs — split packs at ground level, crane to loading bays
- Combustible materials stored away from hot works; fire watch during any adjacent welding or cutting
Common defects
- Gaps behind or between boards creating thermal bypass — air looping around the insulation
- Slumped or missing cavity batts found by thermal imaging after handover
- Cold bridges at lintels, reveals, eaves and slab edges where continuity was never detailed
- Interstitial condensation from a vapour control layer on the wrong side for the climate
- EWI render cracking and water ingress at mesh laps and around openings
- Blown cavity fill in walls unsuitable for it — debris, exposure or narrow cavities — leading to damp
- Non-compliant combustible material substituted during value engineering
- Squashed loft insulation under storage boards, worthless where it is compressed
Best suited for
- Cavity batts and boards — new UK housing and villa envelopes as the walls rise
- EWI — solid-wall retrofit, rendered new-build, and any facade that needs the thermal and weather layer outside the structure
- IWI — listed or character facades that cannot be altered externally
- Roof/loft insulation — the cheapest thermal performance per pound in any building
- Floor and perimeter insulation — ground-bearing slabs and the edge detail that makes the floor U-value real
How long does Insulation Systems take?
Typical duration: Cavity insulation rises with the masonry. EWI on a detached house: 1–2 weeks including basecoat and render cure. Loft insulation on a house: half a day to a day. Full envelope retrofit on a block of flats: months, phased by elevation..
Related processes
- Masonry & Timber Frame
- Floor Slabs & Screeds
- Roofing
- Façade & Cladding
- Windows, Doors & Glazing
- MEP First Fix
- Internal Finishes
- MEP Second Fix & Commissioning
- External Works & Landscaping
- Testing, Handover & Snagging
- Site Access & Enabling Works
- Site Clearance & Demolition
- Setting Out & Survey Control
- Earthworks & Excavation
- Dewatering & Groundwater Control
- Shallow Foundations
- Piling & Deep Foundations
- Basement & Substructure
- Waterproofing and Tanking
- Concrete Frame Construction
- Steel Frame Construction
- Insulation Systems in Commercial & Workplace
- Insulation Systems in Education
- Insulation Systems in Healthcare
- Residential & Housing sector guide