Cavity barriers
Closing the hidden voids in a building so that fire and smoke cannot travel round the compartment walls instead of through them.
Last updated 2026-09-05
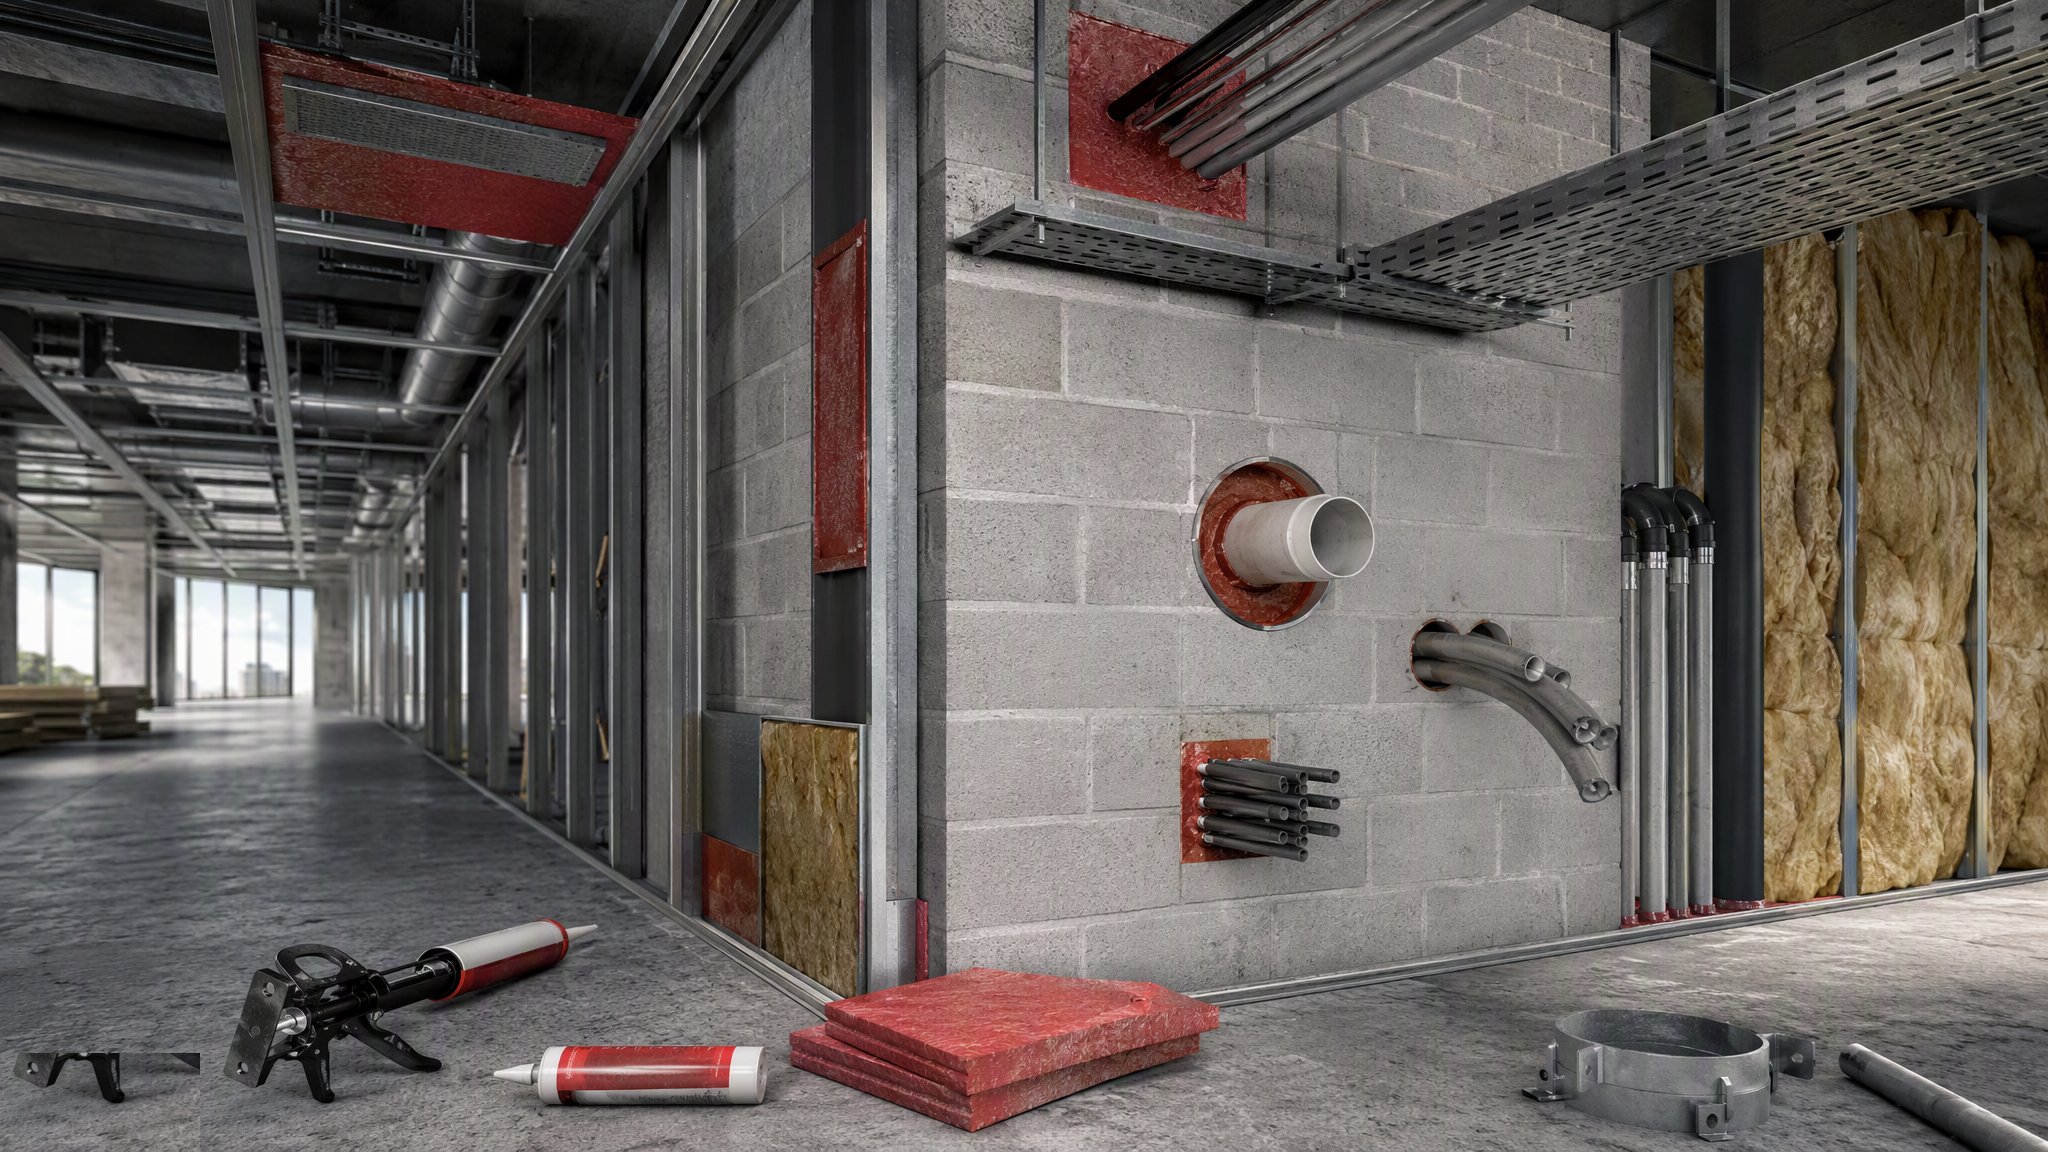
What is Cavity barriers?
A modern building is full of concealed voids. There is a cavity behind the cladding, a void above the ceiling, a gap between the back of a wall lining and the blockwork, a space between the top of a partition and the underside of the slab, and a run of voids following every riser and every service route. Compartment walls and floors are designed to hold fire in one part of the building for a defined period, but a compartment line is only as good as the places where it is interrupted. If a void runs past the wall, fire and smoke will take that route rather than attacking the wall, and the compartment does nothing. A cavity barrier is the element that closes the void at that point so the line of resistance carries on through the concealed space. On most projects the fire strategy, drawn up by the fire engineer and reflected in the designer's details, sets out where those lines run and where barriers are therefore needed - the installer follows that information, and does not decide it.
Barriers come in two behaviours. A closed-state barrier fills the void permanently: mineral fibre in a sleeve compressed into the gap, a rigid board, a coated batt, a steel or timber member, or a proprietary section fixed to one side and bearing on the other. It relies on being tight against both faces, so it is sized against the gap it has to close and installed under compression. An open-state barrier leaves the void open in normal service and closes it only in a fire, when an intumescent element expands and blocks the gap. That matters in drained and ventilated facades, where the cavity behind the cladding is not incidental - it is deliberately there to let wind-driven rain drain away and to let moisture vapour out. Fill that cavity solid and you have solved a fire problem by creating a water problem that will show up in a few winters as saturated insulation and staining. Which type is used, and where, is a design decision that has to reconcile fire, weather and buildability together.
What makes this trade unusual is not the products but the geometry. A barrier that stops short of a junction, that misses the return at a corner, that is scribed loosely round a bracket, or that is fixed to a substrate that will not hold it, is not a partial barrier - it is an open route. Continuity is the whole job. Every horizontal barrier has to meet every vertical one, every penetration through a barrier has to be sealed with something appropriate to what passes through it, and the barrier has to be fixed and supported in a way that keeps it in position while the material around it distorts in a fire. It is also almost entirely hidden work. Once the cladding, ceiling or lining is on, nobody will ever see it again without taking the building apart, which is why on most projects it is photographed, recorded location by location and signed off progressively before it is covered, rather than inspected at the end when the evidence has gone.
How does Cavity barriers work, step by step?
- 1
Step 1: Get the compartment lines off the fire strategy and onto the drawings
Nothing on this trade starts on site. The fire strategy identifies the compartment walls and floors, the protected routes and the shafts, and the designer translates those lines into a set of barrier locations, junction details and interface details with the facade, the ceilings and the services. Cavity barriers appear at the head and perimeter of compartment walls, at floor level in facade cavities, around openings, at the boundaries of protected shafts and routes, and wherever a void would otherwise carry past a line of resistance. On most projects a barrier layout drawing is produced and worked through with the facade contractor, the ceiling contractor and the services contractors before anything is ordered, because the barrier has to suit a gap that those trades between them will actually create.
- 2
Step 2: Select barrier types to suit the void, not just the fire line
Each barrier position is looked at in terms of what the void is doing. A void that has to stay ventilated and drained needs an open-state barrier or a detail that keeps the drainage path clear. A void that has no function needs closing solid. A gap that moves - a slab edge that deflects, a facade that expands and contracts, a movement joint that runs through the fire line - needs a barrier that can accommodate that movement and still be tight when it matters. The specification and the fire engineer set what performance each position has to achieve and how it has been demonstrated under a recognised test regime, and the specialist contractor selects a system that has been tested in a configuration resembling the one it will be built into. A barrier tested in one arrangement and installed in a different one is an assumption, not a result.
- 3
Step 3: Survey the actual gap before ordering
The gap a barrier has to close is rarely the gap on the drawing. Slab edges are not straight, blockwork is not plumb, brackets and fixings land where they land, and a facade zone that is nominally constant will vary along its length. On most projects the specialist contractor surveys the real gap - often after the primary structure is up and the facade brackets are set - and orders against measured dimensions rather than design ones. Closed-state barriers work by compression, so a barrier ordered short of the gap will never be tight and a barrier ordered far oversize will bunch, fold and leave gaps at the ends. Where the survey shows the gap is outside the range the system has been tested in, that goes back to the designer as a design query rather than being packed out on site.
- 4
Step 4: Prepare the substrate and set out the runs
The barrier has to bear on and fix to something sound. Substrates are cleaned of debris, mortar snots, spray coatings and packaging, and any surface the barrier has to seal against is made good. Sequence is the recurring problem here. The barrier at the head of a compartment wall has to go in when the head is accessible, the facade barrier has to go in behind the cladding, and the ceiling void barrier has to go in before the grid. Once the following trade has closed the void, putting the barrier in becomes a strip-out job. On most projects the installation is sequenced into the follow-on trades programme deliberately, with hold points, rather than left to be caught up later.
- 5
Step 5: Install to the tested detail, then deal with the junctions
The straight runs are the easy part. Barriers are fixed at the centres and with the fixings the system requires, compressed into the gap where they are the closed-state type, and lapped or jointed to each other in the way the system has been tested to allow. The job is really made or lost at the junctions: where a horizontal barrier meets a vertical one, at corners and returns, at window and door reveals, at column and bracket penetrations, at movement joints, and wherever a service passes through. Each of those has to be closed with a detail appropriate to it - a service penetration through a barrier is sealed with a firestopping detail suited to what passes through, because a pipe that softens or a cable bundle that burns away leaves a hole where the barrier used to be. Anything that does not match a detail on the drawings is raised rather than improvised.
- 6
Step 6: Record and photograph every location before it is covered
Because this work disappears, the record is the deliverable. On most projects every barrier location is photographed in position with something in the frame that identifies where it is, logged against a location reference on the barrier layout, and inspected before the covering trade closes the void. Inspection regimes commonly involve the installer's own supervisor, the main contractor and, on many projects, an independent inspection of a proportion of the work. Defects are corrected and re-photographed, not noted and left. The completed pack - locations, products, photographs, inspection sign-offs and any design queries and their resolutions - is handed over as part of the building's fire safety information, because whoever manages the building afterwards has to know what is in the voids and where.
What are the benefits of Cavity barriers?
- Closes the concealed routes that would otherwise let fire and smoke bypass compartment walls and floors entirely
- Subdivides large voids so a fire in a ceiling or facade cavity stays local instead of running the length of a building
- Open-state types keep drained and ventilated facade cavities working as designed while still closing in a fire
- Barrier lines can be coordinated with the facade and ceiling grids, so fire and buildability are resolved together rather than fought over on site
- Installation is inherently inspectable at the point of fixing, so quality can be proved while the void is still open
- Produces a location-by-location record that the building manager can use for the life of the building
What are the limitations of Cavity barriers?
- Entirely dependent on continuity - one missed junction, corner or penetration undoes the run either side of it
- Hidden as soon as the following trade closes the void, so late defects are expensive and disruptive to put right
- Closed-state barriers in a drained and ventilated cavity can block drainage and ventilation if the wrong type or detail is used
- Real gaps vary from drawn gaps, and a barrier outside its tested gap range is not performing as tested
- Highly sequence-sensitive, and easily missed where several trades interface in the same zone
- Vulnerable to damage and displacement by follow-on trades working in the same void after installation
What is Cavity barriers best suited for?
What plant does Cavity barriers need?
- Barrier layout drawings and marked-up interface details for the facade, ceiling and services zones
- Access equipment suited to the position - mobile towers, podiums, scissor lifts or mast climbers for facade zones
- Cordless fixing tools, powder-actuated or drilled fixings as the substrate requires, and torque control where specified
- Cutting and scribing tools for mineral fibre, boards and coated batts, with dust extraction and respiratory protection
- Sealant and firestopping application kit for penetrations through barriers
- Photographic recording and tagging system linked to the location log
How is Cavity barriers quality-checked?
- Barrier positions taken from the approved layout, with any deviation raised as a design query rather than resolved on site
- Gap surveyed and recorded before ordering, and confirmed to sit within the range the selected system has been tested in
- Substrate cleaned and sound, and fixings, centres and compression installed as the tested detail requires
- Every junction, corner, reveal, bracket and service penetration inspected individually, not just the straight runs
- Photographic record of every location taken before the void is closed, logged against the location reference
- Progressive inspection and sign-off with hold points before the covering trade proceeds, and the completed pack issued as fire safety information
More firestopping and passive fire protection methods
Next method
Intumescent fire protection to steel