Homes & villas - UK
First fix while the walls are open, second fix once the paint is dry, and a test certificate holding the two apart.
Last updated 2026-08-30
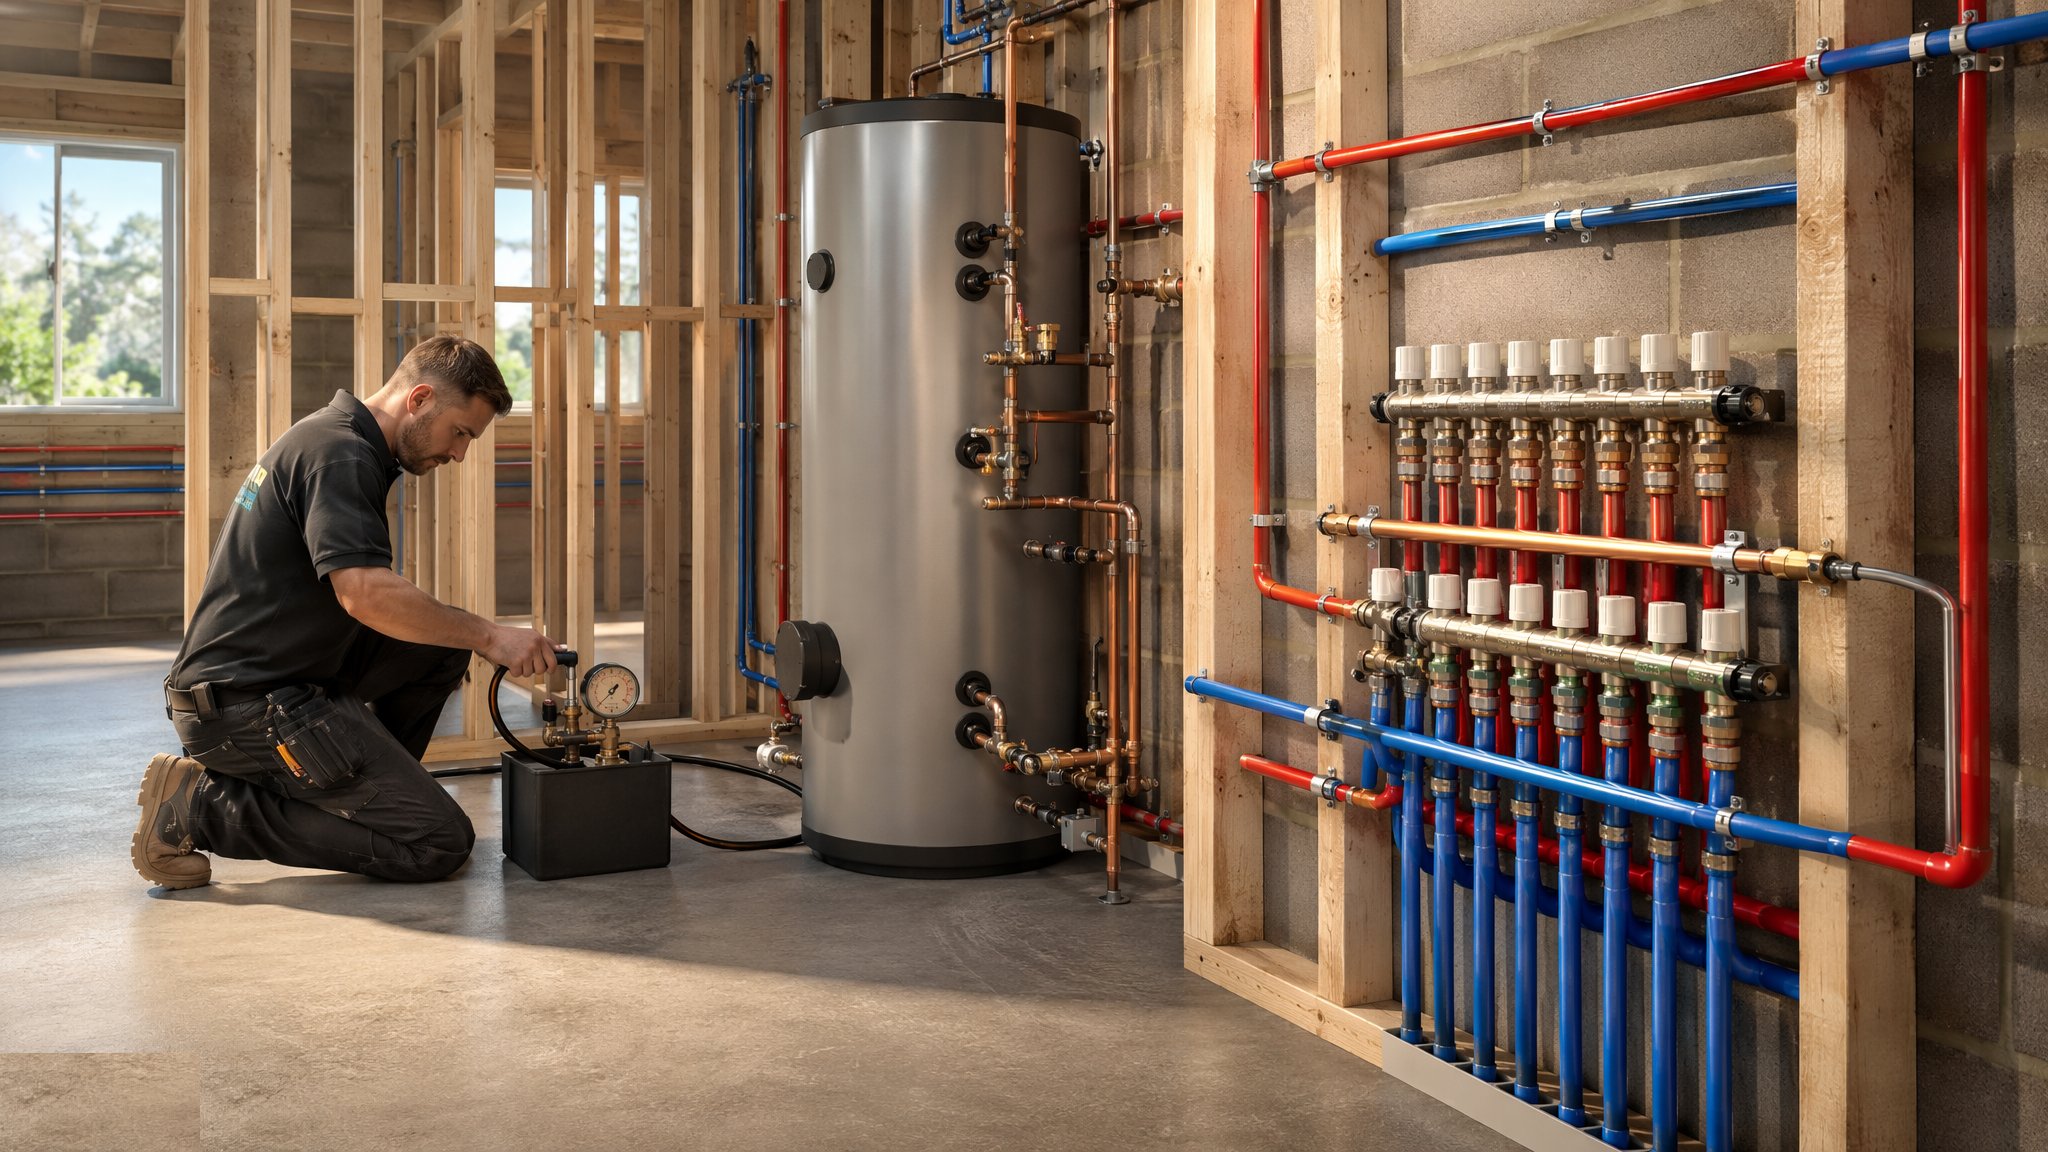
What is Homes & villas - UK?
A UK house plumbing installation is three systems sharing the same voids. Cold water comes in on a buried service pipe to a stop tap, then distributes around the house, stepping down as the branch load drops - the primary legs commonly in 22 mm or 28 mm and the final drops to basins, baths and WCs commonly in 15 mm. Hot water comes from a combi boiler or an unvented cylinder. The heating is a wet circuit, usually a flow and return in 22 mm with 15 mm drops to the radiators, or a manifold feeding small-bore underfloor loops. Above that sits the soil and waste - the branch pipework, commonly 32 mm and 40 mm, joining the sanitaryware to the stack. The materials are copper, press-fit or plastic barrier pipe, and most houses use a mix of all three.
The work splits cleanly. First fix is the carcass: every pipe that will be buried in a floor, a chase or a stud goes in while the fabric is open, gets clipped, gets tested and gets recorded. It has to be finished before screeds, plaster and ceilings close, because those trades are the deadline that never moves. Second fix comes after decoration - sanitaryware, radiators, valves, the boiler or cylinder connections - and then the system is filled, vented, flushed, balanced and commissioned. The design fixes the pipe sizes, the appliance and the safe discharge arrangements; the installer's job is to route it, support it, keep it accessible and prove it before it disappears.
The defects that surface on a house are always the same ones. Dead legs left for a fitting that was never installed, sitting full of stagnant water. Pipework laid across a joist with no clip, so it ticks and knocks every time the heating fires. A service valve boxed in behind tiles with no access panel. Notches cut through the middle of a joist span where the structure will not take them. Copper run hard against a cable, or through a wall with no sleeve so the plaster grips it and it cannot move. None of it is visible at handover - all of it is expensive at year two.
How does Homes & villas - UK work, step by step?
- 1
Step 1: Mark out from the sanitary layout before anything is drilled
Set every appliance position off finished floor level and the finished wall face, not the block or the joist - a basin marked to bare blockwork sits proud of the tile once the boarding goes on. Walk the kitchen and bathroom drawings and confirm what is actually being fitted, because a change from a bath to a shower moves the waste. Then agree the pipe zones in the floor and the stud with the electrician and the ventilation fitter in the same conversation. Ten minutes at this stage is the cheapest coordination you will ever do.
- 2
Step 2: Fix the incoming supply and the appliance positions
The service pipe comes in through a duct with the stop tap accessible - not buried behind a fitted unit that the kitchen fitter installs six weeks later. Set the boiler or cylinder position with its flue route, its condensate route and its safe discharge route all confirmed, because those three routes have to go somewhere real and they are the ones most often left to be solved on the day. Confirm the airing cupboard or plant space is big enough for the appliance plus a service engineer's arms.
- 3
Step 3: Run the cold and hot distribution
Work from the source outwards, dropping pipe size as the load falls away. Put an isolating valve at every group so a leak or a repair takes one bathroom offline instead of the house, and put those valves where a hand can reach them. Keep runs direct and short, because every extra metre of hot pipe is water run to waste at the tap. Insulate hot draws and anything in a loft or an unheated void. The one thing to design out is the dead leg - a blanked branch left for a future fitting is stagnant water with a tiling job on top of it.
- 4
Step 4: Run the heating circuit and the above-ground soil and waste
Radiator tails set to a consistent height so the second fix is quick and the radiators hang level. Clip the pipework properly - copper on horizontal runs at roughly metre centres and closer on plastic, which sags between clips and then makes noise. Waste branches are laid to a fall, kept as short and as straight as they can be, with a rodding point at any run that turns. Where pipes cross joists they go through the drilled zone the structural design allows, never notched deep in the middle of a span.
- 5
Step 5: Support, sleeve, fire-stop and test before anything is covered
Sleeve every pipe passing through a wall so it can move and the plaster is not gripping it. At any compartment wall or floor, the penetration gets the fire-stopping the design calls for, and it gets photographed before the void closes - retro-fitting fire-stopping through a finished ceiling is a demolition job. Then the system is pressure tested to the regime the designer sets, the result is recorded and witnessed, and nothing gets screeded, boarded or plastered until that certificate exists.
- 6
Step 6: Second fix, then fill, flush, balance and commission
Sanitaryware, radiators, valves and the appliance connections go in after decoration so finished goods are not damaged by plaster and paint. Then fill and vent, flush the heating side clean of the flux, swarf and jointing compound the first fix left behind, dose it, and fit the filter. Balance the circuit so the far radiator gets its share. Prove the isolation valves, confirm every access panel is actually accessible after tiling, label the valves, and hand over the commissioning record with the appliance paperwork.
What are the benefits of Homes & villas - UK?
- One dwelling, one system - a competent pair can carcass a typical house in a few days
- Press-fit and plastic systems cut hot works and speed up the first fix considerably
- Isolation at every group means a leak or a repair takes one room out, not the whole house
- Runs in floor voids and chases give clean finishes with nothing on show
- Repeat house types on a development turn the plumbing into a predictable plot-by-plot rhythm
- Faults are usually reachable - a house has far fewer inaccessible services than a tower
What are the limitations of Homes & villas - UK?
- Almost everything is buried, so a missed route costs finishes to put right
- Timber floors constrain the pipe routes - the joist drilling and notching zones are structural rules the pipe has to obey
- Dead legs and long uninsulated runs waste water, waste heat and are hard to correct later
- Loft and unheated void runs freeze if the insulation is skimped at the awkward bits
- The programme is hostage to the screed and plaster dates, which rarely move for plumbing
- Access panels get quietly designed out by the tiler unless they are on the setting-out drawing
What is Homes & villas - UK best suited for?
What plant does Homes & villas - UK need?
- Pipe cutters, benders and a press tool with the jaw sets for the pipe systems in use
- SDS drill, joist brace or hole saws, and chasing tools with dust extraction
- Pressure test pump and gauge for the first fix test
- Pipe freezing kit for alterations to a live system
- Flushing and dosing pump plus a magnetic filter for the heating side
- Thermal camera or leak detection kit for tracing buried and underfloor runs
How is Homes & villas - UK quality-checked?
- Appliance positions set out from finished floor and finished wall levels and signed off before pipework starts
- Joist drilling and notching kept within the zones the structural design allows, and recorded
- Pipework clipped and supported at proper centres, with nothing resting on a ceiling, a cable or a duct
- Pressure test recorded and witnessed before any covering, with the certificate on file
- Fire-stopping complete at every compartment penetration and photographed before the void closes
- Flush, dose, balance and valve access all confirmed at commissioning, with access panels proved after tiling
More mep - plumbing (first & second fix) methods
Next method
Residential towers - zoned risers