Shotcrete shell with tiled finish
Concrete sprayed onto a reinforcement cage and carved to profile, then waterproofed and tiled - the premium shell, and the one where setting out decides the result.
Last updated 2026-09-05
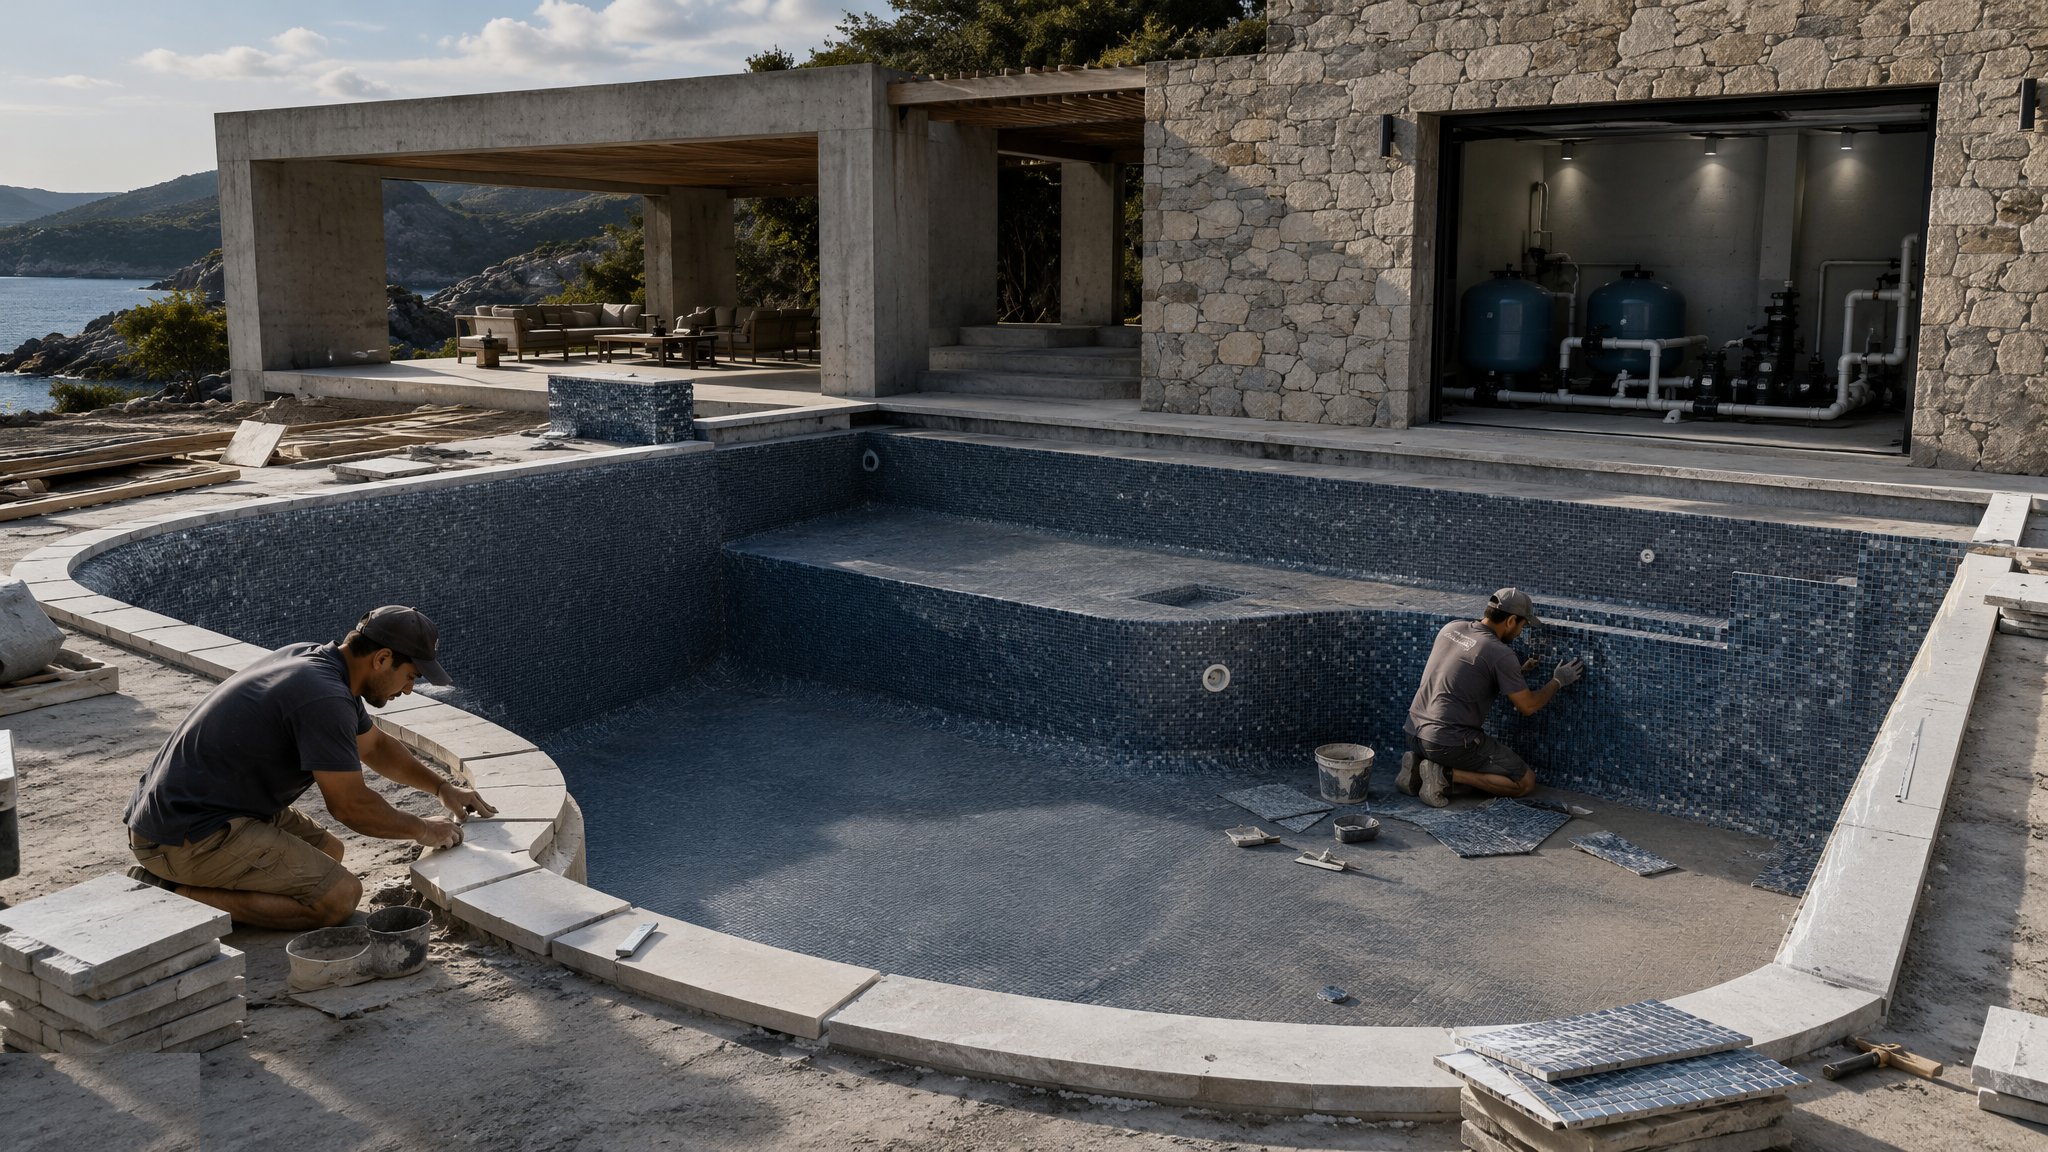
What is Shotcrete shell with tiled finish?
A shotcrete shell is built by spraying concrete under pressure onto a fixed reinforcement cage rather than pouring it into formwork. The excavation is cut close to the finished profile and supported, the cage is fixed to the designer's drawings with the wet-side items built in, and the concrete is then sprayed in layers and cut back to line by hand as it stiffens. What comes out is a monolithic shell with no joints in it, which is the reason the method exists: a pool built this way can take any shape the designer draws, with curved walls, steps, benches and beach entries formed as part of the same structure rather than added afterwards. Shell thickness is commonly a few hundred millimetres, but the thickness and the reinforcement for any particular pool are set by the designer from the ground conditions, the geometry and the loading, and they are not something to be taken off another project.
Everything about the finished quality is decided before the concrete goes on. The cage has to be in the right place with the right cover, the pipework and the cast-in items have to be positioned and protected, and the profile the nozzleman is spraying to has to be marked and checked. Shotcrete is applied by a specialist crew, and the nozzleman is the trade - the angle, distance and sequence of spraying are what decide whether the concrete compacts properly around the bars or traps rebound and voids behind them. Rebound is stripped out as the work proceeds rather than sprayed over. The shell is then cured properly, which on a hot or windy site means covering and keeping it wet for the period the specification requires, because a shell that dries out early cracks and a cracked shell is a leaking pool.
Waterproofing is a separate layer and a separate decision. The concrete may be designed to be substantially water resisting in itself, but on most projects a tanking or waterproof render system is applied over it as the barrier, with the detailing at the wet-side items and at the channel or skimmer throats being the part that actually determines whether it works. Screeds then bring the shell to the profile the tiles need, and the tiling goes on with the adhesive and grout the specification calls for. Tiling is where the visible quality lives: the setting out of the courses at the water line, at the steps and around every faceplate and light is what people see for the next twenty years, and no amount of good concrete underneath rescues tiling that was set out badly. Tolerance discipline through screed and tile is what separates a shotcrete pool that looks expensive from one that just was.
How does Shotcrete shell with tiled finish work, step by step?
- 1
Step 1: Excavate to profile and support the ground
A sprayed shell is built against the ground, so the excavation is cut to the shape of the pool rather than to a convenient box, with allowance for the shell thickness and the finishes. The formation and the faces are supported to the temporary works design, and any groundwater is dealt with before the cage goes in. Buoyancy is considered here too - an empty shell in wet ground wants to float, and the designer decides what holds it down. Adjacent structures, boundaries and buried services are all assessed against the dig.
- 2
Step 2: Fix the reinforcement cage and build in the wet-side items
The cage is fixed to the designer's drawings, tied and supported so that it stays where it was put when the concrete hits it at pressure, and held off the ground on spacers to give the specified cover. Skimmer bodies or the channel profile, floor outlets, returns, light housings, vacuum points and any pipe penetrations are all fixed in position and protected against the spray. Setting out is checked against the water line and against the finished tile thickness. This is the last easy moment to move anything.
- 3
Step 3: Spray the shell in layers
The specialist crew sprays the concrete onto the cage, building up in layers and working the material so that it compacts around the bars rather than shadowing behind them. Rebound is removed as they go rather than being buried in the next pass. The crew work to marked profile guides so the thickness stays what the design asked for. Pool shotcrete is a specialist activity with a specialist crew, and the nozzleman's skill is the single biggest variable in the shell.
- 4
Step 4: Cut and carve to the finished profile
While the concrete is still workable, the surface is screeded, cut and carved to the finished line - walls plumbed, floor falls run to the outlet positions, and steps, benches and coving formed by hand. This is where the freedom of the method is actually used and where the geometry the designer drew becomes real. The closer the shell is brought to the intended profile now, the thinner and more predictable the screeds and the tiling will be later.
- 5
Step 5: Cure the shell properly
Curing is a programme item, not a courtesy. The shell is protected and kept damp for the period the specification requires, covered against sun and wind, because sprayed concrete has a large surface area relative to its volume and dries fast. Early drying causes shrinkage cracking, and cracks in a water-retaining shell are a defect that has to be traced and repaired before anything else happens. On hot or exposed sites the curing regime is planned before the spray day rather than improvised after it.
- 6
Step 6: Waterproof and prove the shell
The tanking or waterproof render system specified is applied over the cured shell, with the detailing worked carefully at every penetration, at the skimmer throats or the channel, and at floor-to-wall junctions - the flat areas rarely fail, the junctions and the penetrations do. Buried pipework is pressure tested and held before backfill. The shell is then filled, marked and watched until the water-tightness test is accepted. Finishes do not start before that acceptance.
- 7
Step 7: Screed to tolerance, then tile
Screeds bring the shell to the flatness and profile the tile size demands, and their tolerance is set by the finish, not by the concrete. Tiling then goes on with the specified adhesive and grout, set out from the water line and from the principal sight lines. Steps, coves, faceplates, light housings and the coping are worked into the setting out rather than cut around. Movement joints go where the designer put them. Grout is finished and cured, and the pool is not filled before the adhesive and grout have gained the strength the manufacturer requires.
- 8
Step 8: Fit out the plant room, commission and hand over
The plant room holds the pump, filter, valves, panel, any heating and the dosing and monitoring equipment, with the space, ventilation, drainage and access it needs. The pool specialist designs, installs and commissions the treatment plant, sets the monitoring and demonstrates the operating regime. Commissioning balances flow, proves the filter and its backwash and runs the circuit under load. Handover covers the operating and maintenance information, the as-built pipework layout, the shell and tiling records and a walk round the plant room.
What are the benefits of Shotcrete shell with tiled finish?
- Monolithic shell with no construction joints through the water-retaining structure
- Free geometry - curves, beach entries, steps, benches and coves formed as part of the same shell
- Strong and durable, and well suited to difficult ground and to pools that are partly retaining
- Built against the ground, so no wall formwork and less working space needed around the excavation
- Tiled finish is hard-wearing, repairable in patches and the most durable of the common wet-side finishes
- The shell can be shaped to suit the finish, which keeps screeds thin and predictable
What are the limitations of Shotcrete shell with tiled finish?
- Depends on a specialist crew, and the nozzleman's skill is the biggest single variable in the result
- Poor spraying traps rebound and voids behind the reinforcement, which are hidden until they leak
- Curing is unforgiving - a shell allowed to dry early cracks, and cracks in a pool shell are a serious defect
- Higher cost than blockwork or liner routes, in both the shell and the tiled finish
- Longer programme, with cure, waterproofing, test, screed and tile all in sequence
- Tiling tolerance is punishing, and setting-out errors at the water line are visible forever
What is Shotcrete shell with tiled finish best suited for?
What plant does Shotcrete shell with tiled finish need?
- Excavator and dumper, with temporary works support and dewatering as required
- Reinforcement fixing gear, spacers and profile guides
- Concrete pump or spray rig with compressor, hoses and nozzle equipment
- Screeding and carving hand tools for cutting the shell to profile
- Curing covers, sheeting and water supply for the curing period
- Waterproofing application equipment for the specified tanking or render system
- Screeding and tiling tools, mixing plant and lifting gear for coping units
- Plant room equipment - pump, filter, valves, panel, heating and the dosing and monitoring package
How is Shotcrete shell with tiled finish quality-checked?
- Excavation profile and formation checked against the shell thickness and finishes allowance
- Reinforcement cage inspected for position, cover, tying and support before any spray
- Cast-in items surveyed against the fixed water line and protected before spraying
- Shell thickness checked against profile guides, and rebound removed rather than buried
- Curing regime specified, resourced and recorded, with the shell inspected for cracking afterwards
- Buried pipework pressure tested and held before backfill
- Waterproofing detailing inspected at junctions and penetrations, which is where systems fail
- Water-tightness test on the filled shell accepted before finishes start
- Screed flatness checked against the tolerance the tile size needs, and tile setting out approved before fixing
- Adhesive and grout allowed to gain strength before filling, with commissioning records issued at handover