Individual bases and kerbed plinth islands
The foundation each charger stands on, the kerb that stops a vehicle reaching it, and the falls that keep water away from both.
Last updated 2026-09-06
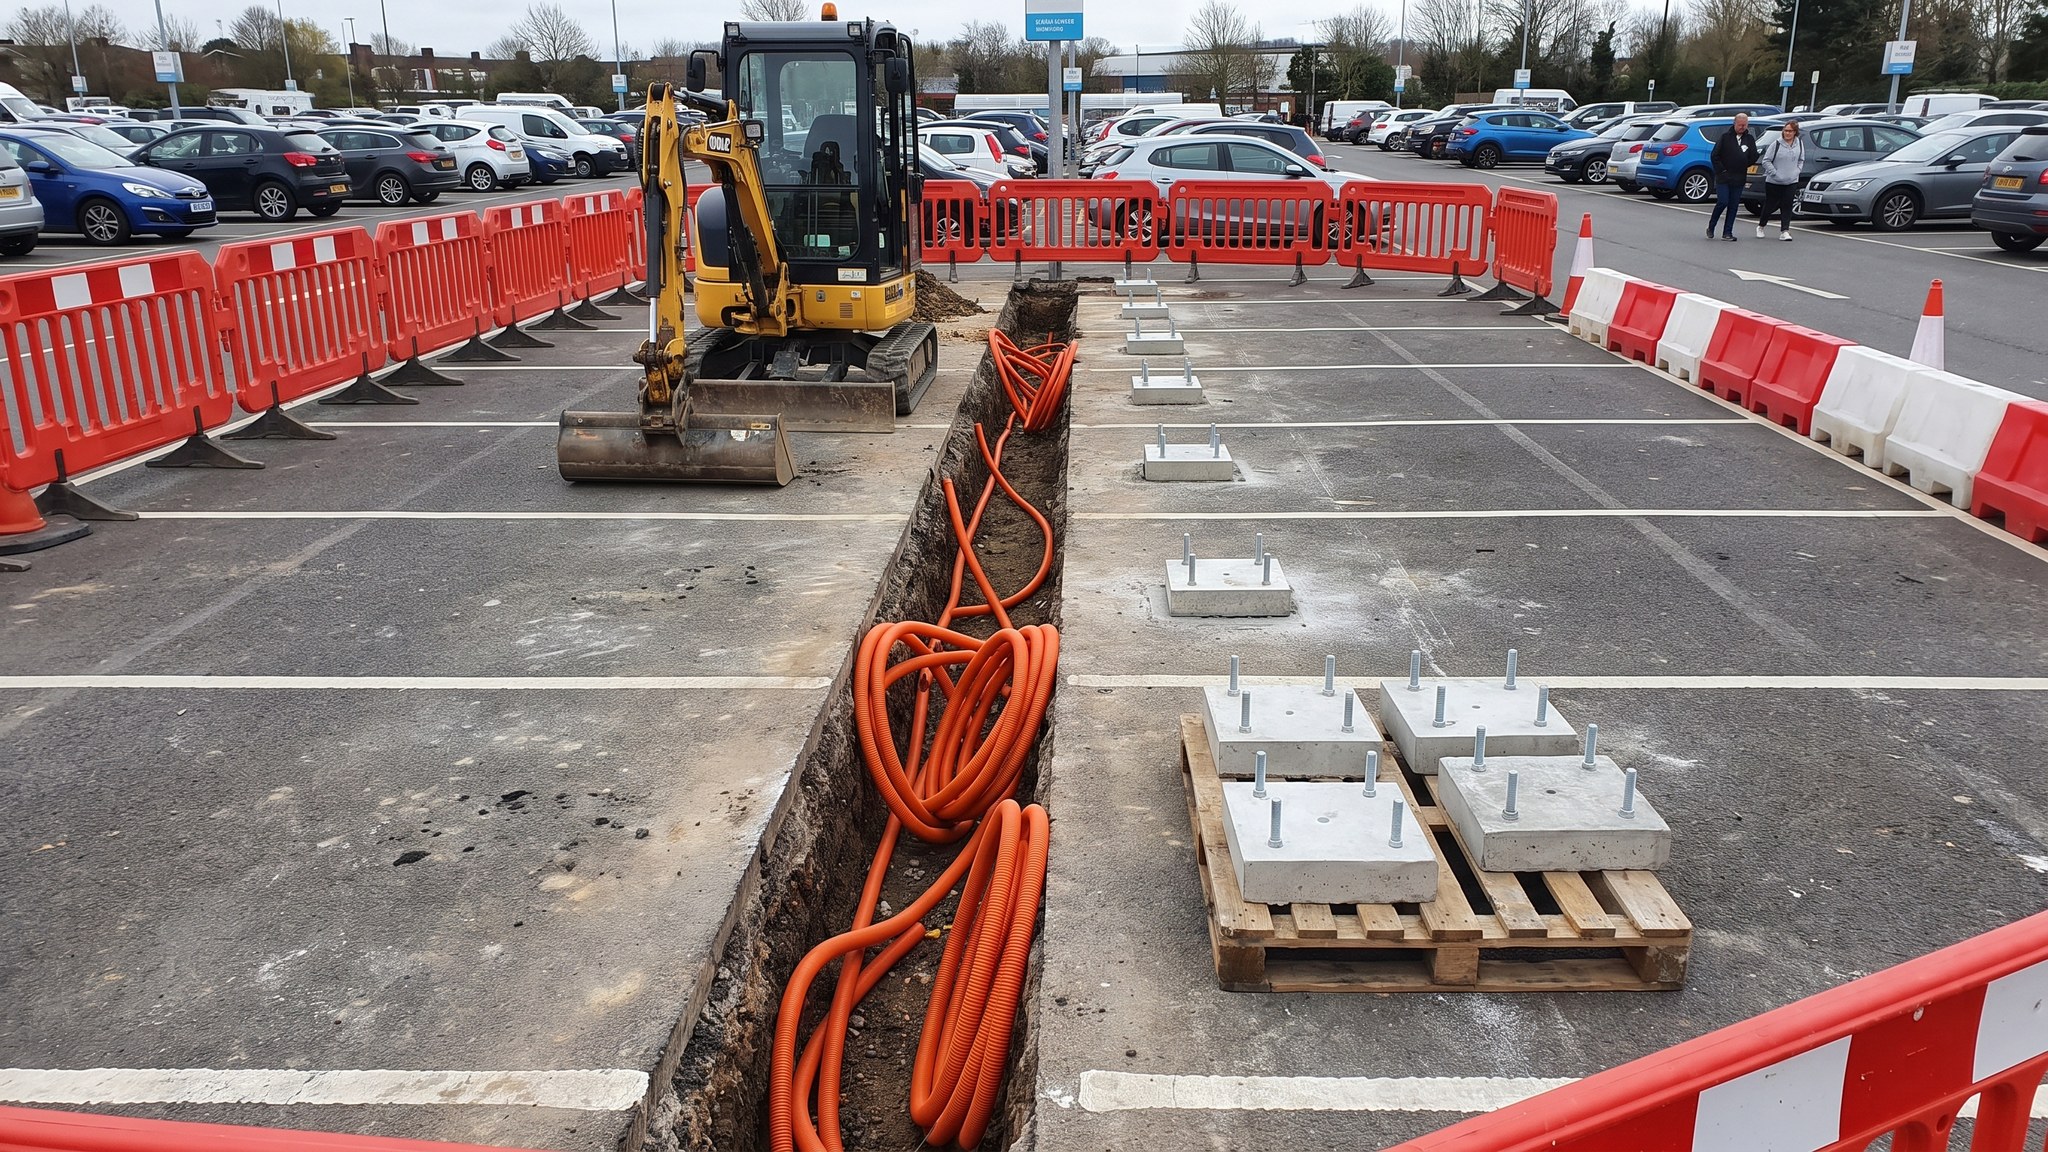
What is Individual bases and kerbed plinth islands?
Every charger has to stand on something. On most projects that is either an individual base serving one unit, or a kerbed plinth island serving a pair or a row of them between bays. The base does more than hold the unit upright. It anchors it against being pushed over, it brings the ducts up into the unit in the right position and at the right spacing, it presents a level and durable surface at the height the unit needs, and it sets the relationship between the charger, the parking bay, the cable and the driver who has to use all three.
Vehicle impact is the governing consideration. Chargers sit at the head of parking bays, in the path of vehicles that are manoeuvring, sometimes reversing, occasionally driven by someone unfamiliar with the site. A struck charger is a large repair, an outage, and potentially a dangerous incident. Protection is designed rather than added afterwards: a kerbed island that keeps the vehicle away, a raised plinth, bollards, or a combination. The kerbed island is the common answer on new layouts because it protects the unit, provides a place for the driver to stand out of the traffic, and gives somewhere to run the ducts.
The details that cause trouble are drainage, position and the duct entry. Water that collects around the base of a unit shortens its life and makes the bay unpleasant to use, so falls are set to take water away from the plinth rather than into it. Position determines whether the tethered cable actually reaches the vehicle's inlet, which varies between makes, and whether the cable lies across the walking route when it does. The duct entry has to arrive inside the unit's footprint, in the right place, sealed, and with enough length left to terminate. Getting that entry wrong is the commonest reason a base has to be broken out and rebuilt.
How does Individual bases and kerbed plinth islands work, step by step?
- 1
Step 1: Fix the layout around how the bays will be used
The position of every unit is set from the parking layout, the swept paths of vehicles entering and leaving, the reach of the cable to inlets in different positions on different vehicles, and the pedestrian route. Accessible bays have their own space requirements, and a charger positioned without regard to them makes the bay unusable. The layout is drawn and, on most projects, walked and marked out on the ground before anything is dug, because a plan that works on paper can be obviously wrong once you stand in the bay.
- 2
Step 2: Take the fixing requirements from the actual unit
The base is designed for the unit that will sit on it. That means the bolt pattern, the loads to be resisted, the footprint, the duct entry position and any clearance the unit needs to open its doors or dissipate heat. This information comes from the specification for the selected equipment, and it has to be in hand before the base is designed. Building bases before the units are chosen is a familiar false economy that ends in drilled and grouted fixings, packers and a unit that does not sit true.
- 3
Step 3: Excavate and prepare the formation
The base excavation is taken out to the formation the design requires and the ground is inspected and proved. Soft or made ground is dug out and replaced, and where the base sits next to an existing trafficked surface the excavation is arranged so that surface is not undermined. Any support to the excavation and the arrangements for working in it are designed by a competent person for the particular case. The ducts to the base have already been installed, so their position is confirmed and protected before concreting.
- 4
Step 4: Position the ducts and set the fixings
This is the step that decides whether the base works. Ducts are brought up inside the unit's footprint, at the position and spacing the equipment requires, with sufficient length left to reach the termination point inside it, and sealed against water and vermin. Holding down bolts or cast-in sockets are set in a template rather than positioned by measurement, checked for level and for rotation, and protected from the concrete. Everything is checked against the equipment specification before the pour, because after it there are no options that do not involve a breaker.
- 5
Step 5: Cast the base and finish it accurately
The base is cast to the design, with the concrete specification chosen for the exposure it will face. The top surface is finished to level and to line, because the unit will show any error in both. Where a plinth stands proud, edges are formed cleanly and, where the design calls for it, chamfered. Curing is protected. The base is then left long enough before loading and before the unit is set on it, which on a compressed programme is the constraint everybody wants to argue with.
- 6
Step 6: Build the kerbed island and the protection
Where the design uses an island, the kerbs are laid to line and level on their bed and haunching, the island is filled and surfaced, and its height is set so that a vehicle nosing into the bay meets the kerb rather than the unit. Where bollards are used, they are founded in their own bases rather than in the surfacing, and they are positioned so they protect the unit without blocking the cable, the driver or a wheelchair user. The protection arrangement is a design decision taken with the client, since it has to survive real driving.
- 7
Step 7: Set the falls and make the drainage work
Surfacing around the island is laid to falls that take water away from the unit and the plinth and towards the site drainage, and the falls are checked with a level rather than by eye. Standing water at the foot of a charger is a durability problem and an amenity problem, and it is far cheaper to get right at the surfacing stage than to correct afterwards. Where the island interrupts an existing drainage path, the path is re-established rather than left to find its own way.
- 8
Step 8: Set the unit, then finish the bay
The unit is set on the base by the installer, packed and levelled as required, fixed down, and its duct entries sealed once the cables are in. Electrical termination and commissioning are work for competent qualified people. The bay is then finished: surfacing made good, line marking and bay markings applied, signage installed, and any surface treatment or colour the operator wants. The finished bay is inspected with a vehicle parked in it, which is the only test that finds a cable that does not reach or a bollard in the wrong place.
What are the benefits of Individual bases and kerbed plinth islands?
- Protects an expensive and vulnerable unit from the vehicles it is there to serve
- Provides a clean, level and durable mounting at the height the equipment requires
- Brings ducts up inside the unit in a controlled and sealed position
- Gives drivers somewhere to stand clear of manoeuvring vehicles while connecting
- Kerbed islands serve several units economically and tidy the cable and duct routes
- Well-detailed falls keep water away from the unit and extend its service life
What are the limitations of Individual bases and kerbed plinth islands?
- Base design depends on the selected equipment, so procurement has to precede construction
- Duct entry errors are effectively unfixable without breaking out and recasting
- Islands and bollards consume space and can compromise bay widths and manoeuvring
- Kerbs and bollards are themselves trip hazards and obstacles if badly positioned
- Curing time before the unit can be set is a real programme constraint
- Retrofitting islands into an existing layout usually means losing bays
What is Individual bases and kerbed plinth islands best suited for?
What plant does Individual bases and kerbed plinth islands need?
- Small excavator and breaker for base excavations and surface removal
- Concrete supply, placing and finishing equipment with vibrating pokers
- Setting-out and levelling instruments, and templates for holding down fixings
- Kerb laying equipment, compaction plant and surfacing tools
- Coring and fixing equipment for bollards and protection
- Lifting equipment appropriate to the weight of the units being set
How is Individual bases and kerbed plinth islands quality-checked?
- Layout marked out and walked on site, with cable reach and swept paths checked before excavation
- Base design and fixing template taken from the specification for the selected equipment
- Duct entry position, spare length and sealing checked and signed off before the pour
- Base level, line and fixing positions surveyed after casting and before the unit is set
- Falls around the island checked with a level to confirm water runs away from the unit
- Completed bay inspected with a vehicle in place, and defects corrected before handover