Feeder pillar and distribution board schemes
Conventional distribution to groups of chargers - simple, familiar and easy to maintain, which is exactly why it is the default.
Last updated 2026-09-06
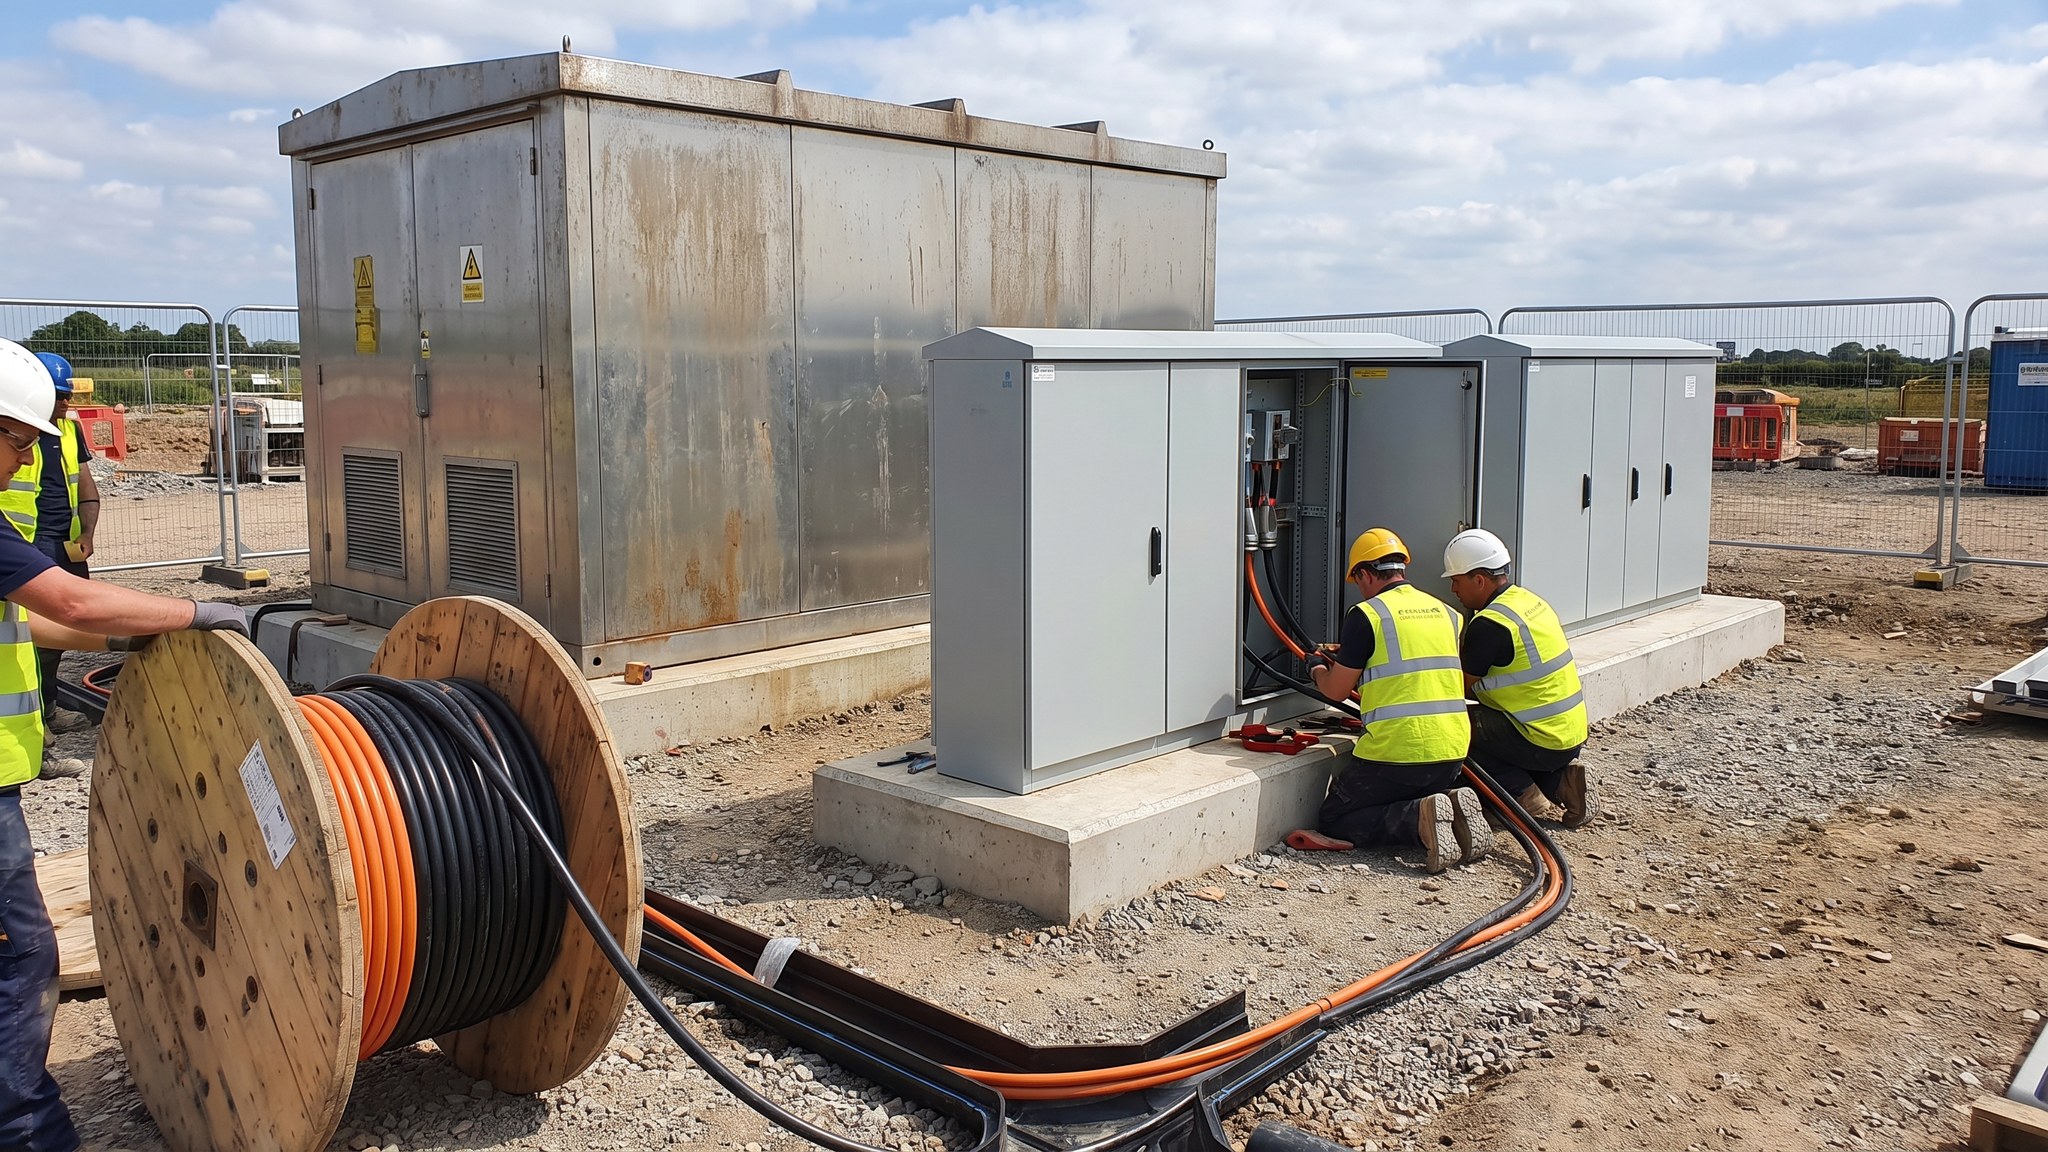
What is Feeder pillar and distribution board schemes?
The commonest way to distribute power around a charging site is also the least remarkable. A distribution board or an outdoor feeder pillar sits near a group of bays, is fed from the main distribution, and serves the chargers around it. Several pillars distributed across a large car park keep the runs to individual units short and give a sensible point at which each group can be isolated for maintenance. There is nothing novel about the arrangement, and that is its principal virtue: any competent contractor can install it, any competent electrician can maintain it, and everybody who looks at it understands what they are seeing.
The design decisions are about grouping and position rather than technology. How many bays does each pillar serve, and does that grouping match how the site will be maintained and how it will grow. Where does the pillar sit so that it is accessible to a maintainer but not in the way of vehicles, not blocking a pedestrian route, and not the first thing a customer sees. How much spare provision is included, given that the marginal cost of a larger pillar with spare ways at the outset is small and the cost of replacing an undersized one is not.
Because pillars stand outdoors in a car park, the practical requirements are environmental and physical as much as electrical. They face weather, vehicle impact, casual interference and, on some sites, deliberate attack for the metal inside them. They need an enclosure suited to the exposure, a base that keeps them out of standing water, protection from vehicles, security appropriate to the location, and clear labelling so that the right circuit is identified by someone working in the dark and the rain. All work inside them is for competent qualified people, and the enclosures are kept locked and controlled.
How does Feeder pillar and distribution board schemes work, step by step?
- 1
Step 1: Group the bays into sensible circuits
The designer divides the charging bays into groups, each served by one pillar or board. The grouping considers the physical layout, the length of the runs to each unit, how the site will be maintained - because taking one pillar out of service takes its whole group with it - and how the site is expected to grow. A grouping that leaves a whole car park dependent on a single point is fragile; one that spreads the load across several pillars keeps most of the site working while one is attended to.
- 2
Step 2: Position each pillar where it can be used and not hit
Position is a compromise. The pillar should be central to its group to keep runs short, accessible to a maintenance vehicle, clear of manoeuvring vehicles, out of the pedestrian desire line, and unobtrusive from the customer's point of view. It needs space for its doors to open fully and for someone to stand and work in front of it safely. On most projects the positions are marked out on site and reviewed with the operator, because a pillar that is convenient on the drawing frequently turns out to be in the middle of the route the delivery lorry takes.
- 3
Step 3: Specify the enclosure for the environment it faces
The enclosure specification follows the exposure: weather, ultraviolet, salt where the site is coastal, and the possibility of impact or interference. Locking and security are specified for the location, since remote car parks attract attention. Ventilation and heat dissipation are considered where the equipment inside generates heat in an enclosed box in the sun. Colour and finish are usually a matter for the operator, and getting agreement on appearance early avoids a late and expensive change.
- 4
Step 4: Build the base, the ducts and the protection
The pillar sits on a base that raises it clear of standing water, with the ducts brought up inside its footprint in the positions the equipment requires and sealed. Where vehicles pass close, bollards or a kerbed island protect it, founded independently rather than in the surfacing. Falls around the base take water away. As with charger bases, the duct entry is the detail that has to be right before the concrete goes in, because correcting it afterwards means breaking out the base.
- 5
Step 5: Install and terminate by competent qualified people
The pillar is set, fixed and made weathertight. Cables are pulled in, dressed and terminated, and the internal equipment is installed to the design. All of this work is carried out by competent qualified people, and any connection into existing live equipment proceeds under permit. Spare ways are left blanked and identified rather than left open. Cable entries are sealed after termination, because an unsealed pillar collects water, silt and vermin within a season.
- 6
Step 6: Label everything so it can be found in the dark
Labelling is the difference between a five-minute fault and an hour of guessing. Every circuit is identified with the bays it serves, in language that matches the signage on those bays, durable enough to survive outdoors for years. A schedule is fixed inside the enclosure and matches the drawings. Warning and identification labelling is applied to the outside as the specification requires. Sites where the bay numbers on the pillar do not match the numbers painted on the ground generate maintenance visits forever.
- 7
Step 7: Provide for control, metering and communications
Modern charging sites carry more than power. Metering, load management signals and communications to the charge point management system all need containment, routes and space inside the pillar. This provision is designed in from the start, alongside the power, rather than added into a full enclosure afterwards. Spare containment capacity on the same routes is cheap now and valuable later, since the control requirements of a charging site change faster than its power requirements do.
- 8
Step 8: Test, commission and hand over the schedules
The installation is tested and certified by competent qualified people and the chargers are commissioned group by group. Handover includes the circuit schedules, the as-built drawings showing each pillar and the bays it serves, the routes and duct records, and the keys and access arrangements. The maintenance regime for the enclosures - inspection, seals, security, labelling - is set out, because outdoor equipment that is never opened until it fails deteriorates quietly for years first.
What are the benefits of Feeder pillar and distribution board schemes?
- Simple, familiar and understood by any competent contractor or maintainer
- Keeps runs to individual units short by distributing pillars across the site
- Allows one group of bays to be isolated for maintenance while the rest keep working
- Spare ways can be included cheaply at installation to support later expansion
- Straightforward to fault-find and repair, which keeps availability high
- Well-established components with good availability and no unusual procurement risk
What are the limitations of Feeder pillar and distribution board schemes?
- Pillars occupy space in a car park and are visible in a customer-facing environment
- Exposed to weather, vehicle impact and interference, so protection and security are needed
- Losing one pillar takes its whole group of bays out of service
- Fixed distribution offers no ability to share capacity dynamically between groups
- An undersized pillar with no spare ways caps expansion and has to be replaced
- Poor labelling and mismatched bay numbering create a permanent maintenance overhead
What is Feeder pillar and distribution board schemes best suited for?
What plant does Feeder pillar and distribution board schemes need?
- Small excavation and concrete plant for pillar bases and duct entries
- Lifting equipment appropriate to the weight of the pillar being set
- Cable pulling winches, rollers and cable drum handling equipment
- Coring and fixing equipment for bollards and impact protection
- Labelling and identification equipment suited to outdoor durability
- Test instruments used by competent qualified people for certification
How is Feeder pillar and distribution board schemes quality-checked?
- Bay grouping and pillar positions marked out and reviewed on site with the operator
- Enclosure specification checked against the exposure, security and heat conditions
- Duct entry positions confirmed against the equipment specification before the base is cast
- Cable entries sealed and spare ways blanked and identified after termination
- Circuit labelling cross-checked against the bay numbering painted on the ground
- Certification, circuit schedules and as-built drawings issued with the maintenance regime