Roof slating and tiling
Small overlapping units hung in courses, weathering the roof by lap and gravity rather than by seal.
Last updated 2026-09-05
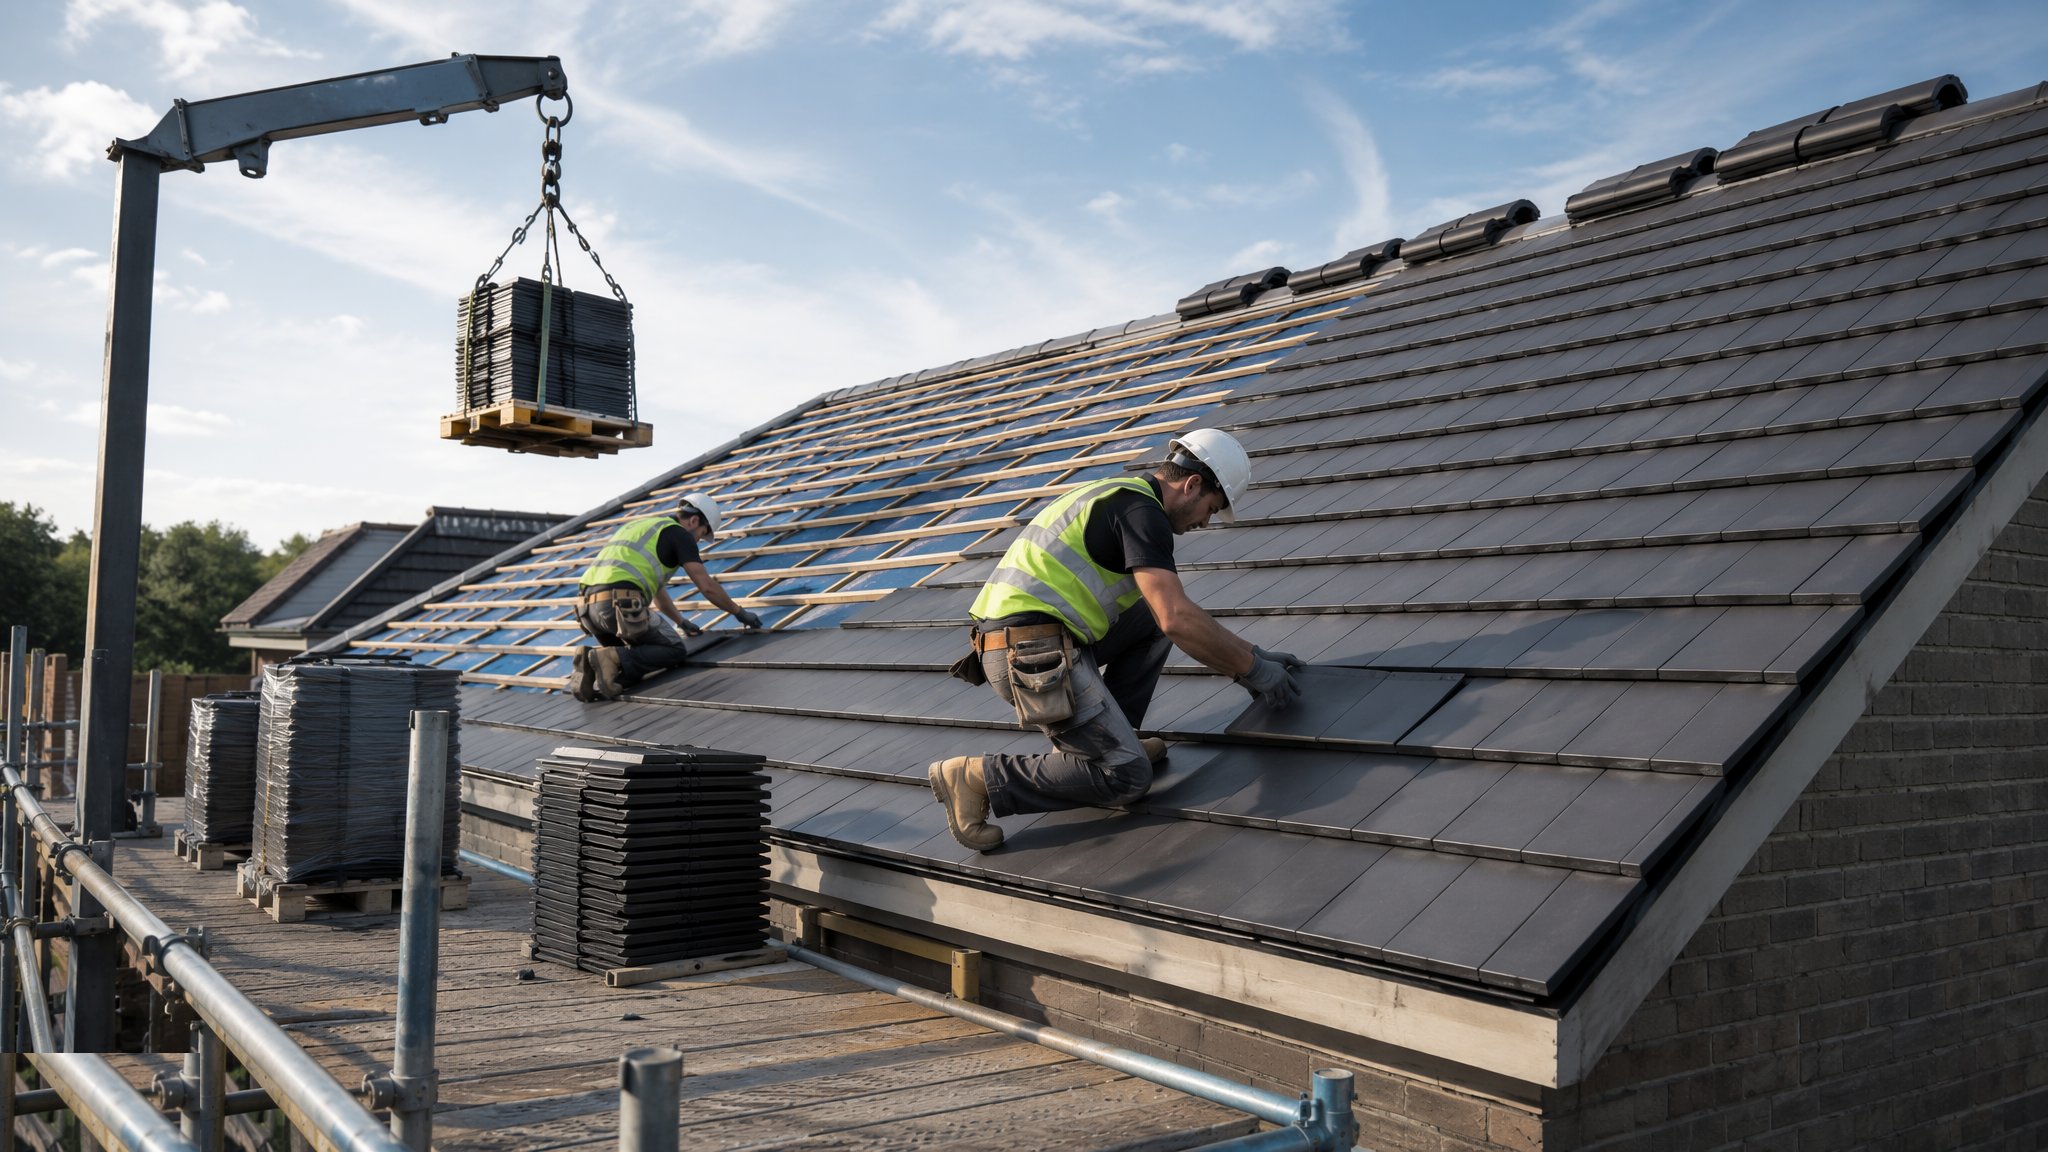
What is Roof slating and tiling?
Slating and tiling is the dominant pitched roof covering in the UK, and like thatch it works by overlap rather than by seal. Small units are hung on battens in courses running up the slope, each course covering the head of the one below, so that water running down the surface always meets another unit before it can find a joint. Nothing is stuck down and nothing is welded. The covering is a rain screen, and the roof is designed on the assumption that a certain amount of wind-driven water will get past it - which is why the underlay beneath is a working part of the roof rather than a temporary cover. Get the laps right and a slated or tiled roof will run for generations with almost no attention; get them wrong and it will leak in the first driven rain and there is no local fix.
The unit choice splits broadly into natural slate and manufactured tiles. Natural slate is a split stone, thin, dense and long-lived, and it is laid double-lap, meaning every point on the roof is covered by at least two thicknesses and the joints in one course are covered by the slate above. Manufactured tiles cover a wide family: clay plain tiles, also double-lap and also small; clay and concrete interlocking tiles, which are larger units with a rebated side joint and are laid single-lap, one thickness over most of the roof with the interlock doing the work at the side; and fibre cement slates, which behave much like natural slate on the roof. Each family has its own pitch range, its own headlap behaviour and its own weight, and the differences are large. A plain tile roof is commonly laid at pitches above about 35 degrees; interlocking tiles will generally go lower; natural slate covers a wide range depending on size and quality. The manufacturer and the designer set the limit for a particular product on a particular roof, and it is not a figure to be borrowed from the last project.
Three concepts run through all of it: gauge, headlap and side lap. Headlap is the distance the unit overlaps the head of the course two below on a double-lap roof, or the course directly below on a single-lap roof - it is the depth of cover against water driven up the slope. Gauge is the batten spacing that results, calculated from the unit length and the headlap chosen, and it is what the roofer actually sets out and marks. Side lap is the sideways cover at the vertical joints, provided by the bond of the courses on plain tiles and slates and by the interlock on interlocking tiles. Headlap increases with exposure and decreases with pitch, so a steep sheltered roof takes less lap than a shallow exposed one - but the headlap for a given roof comes from the designer working from the product, the pitch, the site exposure and the rafter length, and that calculation is the professional judgement at the heart of the trade. On site the roofer's job is to set the gauge out accurately, keep the courses parallel, fix everything as the fixing specification requires, and detail the perimeters and junctions so that water is always led onto the surface of something rather than into a joint.
How does Roof slating and tiling work, step by step?
- 1
Step 1: Confirm the covering, the pitch and the exposure
The designer selects the covering and confirms it is within its pitch range for the actual roof, then sets the headlap from the product, the pitch, the rafter length and the exposure of the site. Weight is checked against the structure, because concrete interlocking tiles, clay plain tiles and natural slate differ substantially and a re-roof in a heavier covering can overload existing rafters. Wind uplift is assessed and the fixing specification follows from it - which units are nailed, which are clipped, which are both, and how the perimeter zones are treated. All of that arrives on site as a written specification, and where site conditions differ from what was assumed, the question goes back to the designer rather than being settled on the scaffold.
- 2
Step 2: Prepare the deck, lay the underlay and set the ventilation
The roof structure is checked for line and level, because a covering laid on a wavy roof shows every dip. The underlay is then laid horizontally from eaves upwards, each sheet lapped over the one below so water shed onto it runs out at the eaves rather than into the roof, and dressed into an eaves carrier or over a tray so it discharges into the gutter. The vapour permeability of the underlay and the ventilation strategy for the roof void go together and are set by the designer - an impermeable underlay on a warm roof without adequate ventilation is one of the more common ways to build condensation into a new roof. Ventilation provision at the eaves, at the ridge and at any abutment is installed as the covering proceeds, not retro-fitted afterwards.
- 3
Step 3: Set out the gauge and fix the battens
Setting out is the skilled part. The roofer measures the true rafter length from eaves to ridge, works out how many courses fit at the specified headlap, and adjusts the gauge slightly so the courses divide evenly and the roof finishes correctly at both eaves and ridge - the eaves course and the top course are always a special case. The gauge is marked on the rafters and the battens are fixed to it, each batten fixed at every rafter, with batten joints staggered and always landing over a rafter. Battens are typically in the order of 25-50 mm in section, with the size for a given roof set by the rafter spacing and the specification. A batten line that wanders shows in the finished roof as a wandering course, so the roofer works from marks and a line, not by eye.
- 4
Step 4: Detail the eaves, verge and abutments as the work rises
The perimeter details are built into the covering rather than added to it. At the eaves a shorter under-eaves course or a double course closes the bottom of the roof so the first full course has something to lap onto, and the covering projects far enough to discharge into the gutter. At the verge the covering is either bedded on mortar over an undercloak or finished with a dry verge system, and the courses are laid so that a cut unit at the verge is wide enough to hold its fixings - the roofer works this out at setting out, not when the course arrives at the edge. At an abutment the covering is closed with a soaker and flashing arrangement, or with a secret gutter where the design calls for one, all detailed by the designer.
- 5
Step 5: Lay and fix the courses up the slope
Units are laid course by course working up the roof, maintaining the bond so that vertical joints in one course are covered by the units above. Slates and plain tiles are nailed, either head-nailed or centre-nailed depending on the type and the exposure, and interlocking tiles are hung on their nibs and then nailed or clipped according to the fixing specification. Every unit is checked for lie and for hairline cracks as it goes on. The general principle is that fixing is increased in the more exposed zones of the roof - the perimeter, the ridge, the verge and the eaves - and the fixing specification prepared for the project sets exactly what goes where. The roofer follows it as written; substituting a lighter fixing because the roof looks sheltered from the scaffold is how coverings come off in the first serious gale.
- 6
Step 6: Form the hips, valleys and any penetrations
Hips and valleys are where two planes meet and where the water concentrates, so they carry the most careful work. A valley may be lined in metal, formed in a preformed valley trough, or swept or laced in plain tiles by a skilled tiler, and the cut units either side are supported so they cannot rock. Hips are finished with hip tiles, either bedded and mechanically fixed or dry-fixed, with a hip iron at the foot to stop the run slipping. Penetrations - flues, vents, roof windows and pipes - are weathered with proprietary units or lead work, always arranged so that water is led over the covering below and never behind it. Cut units around any of these details are still fixed, and a cut piece too small to hold a fixing is a defect, not a detail.
- 7
Step 7: Ridge, dry-fix or mortar, and final inspection
The ridge closes the roof and is finished either in mortar-bedded ridge tiles or with a dry-fix ridge system. Dry-fix uses a mechanically fixed ridge batten with a ventilated roll, and it has largely taken over on new work because it does not rely on mortar staying sound and it builds ridge ventilation in. Mortar bedding remains the right answer on many conservation and repair projects, and where it is used the mortar mix, the bedding and the mechanical fixing behind it all matter. The roof is then inspected: courses parallel, gauge consistent, laps correct, all units fixed as specified, perimeter and junction details complete, underlay dressed correctly into the gutter, and ventilation paths clear and unobstructed.
What are the benefits of Roof slating and tiling?
- Very long service life, with natural slate and clay tile roofs commonly running for many decades with little attention
- Individual units can be replaced, so local damage is a repair rather than a re-roof
- A wide range of materials, colours and profiles, including matches for almost any regional or historic context
- Well-understood technology with a large and skilled labour pool across the UK
- Works by lap and gravity, so there is no seal or membrane joint to fail over time
- Interlocking tiles cover ground quickly and suit lower pitches than plain tiles or slate
- Natural slate and clay are durable, largely inert and straightforward to reclaim and reuse
What are the limitations of Roof slating and tiling?
- Every covering has a minimum pitch, and below it the covering simply cannot be used whatever the workmanship
- Heavy - a re-roof in a different covering can exceed what existing rafters were designed for
- Wind uplift governs the fixing specification, and an under-fixed roof in an exposed position is a real risk
- Detailing at verges, valleys, hips and abutments is where most defects appear, and it is skilled work
- Mortar bedding at ridge and verge needs maintenance and is a common failure point on older roofs
- Setting out errors propagate the whole way up the slope and are expensive to correct once battens are fixed
- Weather-dependent, with an open roof needing temporary protection at every stage
What is Roof slating and tiling best suited for?
What plant does Roof slating and tiling need?
- Scaffold with edge protection, a loading bay and a roof ladder or crawl boards
- Telehandler or hoist for landing pallets of tiles or slates at eaves level
- Slate cutters, slate rippers, zaxes and holing tools, or a tile cutting saw with dust suppression
- Nail guns or hand tools for battening, with battens graded and marked to the specification
- Chalk lines, gauge rods and levels for setting out
- Lead working tools and a bossing set for flashings, soakers and valley linings
- Temporary sheeting and weights for protecting an open roof overnight
How is Roof slating and tiling quality-checked?
- Covering confirmed within its pitch range for the actual roof before any material is ordered
- Roof structure checked for line and level, and its capacity confirmed against the weight of the chosen covering
- Underlay laps, eaves discharge into the gutter and ventilation provision inspected before the covering starts
- Batten grade, section and fixings checked, with joints staggered and landing over rafters
- Gauge and headlap measured against the specification on a sample area, and again as the work rises
- Fixing specification checked in place, including the increased fixing in the perimeter zones
- Cut units at verges, valleys, hips and penetrations confirmed large enough to be fixed
- All flashings, soakers and abutment details inspected before the scaffold is struck