Homes & villas - brick/block cavity wall
Two leaves, one cavity, and a hundred small details that decide whether the wall is still dry in sixty years.
Last updated 2026-09-05
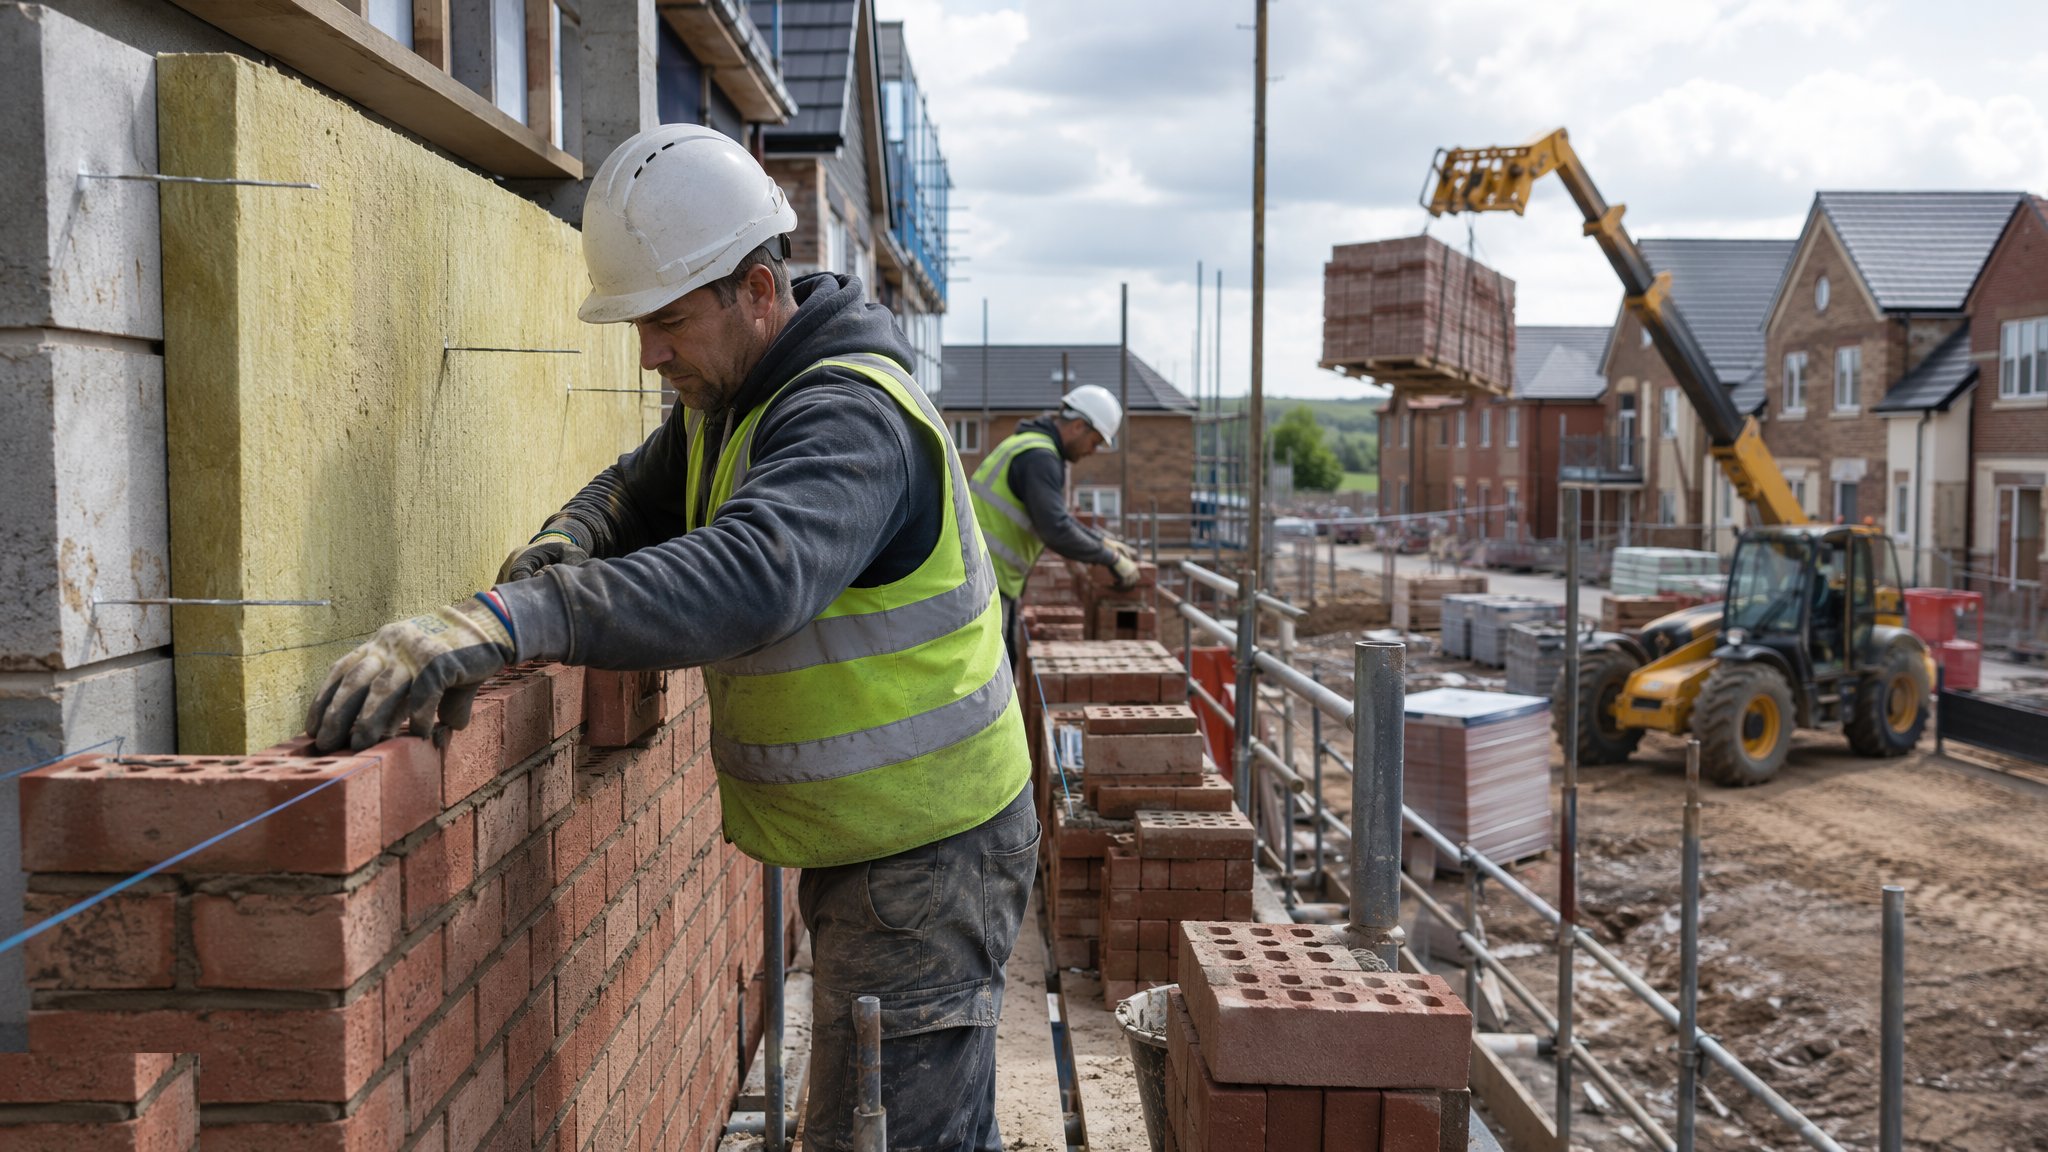
What is Homes & villas - brick/block cavity wall?
The cavity wall is the default house wall across the UK and much of northern Europe. An outer leaf of facing brick, commonly a little over 100 mm thick, a cavity that is typically 100-150 mm and increasingly filled or part-filled with insulation, and an inner leaf of blockwork around 100 mm that does the structural work and carries the floors and the roof. Stainless steel wall ties cross the cavity and make the two leaves act together against wind. The gauge is worth learning on day one: a standard brick plus a joint runs at 75 mm a course, so four courses rise 300 mm, and three brick courses line up with one course of standard block. That relationship is what keeps ties level and lets both leaves rise together.
The principle behind the wall is simple. The outer leaf is expected to get wet. It is not a barrier, it is a sacrificial rain screen. Water that gets through the face runs down the cavity side of the outer leaf, lands on a damp-proof course or a cavity tray, and is pushed back out through weep holes. Everything that goes wrong with cavity walls goes wrong because something bridged that route - a lump of mortar sitting on a tie, a board of insulation leaning across the gap, a tray that stopped short of the reveal, mortar packed into the base of the cavity below the damp-proof course level. None of it is visible once the plasterboard is on.
So the trade is half bricklaying and half housekeeping. Corners gauged and plumb, the line kept tight, full bed joints, perpends filled rather than tipped and pointed later, and the cavity swept and clean at every lift. A comfortable rate of build is somewhere around a metre to a metre and a half of height a day, because green mortar will not hold the weight of an overloaded wall and the whole thing rides and bulges. The specification sets the mortar, the brick and the cavity width; the structural engineer sizes the wall and the tie pattern. Your job is to build what is drawn, and to leave the cavity as clean as you found it.
How does Homes & villas - brick/block cavity wall work, step by step?
- 1
Step 1: Set out, check the damp-proof course, dry-bond the first course
Set the wall line off the datum and confirm the slab or foundation blockwork is level within tolerance - out of level here is a fight you lose for the next twenty courses. Check the damp-proof course is down, lapped at every joint, continuous through every junction and sitting clear of external ground level by a comfortable margin, commonly around 150 mm. Then lay the first course dry, all the way along, and work out where the cut bricks land. Ten minutes with a tape now saves a sliver cut at every window reveal later.
- 2
Step 2: Gauge the corners and quoins
Build the corners first, four to six courses, racked back, with the gauge rod against every single course. The corners are the control for the whole elevation. Plumb both faces, level across, then check the diagonal at returns. If a corner is 5 mm out of plumb at course six it is 25 mm out at eaves, and no amount of good laying in between will pull it back. Corners are where the experienced hand goes and where the foreman looks first.
- 3
Step 3: Run both leaves together to the line
Rise the inner and outer leaves in step so the ties can be bedded level in both. Mortar spread for two or three bricks at a time, full beds, perpends filled as you go. Work to the line every course and tool the joints while the mortar is still thumbprint firm, so the face is compacted rather than smeared. Keep the day's lift sensible - roughly a metre to a metre and a half - and stop the wall before the mortar tells you to.
- 4
Step 4: Bed the ties and fix the insulation
Ties go at the centres the engineer specifies - a common pattern is around 900 mm horizontally by 450 mm vertically, with an extra row close to every opening reveal. Bed them properly into both leaves, level or with a slight fall to the outer leaf, never sloping back towards the inside. Partial-fill boards clip tight to the ties against the inner leaf so the residual cavity stays clear; full-fill batts are butted with no gaps at all, because a 20 mm gap between two boards is a cold spot that will show up as a mould patch in a bedroom corner.
- 5
Step 5: Keep the cavity clean and drained
This is the step nobody photographs and everybody blames later. Use a cavity batten pulled up on wires as you rise, sweep the ties clean before each lift, and leave lift-out bricks at the base so droppings can be raked out and the base inspected. Mortar snots welded to a tie are a wick straight to the inner leaf - one damp patch, one very expensive investigation. At the base of the cavity, keep fill and mortar below the damp-proof course line, and leave open weeps so any water that gets in can get out.
- 6
Step 6: Openings, movement joints, plate and protection
Lintels bear their full length each end on a level bed, with the cavity tray over them stepped up to the inner leaf, stop-ends fitted and weep holes in the course above - typically every fourth or fifth perpend. Insulated cavity closers go to the jambs and heads so the reveal is not a cold bridge. Where the elevation runs longer than the movement-joint spacing the designer has set, form the joint straight through, slip-tie it and seal it later. Bed and strap the wall plate, then cover the wall heads overnight - saturated fresh brickwork effloresces and frost picks at it.
What are the benefits of Homes & villas - brick/block cavity wall?
- The cavity separates wetting from the inside face, so the wall handles driving rain far better than a solid wall of the same thickness
- Insulation sits in the cavity where it does the most good, which is what makes the build-up work thermally without thickening the structure
- Two leaves of different materials let you put the good-looking brick outside and the cheap structural block inside
- A facing brick outer leaf needs no applied finish and very little maintenance beyond pointing decades later
- Masonry mass evens out temperature swings and gives a solid, quiet feel that lightweight walls struggle to match
- Trade is widely available, materials are ordinary stock, and there is no factory lead time on a house-sized order
What are the limitations of Homes & villas - brick/block cavity wall?
- Rate of build is fixed by mortar and weather, so masonry envelopes are slower than panel or frame systems
- Almost every failure mode is invisible after completion - bridged cavities, missing ties and short trays only show up as damp two winters later
- Cold weather stops work, hot weather dries the mortar before it hydrates, and wet weather saturates fresh lifts
- The wall is unbraced and vulnerable until floors and roof tie it in, so temporary propping and wind exposure need thought
- Reveals, cills, eaves and joist penetrations are where cold bridging concentrates, and detailing them well takes real coordination
- Retro-fixing anything into the cavity later - services, insulation, remedial ties - is intrusive and rarely tidy
What is Homes & villas - brick/block cavity wall best suited for?
What plant does Homes & villas - brick/block cavity wall need?
- Mortar mixer or a silo with a batching auger for consistent mixes
- Bricklayer's scaffold, raised in lifts to keep the working course at waist height
- Telehandler for landing brick and block packs at the scaffold
- Bench saw with dust suppression, plus a cut-off saw for site cuts
- Cavity battens, cleaning wires and a mirror-and-torch kit for cavity inspection
- Laser or dumpy level, gauge rod, line and pins, and a long spirit level
How is Homes & villas - brick/block cavity wall quality-checked?
- Damp-proof course continuous, lapped and clear of finished ground level, checked before the first lift covers it
- Ties at the specified centres, bedded in both leaves, falling outwards, with extra ties at every reveal
- Cavity swept clean at every lift and the base raked out and inspected through lift-out bricks before closing up
- Cavity trays over every opening, stepped up to the inner leaf with stop-ends, and weep holes left open
- Insulation butted tight with no gaps, clipped back and not leaning into the residual cavity
- Wall plumb, level and on gauge at every scaffold lift, with movement joints formed straight and full depth
More brick wall construction methods
Next method
Solid brick wall (215 mm)