Porcelain & ceramic tiling
Rigid tiles bedded on a substrate that has to be flatter than anything beneath it - because a tile will not bend to hide what is under it.
Last updated 2026-09-05
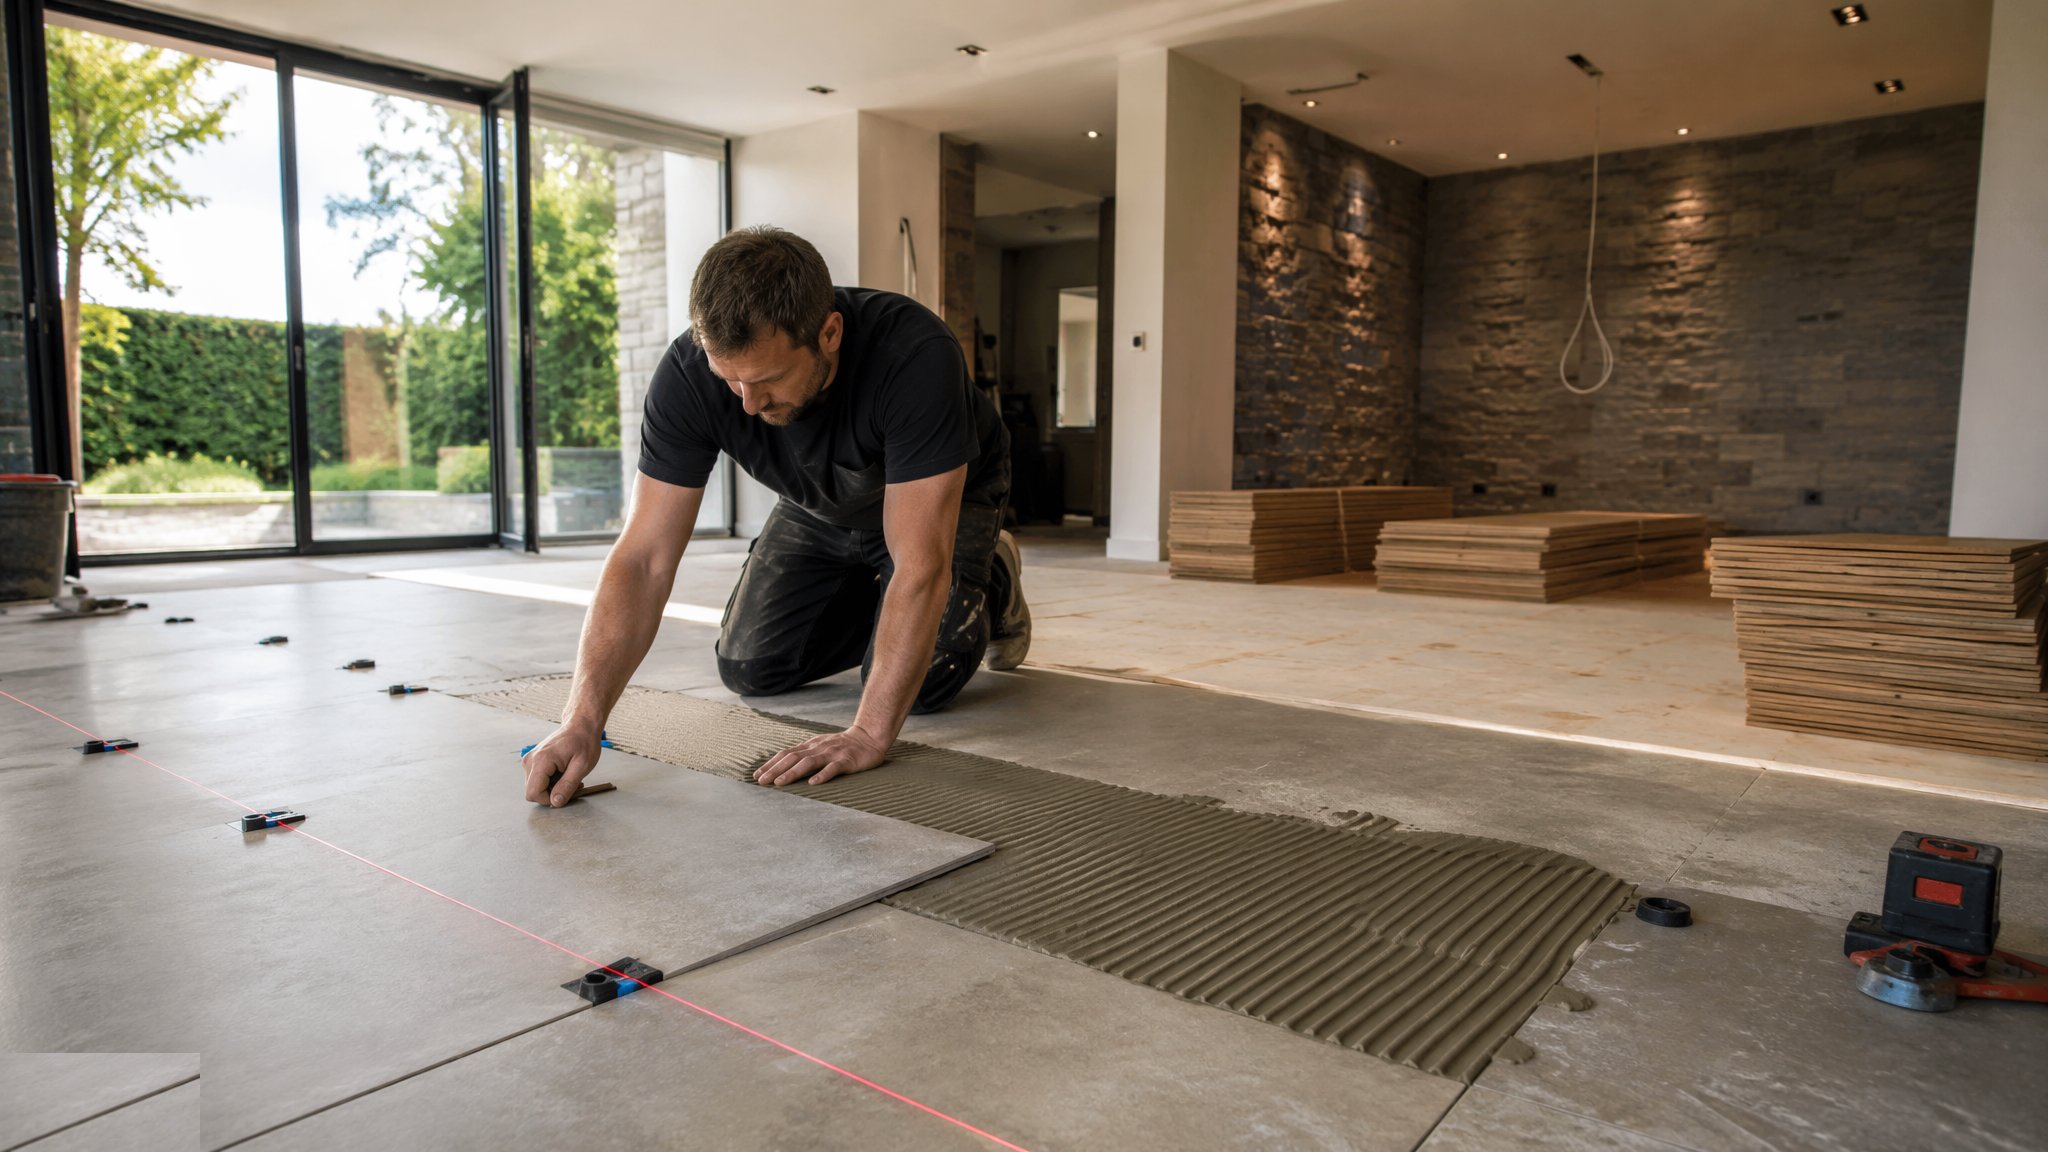
What is Porcelain & ceramic tiling?
Porcelain and ceramic tiling lays a rigid, fired, effectively unbending unit onto a substrate that moves, dries and settles. Everything that goes wrong with a tiled floor comes out of that one sentence. The tile itself is the easy part: porcelain is dense, low-porosity and hard-wearing, ceramic is softer and more absorbent and usually kept to walls and light-duty floors, and both arrive flat, square and consistent from the factory. The substrate does not. On most projects the tiler inherits a sand-cement or flowing screed laid weeks earlier by somebody else, over a slab laid months before that, and is asked to produce a surface that reads as one continuous plane across a room. The bed of adhesive between the two is thin - on modern thin-bed work it is a matter of a few millimetres, not the thick mortar beds of older practice - so the adhesive has almost no capacity to make up for a substrate that is out of tolerance. Flatness under the tile is the single thing that decides whether the finished floor is right.
Format has pushed that problem harder every year. Tiles that were once 300 mm square are now routinely 600 mm and 1200 mm on a side, and large slabs go further again. A long tile bridges any dip in the substrate rather than following it, so the same wave that would have been invisible under a small mosaic shows as lippage - one tile edge standing proud of its neighbour - on a large format. Lippage is what people feel through a shoe and see under a raking light, and it is the most common complaint on a tiled floor. The trade answers it in three ways: by preparing the substrate flat before any tile is opened, by achieving full and even support under the tile rather than dabs of adhesive at the corners, and by using levelling clips or wedges during setting on large formats to hold adjacent edges in the same plane until the adhesive has gone off. Bedding matters for strength as well as appearance. A tile supported only at its corners has an unsupported middle, and an unsupported middle under a wheeled load or a dropped tool is a cracked tile - which is also, on most projects, why the floor sounds hollow when it is tapped.
The other half of the trade is geometry and movement. Setting out is a design decision made on site: a floor is set out from the lines the eye actually reads - the doorway, the run of a corridor, the face of an island unit, the line of a shower former - so that cuts fall where nobody looks and full tiles fall where everybody does. Movement provision is the same kind of decision, made in advance and then defended. Tiled floors expand and contract with temperature and with the drying of what is underneath, and a large field of rigid tiles bonded to a substrate that is doing something different has to be allowed to move at its edges and at intervals across its area. Perimeter gaps get filled with a flexible sealant behind the skirting; field joints are formed as a designed detail. These joints are also the first thing squeezed out of a project when the programme tightens, because they cost time, they interrupt the pattern, and on the day of laying nothing appears to be wrong. The floor tents, cracks or debonds some months later, usually along a line that could have been drawn in advance. Like every finishing trade, tiling happens last, so it takes over whatever tolerance the preceding trades left and then gets walked on by everybody who comes back to finish their own snagging.
How does Porcelain & ceramic tiling work, step by step?
- 1
Step 1: Take over the substrate and prove it
Tiling starts with a handover, not with a tile. The substrate is checked for soundness by tapping and by eye, for cleanliness, for contamination by curing compounds, plaster droppings and paint, and for flatness against the tolerance the specification sets, measured with a straightedge across the room in several directions rather than in one convenient line. Moisture is measured where a moisture-sensitive adhesive or a floor covering over the tiling is involved, and the reading is compared with the limit the manufacturer of that system states - the measurement is taken and recorded, and the decision to proceed belongs to the designer and the manufacturer, not to the programme. Cracks in the base are mapped, because a live crack in a slab will find its way through a bonded tile unless it is dealt with. Any substrate that fails is reported in writing before work starts, because once tiles are down the tiler owns every defect underneath them.
- 2
Step 2: Prepare, level and prime
Preparation is the majority of the hours on a good tiled floor. High spots are ground off, laitance is removed from flowing screeds by mechanical sanding, loose material is taken up, and the whole area is vacuumed rather than brushed. Dips and falls are corrected with a levelling or smoothing compound applied over a primer suited to that substrate, and falls to gullies in wet areas are formed here rather than being chased later with adhesive thickness. Where the design calls for it, an uncoupling or crack-isolation membrane is bonded down so that small movements in the base are not transmitted straight into the tile bed, and tanking is applied and lapped in wet rooms before any tiling. Priming controls how fast the substrate draws water out of the adhesive, and the primer used is the one the adhesive manufacturer specifies for that combination.
- 3
Step 3: Set out from the lines the room actually reads
Setting out is done dry, on the floor, before anything is bonded. The tiler establishes the governing sightline - commonly the main door, the length of a corridor, the front of a run of units, or the centre of a feature - and works the grid out from it so that the cuts land at the least visible edges and no sliver cut lands at a threshold. Squareness is checked against the room rather than assumed, because rooms are rarely square, and the error is shared out across the field instead of accumulating in one corner. Chalk lines and a dry-laid first row confirm the decision, thresholds and level changes are resolved, and where the floor runs through several rooms the grid is carried through so the joints line up across the doorways. Setting out from a corner because it is convenient is the classic mistake, and it is only visible when the floor is finished.
- 4
Step 4: Plan the movement joints before the first tile is bedded
Movement provision is designed, marked on the setting out and then built. Perimeter joints run round the whole field, at columns, at upstands and wherever the floor abuts a different construction, and they are left open during tiling and filled with a flexible sealant afterwards, hidden by the skirting. Intermediate joints divide large fields and are placed to coincide with structural joints below, at doorway thresholds and at changes in substrate type or in the direction of the structure. Areas that carry underfloor heating or that see direct sun through glazing take more movement, not less. The width and spacing come from the designer and the specification and are set for the particular floor. The reason these joints are worth defending is simple: they are cheap to build and expensive to retrofit, and a field that has been tiled through without them is a field that will eventually relieve its own stress by lifting.
- 5
Step 5: Bed the tiles with full and even support
Adhesive is mixed to the manufacturer's instructions, applied to the substrate with a notched trowel sized to the tile and combed in one direction, and on larger formats it is also back-buttered so that the ribs collapse into a solid bed rather than leaving voids. The tile is placed and worked into the bed by sliding it across the ribs, and coverage is checked by lifting one tile early in the day and again as the work proceeds - the underside should show adhesive over effectively the whole face in wet and external areas, and generously and evenly elsewhere. Large-format tiles are handled with suction lifters and by two people, because a slab flexed in the middle while being carried cracks before it is laid. Levelling clips or wedges hold adjacent edges in plane while the adhesive sets, and joint width is held with spacers rather than by eye. Wet and heavily trafficked areas are the ones where hollow spots come back to bite, so those are the ones checked hardest.
- 6
Step 6: Grout, seal and finish the junctions
Grouting waits until the adhesive has developed enough strength for the tiles to be worked over, on the manufacturer's regime rather than on the programme's hope. Joints are raked clean of adhesive squeeze-up first, because grout over adhesive is a colour difference that shows the moment the floor dries. Grout is worked in fully, struck off diagonally and cleaned back in stages, and the whole field is finished with the same batch and the same water content wherever possible - variable water in the mix reads as patchy colour later. Movement joints and internal corners are not grouted; they take a flexible sealant. Porcelain is dense enough that it rarely needs sealing, but polished and unglazed porcelain, natural stone and some grouts do, and the sealer used is the one the manufacturer names for that tile. Thresholds, trims and edge profiles are fitted so that the floor terminates deliberately rather than in a raw cut edge.
- 7
Step 7: Protect it and keep it protected
A finished tiled floor is a work surface for everyone who comes after it, and on most projects several trades still have snagging to do in the room. Protection goes down as soon as the grout will take it - a breathable layer against the tile so that residual moisture is not trapped, then a hard board where any plant, access equipment or material storage will cross - and it is taped at the joints so it does not migrate and let grit underneath. Grit under a protection sheet is an abrasive pad. Wheeled access towers, scaffold feet and pallets get spreader boards. Protection is inspected and repaired rather than laid once and forgotten, and it stays down until the room is genuinely finished. On most projects the damage bill for a tiled floor is not made during tiling, it is made in the six weeks afterwards.
What are the benefits of Porcelain & ceramic tiling?
- Hard-wearing, dimensionally stable and effectively unaffected by water, which is why it is the default in wet rooms, kitchens and entrances
- Individual damaged tiles can be cut out and replaced without disturbing the rest of the floor, provided spares were kept
- Works over underfloor heating better than most finishes, because the tile conducts heat readily and does not mind the temperature cycling
- A very long service life with routine cleaning, and no need for periodic refinishing
- Large formats give a floor with few joints, which reads calmer and is easier to clean
- Wide range of appearance and slip characteristics available, so the same construction detail suits a bathroom, a plant room or a shopping centre
What are the limitations of Porcelain & ceramic tiling?
- Utterly unforgiving of substrate flatness - large formats show as lippage every deviation the base contains
- Rigid and brittle: a live crack in the base, or a floor deflecting more than the tile system was designed for, transmits straight through
- Movement joints are visually intrusive and are frequently omitted on site, and omitting them is a delayed failure rather than a saving
- Heavy, slow to lay compared with sheet and resilient finishes, and the preparation is often longer than the laying
- Cold and acoustically hard underfoot, so it needs a resilient layer or a rug where comfort or impact sound matters
- Repairs are visible - matching a batch of tile and a batch of grout years later rarely works
What is Porcelain & ceramic tiling best suited for?
What plant does Porcelain & ceramic tiling need?
- Straightedges, laser or optical level and long spirit levels for substrate survey and setting out
- Grinders, planers and industrial vacuums for preparation, with dust extraction and water suppression
- Mixing paddles and drills, gauging buckets and notched trowels sized to the tile format
- Wet cutting bench and hand-held wet saws, plus core drills for services penetrations
- Suction lifters, transport frames and large-format handling boards
- Levelling clips and wedges, spacers, grout floats, sponges and washboys, and hollowness sounding equipment
How is Porcelain & ceramic tiling quality-checked?
- Substrate handover record covering flatness against the specified tolerance, soundness, cleanliness and any moisture reading required
- Setting-out approved on the dry lay before bonding starts, with cut positions and thresholds agreed
- Movement joint layout marked and checked against the design before tiling, and inspected as built
- Adhesive coverage verified by lifting tiles at intervals through the works, with the results recorded
- Lippage and level checked with a straightedge and a raking light on completed areas, and joint widths checked for consistency
- Grout colour consistency, joint fill and sealant at all movement joints and internal corners inspected before protection goes down
More flooring & floor finishes methods
Next method
Engineered & solid timber