Riser modules and corridor racks
The services of a whole riser or corridor built and tested as one assembly, then dropped or slid into place.
Last updated 2026-09-05
What is Riser modules and corridor racks?
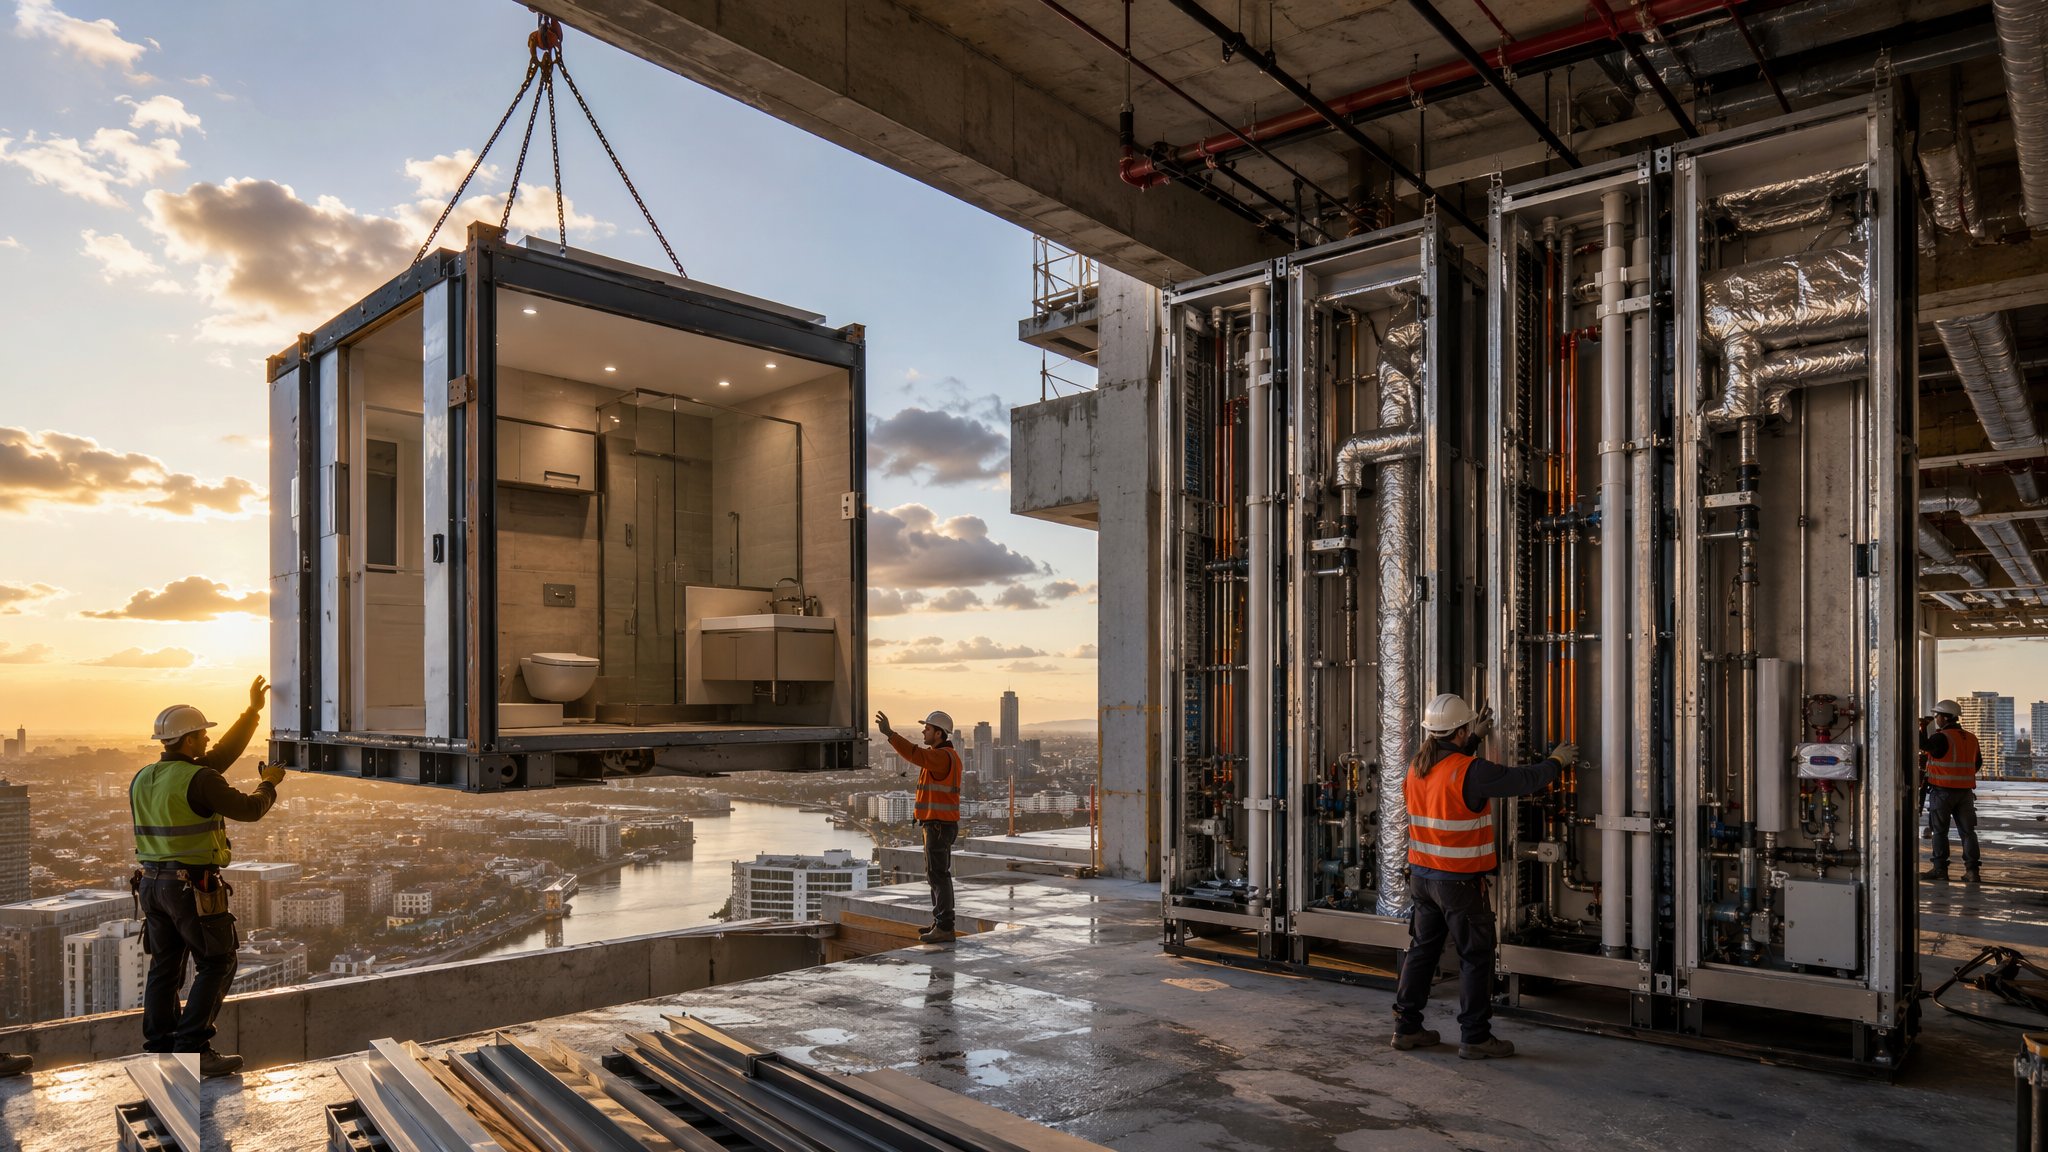
A riser module is a full storey height of vertical services - pipework, ductwork, containment, cable tray and often the supporting steelwork - assembled and tested as a single unit in a factory and installed into the riser shaft as one operation. A corridor rack is the same idea turned on its side: the horizontal run of services above a corridor ceiling built as a length of frame with everything already on it, then lifted or slid into position and connected end to end. Both replace weeks of overhead work by several trades in a confined space with a delivery, a placement and a set of joints. On a large hospital, laboratory, data centre or residential tower, the services in the risers and corridors are a substantial share of the total installation, and they sit squarely on the critical path.
The gain is not mainly in labour hours. It is in access and in sequence. Overhead installation in a riser or a tight corridor is slow, awkward and one of the least safe things a services team does - work at height, in a confined space, with heavy components lifted above shoulder height, and with each trade waiting on the one in front. Building the same assembly horizontally on a bench, then testing it before it goes anywhere near the building, converts that work into a factory operation and reduces the site activity to installation and jointing. Modules are commonly built with the joints deliberately positioned so that the connection between modules is at an accessible point rather than in the worst place on the run.
What the method demands in return is coordination of a rigour that most projects are not used to. A riser module or corridor rack only works if the services model is complete, correct and frozen at the point of manufacture, and if the building is built to the dimensions the module was made to. Every clash has to be resolved in the model, every connection point fixed, and every tolerance in the surrounding structure understood, because a rack built to a nominal dimension will not fit a shaft that has drifted. In practice this is where the method succeeds or fails. Where the design team, the services contractor and the frame contractor work to a single coordinated model with a real freeze date, the results are excellent. Where the model is still moving when the first module is made, the modules arrive and do not fit, and the project ends up doing the work twice.
How does Riser modules and corridor racks work, step by step?
- 1
Step 1: Decide early that the risers and corridors will be modular
This is a design-stage decision, not a procurement one. Modularising the risers changes the shaft sizes, the builder's work openings, the position of joints and the sequence of the frame. It also changes who does what and when. The decision has to be taken while the shaft and corridor geometry can still be adjusted to suit, which on most projects means it belongs to the same conversation as the structural grid.
- 2
Step 2: Model and coordinate the services completely
The full services arrangement is modelled and clash-resolved to a level of completeness that leaves nothing to be worked out on site. Every pipe, duct, tray, valve, support and access requirement is in the model, along with the builder's work openings and the structural interfaces. Maintenance access is designed in at this stage, because a rack that cannot be reached in service is a defect however well it was made. The model is then formally frozen, and the freeze is real - changes after it carry a cost and a programme consequence that the team agrees in advance.
- 3
Step 3: Split the runs into modules and design the joints
The coordinated services are divided into module lengths that can be made, transported, delivered and installed. The split points are chosen deliberately: at accessible positions, at natural breaks, and where the joint can be made and tested easily. Each module is designed as a self-supporting assembly with its own frame, its lifting or handling provisions, and its interface details at both ends. Getting the joints in sensible places is most of the design skill in this technique.
- 4
Step 4: Survey the building as built, not as drawn
Before manufacture, and again before installation, the actual shaft and corridor dimensions are surveyed. Concrete cores and steel frames are built within construction tolerances, and those tolerances accumulate. The module is made to fit the building that exists, with adjustment designed into the supports and the end connections to absorb the difference. Projects that skip this step discover the accumulated deviation with a module hanging on a crane hook.
- 5
Step 5: Build and test the modules in the factory
Modules are assembled horizontally on jigs at bench height. Pipework is welded or jointed, ductwork installed, containment and cable tray fitted, valves, dampers, meters, insulation and identification added, and the whole assembly is then pressure tested, leak tested and inspected before it leaves. Every module carries a unique identity and its own test record. Testing in the factory is the single largest quality gain in the method, because a pressure test in a workshop is a five-minute job and the same test in a live riser at level twelve is not.
- 6
Step 6: Deliver and install into the shaft or ceiling void
Modules are delivered to a sequence matched to the structure and craned, hoisted or slid into position as a planned handling operation designed by the appointed person. Riser modules are commonly lowered down the shaft from above and landed on prepared supports at each floor; corridor racks are commonly lifted into the ceiling void and slid along to their position. The route, the openings and the temporary support arrangements are all confirmed before the first module arrives.
- 7
Step 7: Support, joint and test the connections
Each module is fixed to its permanent supports, then the joints between modules are made. Only the joints are new site work, so they receive the full site testing regime - pressure and leak testing across the connections, inspection of every weld or mechanical joint, and confirmation that supports and anchors are as designed. Fire-stopping at every floor penetration is installed, inspected and recorded before anything is closed up, and on a riser this is a substantial item in its own right.
- 8
Step 8: Commission the system and hand over the records
The assembled system is flushed, filled, balanced and commissioned as a whole, and the factory test records and site joint records are combined into the handover documentation. Because each module is identified and its factory test recorded, the completed installation comes with far better traceability than a conventionally installed riser. Access panels and maintenance routes are checked against the design intent before the ceilings and riser doors go in.
What are the benefits of Riser modules and corridor racks?
- Removes weeks of overhead and confined-space installation work from the site programme
- Assemblies are built at bench height in a factory, which is safer and produces better workmanship
- Modules are pressure and leak tested before delivery, so only the joints are tested on site
- Site work reduces to placement and jointing, cutting the number of trades working in the riser at once
- Each module is identified and traceable, giving stronger handover records than a site-built riser
- Forces a level of design coordination that benefits the whole services installation
What are the limitations of Riser modules and corridor racks?
- Requires a complete, clash-free and genuinely frozen services model before manufacture
- Sensitive to as-built dimensional deviation - the shaft has to be surveyed, not assumed
- Late design changes are expensive and can strand modules that have already been made
- Needs shaft and corridor geometry designed for modular installation from the outset
- Delivery, storage and installation sequence are tightly interlocked with the frame programme
- Not worth the coordination effort on small or highly irregular services installations
What is Riser modules and corridor racks best suited for?
What plant does Riser modules and corridor racks need?
- Factory assembly jigs, welding and jointing stations, and lifting gear at bench height
- Factory pressure and leak test equipment with recording
- Survey equipment for as-built shaft and corridor dimensions before manufacture and before installation
- Transport frames sized to the module and matched to the delivery route
- Crane, hoist, gantry or shaft-mounted lifting arrangement under a plan by the appointed person
- Temporary supports, guides and skates for lowering or sliding modules into position
How is Riser modules and corridor racks quality-checked?
- Coordinated services model signed off and formally frozen before manufacture
- As-built survey of every shaft and corridor recorded and reconciled against the module dimensions
- Factory pressure, leak and inspection records held per module identity
- Delivery, route and opening dimensions confirmed before the first module leaves the factory
- Permanent supports, anchors and fixings inspected against the design at installation
- Site testing and inspection of every joint between modules, recorded by location
- Fire-stopping at every floor and wall penetration inspected and photographed before concealment
- Maintenance access verified against the design before ceilings and riser doors are closed