Needle beams and dead shores
Beams passed through a wall to pick up the load from above, carried down to the ground on shores, so the wall below can be cut away.
Last updated 2026-09-05
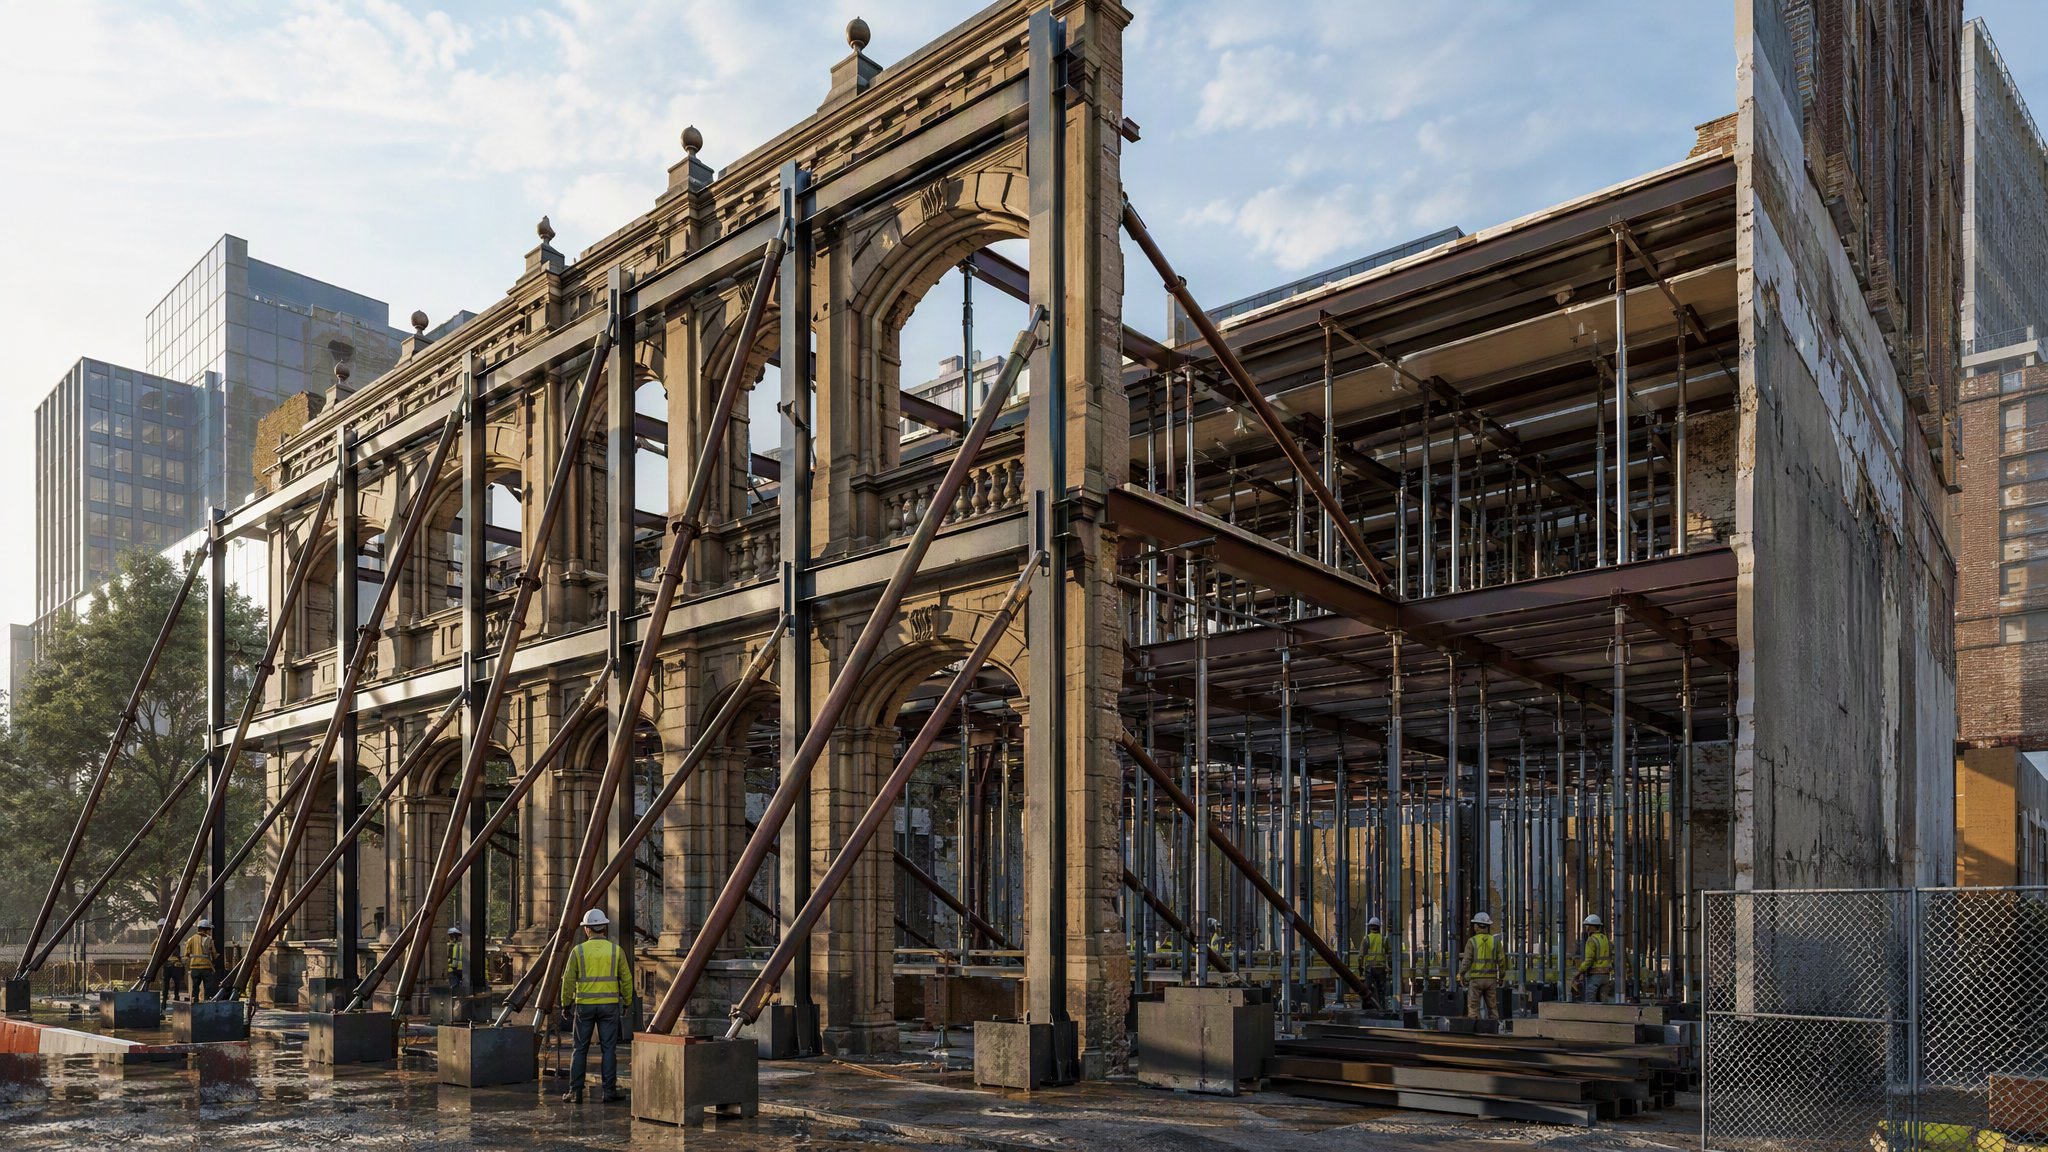
What is Needle beams and dead shores?
Needle beams and dead shores are the classic arrangement for taking the weight out of a wall so that something can be removed from underneath it. Holes are formed through the wall above the area of work and beams - the needles - are passed through them. Each needle picks up the masonry, and sometimes the floors and roof, sitting above it. The ends of the needles bear onto vertical shores, and those shores carry the load down past the working area to a foundation prepared to receive it. Once the load is on the needles and the shores, the wall below can be opened up for a new opening, a new beam, a new column or a repair, and the structure above never knows it happened. The system is temporary by definition. It exists only to hold the building still while the permanent work that will replace it is built.
The reason this arrangement is used so often is that it is direct. The load takes the shortest route it can find: out of the wall, into the needle, down the shore, into the ground. There is no reliance on the wall spanning over the opening, which is exactly what a wall that has just been cut is least able to do. That directness is also what makes the arrangement unforgiving. Every part of the route has to be sound. The masonry that bears on the needle has to be capable of doing so, the shore has to be straight and properly seated top and bottom, and the ground or slab under it has to take what arrives without settling. If any one of those is weaker than assumed, the load finds another path, and on most projects that path runs through the part of the building nobody looked at.
None of this is decided on site. The temporary works designer establishes what is being carried, works out where the needles go and how the load reaches the ground, and produces a design that is checked before it is issued. The temporary works coordinator makes sure the design exists, that it has been checked, that it is on the register, and that the work in front of it matches the drawing. On most projects the erected arrangement is inspected and signed off by a competent person before any load is transferred, and a permit to load is issued before the wall below is touched. It is inspected again through the works, because dead shores can be knocked by plant, loosened by drying and shrinkage or quietly modified by somebody who needed the space. Removal is treated as a design activity in its own right and is not started until the permanent structure is complete and has been accepted as able to take the load.
How does Needle beams and dead shores work, step by step?
- 1
Step 1: Establish what the wall is actually carrying
The first task is to find out what the structure does, not what the drawings say it does. That means opening up where necessary to establish wall construction and thickness, how the floors and roof bear, whether there are hidden openings, chases or flues, and what the wall stands on. Older buildings rarely match their record drawings and frequently carry loads by routes nobody intended. Alterations, previous openings and made-good repairs all change the answer. The survey feeds the temporary works designer, and where the survey cannot answer a question the designer is told that rather than left to assume.
- 2
Step 2: Design the support and have it checked
The temporary works designer decides the arrangement: where the needles pass through, how many there are, what carries them, and how the load reaches a foundation that can take it. The design covers the whole load path, including the part below ground, and it covers the condition of the structure it is bearing on. It is then independently checked to a level of check set by the temporary works coordinator according to the risk. The design and the check are recorded on the temporary works register, and the arrangement is not built to anything other than the checked design.
- 3
Step 3: Prepare the bearings top and bottom
A shore is only as good as what it stands on and what it bears against. Foundations for the shores are prepared as the design requires, which commonly means checking the existing slab is capable or forming a spread bearing where it is not. Where the shores land in a basement or on a suspended floor, the load has to be carried on down through that structure too, which is a design question and not a site one. At the top, the masonry that will bear on the needles is examined and made good where it is loose or damaged. Bearing surfaces are made square and full, because a partial bearing concentrates load exactly where the structure is weakest.
- 4
Step 4: Form the needle holes carefully
The holes through the wall are formed in the positions on the drawing and no others. They are cut rather than knocked through, so that the masonry around them is disturbed as little as possible, and the surrounding fabric is supported as required by the design while the holes are formed. Cutting is sequenced so that the wall is never left with more removed than the design allows. Where the fabric turns out to be worse than the survey suggested, the work stops and the designer is asked, because a needle bearing on masonry that cannot carry it is a hazard rather than a support.
- 5
Step 5: Install the needles and shores and take up the load
The needles are placed, the shores are erected under them plumb and true, and the assembly is tightened until it is bearing. The transfer of load is a controlled operation carried out to the designer's requirements, in the order the design sets, and it is done gently. Snatching load onto a shore is how bearings crush and how walls crack. The arrangement is braced against the sideways forces that would otherwise buckle it, and everything is left tight, seated and properly connected before anybody moves on.
- 6
Step 6: Inspect, permit and only then cut
The completed arrangement is inspected by a competent person against the design and signed off. On most projects a permit to load is then issued, and only after that is the wall below opened up. Nobody works beneath a temporary support that has not been signed off, and nobody assumes it has been because it looks finished. If the arrangement differs from the drawing in any respect it is referred back to the designer before it is used, however small the difference appears.
- 7
Step 7: Monitor and re-inspect through the works
Dead shores are inspected at the frequency the temporary works coordinator sets, after any event that could have disturbed them, and whenever anything changes around them. Movement of the structure above is monitored where the design calls for it, with trigger levels set by the designer and a named person who receives the readings. Wedges loosen, timbers shrink, props get knocked by plant, and somebody always wants to move one to get a delivery past. Every one of those is a change to a checked design and is treated as such.
- 8
Step 8: Strike only when the permanent work can carry the load
Removal is designed, not improvised. The permanent structure that replaces the temporary support has to be complete, has to have gained the strength the permanent works designer requires, and has to have been accepted before load is transferred back to it. The sequence for striking is set by the temporary works designer and released under permit. Load is let down gradually and the structure is watched while it takes it. The arrangement is then dismantled, the needle holes are made good, and the entry is closed out on the temporary works register.
What are the benefits of Needle beams and dead shores?
- Takes load out of a wall directly, without relying on the wall to span over the area being cut
- Allows openings, beams and columns to be formed in a loaded wall while the building above stays in service
- The load path is short, visible and easy for a competent person to inspect
- Suits the irregular fabric of older buildings, where the arrangement can be tailored to what is actually there
- Uses familiar components and skills, so competent crews are widely available
- Can be combined with raking or flying shores where the wall also needs lateral support
What are the limitations of Needle beams and dead shores?
- Needs space on both sides of the wall for shores and for their foundations, which is often not available
- Depends entirely on the masonry above being capable of bearing on the needles, which older fabric may not be
- The shores obstruct the working area and the routes through it for the whole period the support is in place
- The load has to be taken all the way to competent ground, which can mean carrying it through basements and suspended floors
- Sensitive to disturbance - a shore knocked out of plumb or a bearing that has loosened is a serious defect
- Forming the needle holes disturbs the very fabric the support relies on, so the survey has to be right first time
What is Needle beams and dead shores best suited for?
What plant does Needle beams and dead shores need?
- Steel or timber needle beams and the packing and bearing components the design specifies
- Proprietary or fabricated vertical shores with their bracing and connections
- Materials for spreading load at the foundations, as required by the design
- Controlled cutting equipment for forming the needle holes with minimum disturbance
- Lifting equipment appropriate to the components and the access
- Monitoring equipment where the design calls for movement to be measured
How is Needle beams and dead shores quality-checked?
- Structural survey completed and reported to the temporary works designer before design
- Design produced, independently checked and recorded on the temporary works register
- Bearings and foundations prepared and inspected before any component is installed
- Erected arrangement inspected by a competent person against the design and signed off
- Permit to load issued before load is transferred and before cutting starts below
- Re-inspection at the set frequency and after any disturbance, with all changes referred back to the designer
- Striking carried out to a designed sequence, under permit, only after the permanent works are accepted
More propping, façade retention and temporary support methods
Next method
Raking shores