FM-class free movement floors
The floor for trucks that go anywhere - flatness judged across the whole slab rather than along a line.
Last updated 2026-09-06
What is FM-class free movement floors?
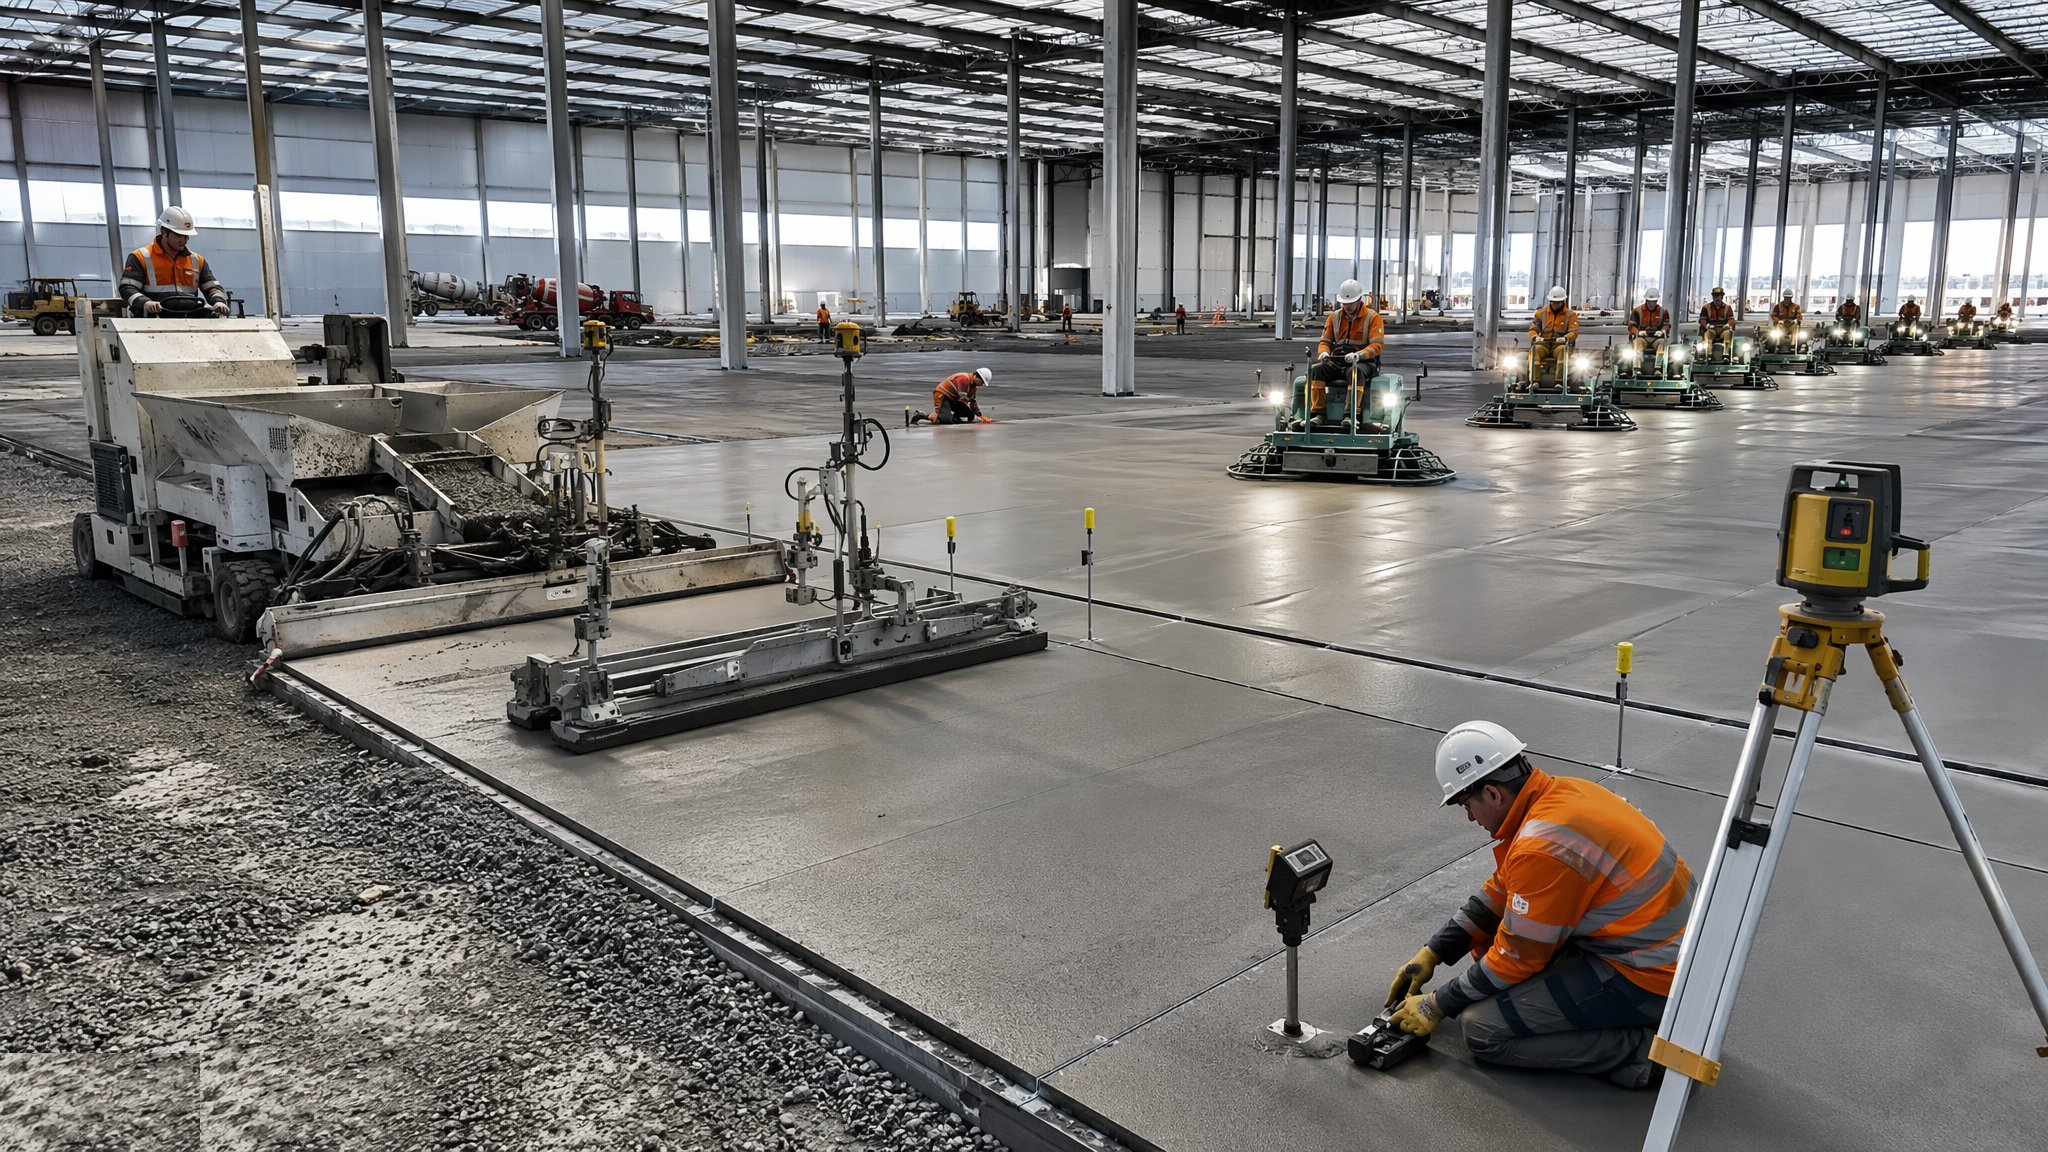
Free movement floors, generally referred to in the industry as FM-class floors, are the standard for warehouses where handling equipment can travel in any direction. Counterbalance forklifts, reach trucks, pallet trucks and pedestrians roam the open floor, so there is no fixed path to measure along and no way to predict where a wheel will run. Flatness therefore has to be acceptable everywhere. The assessment reflects that: the floor is judged over the whole area, on a grid of measurements taken across the slab, rather than along the specific wheel tracks of a machine. The relevant term is free movement precisely because the traffic is free to move.
FM-class covers the great majority of warehouse and industrial floors - conventional wide-aisle storage, cross-dock sorting areas, manufacturing halls, transit sheds and the open areas of otherwise automated facilities. The performance required is real but achievable with good workmanship and normal floor plant: a laser screed, a competent concrete supply, disciplined finishing and proper curing will produce it. That is the fundamental difference from defined movement work. An FM-class floor is a well-built floor. A defined movement floor is a precision element that needs different methods entirely.
What goes wrong on FM floors is rarely the general flatness of the panels - it is the joints, the edges and the curling. Wheels crossing a joint hundreds of times a day hammer any lip or any unsupported edge, and once a joint arcs breaks down it deteriorates fast. Slabs curl at their edges as the top surface dries faster than the bottom, lifting the perimeter of each panel and creating exactly the step a wheel finds. Poor curing makes curling worse and makes the surface softer. The floor specialist and the structural engineer set the slab design, the joint arrangement, the reinforcement approach and the acceptance criteria against the actual traffic and racking layout, and none of those decisions belong to the pour team.
How does FM-class free movement floors work, step by step?
- 1
Step 1: Establish the traffic and the racking before designing the floor
The floor cannot be designed without knowing what will run on it and what will stand on it. That means the truck types and their wheel arrangements, the traffic intensity, the racking layout with its leg positions, whether block stacking will be used, and any point loads from equipment or mezzanines. The floor specialist and the structural engineer take those inputs and set the slab design. Where the occupier is unknown, the developer states a design basis aimed at the intended market and it is recorded, so that a future occupier knows what the floor was built to take.
- 2
Step 2: Prepare and prove the sub-base
A ground bearing slab is only as good as what it sits on. The sub-base is placed, compacted and proof-rolled to a uniform stiffness, because variation in support shows up as differential movement in the slab above. Levels are surveyed tightly - an uneven sub-base means variable slab thickness, which means variable shrinkage and variable behaviour. Underslab drainage, ducts and services are all completed and signed off first, since nothing can be added afterwards. A slip membrane is normally laid to let the slab shrink freely rather than dragging on the sub-base.
- 3
Step 3: Set out the joints against the racking and the columns
Joint layout is a design decision made by the floor specialist with the structural engineer, coordinated with the column positions, the racking runs and the traffic routes. Joints are kept out of heavily crossed areas where the layout allows, and isolation details are provided around columns, bases and any penetration so that the slab can move without cracking from those restraints. This is why the racking layout has to be known first: a joint layout drawn without it will place joints in the worst possible places.
- 4
Step 4: Control the concrete supply and the pour rate
A large floor pour depends on continuous, consistent concrete. Supply is arranged so that deliveries arrive at the rate the finishing team can work, with contingency for a plant breakdown, and the mix is consistent load to load because variation between loads shows up in the finish. Weather is planned around: pouring in high wind, strong sun or near-freezing conditions changes the surface behaviour and needs specific measures agreed in advance. A pour that stops halfway because the concrete stopped arriving leaves a cold joint where none was designed.
- 5
Step 5: Place, level and consolidate
Concrete is placed and struck off, normally with a laser screed, working to the levels set out. Consolidation is done properly and consistently, because voids and poor compaction under the surface become failures later. Reinforcement, whether fabric, bar or fibre, is positioned as designed and its position is checked during the pour rather than assumed - reinforcement lying on the sub-base is doing nothing. The floor specialist controls the sequence and the rate so that each area is finished at the right time.
- 6
Step 6: Finish the surface at the right moment
Power floating and power trowelling are timed against the concrete, not the clock. Too early and the surface is worked while it is still bleeding; too late and it cannot be closed. Finishing to the required surface regularity and to the required abrasion resistance is a skill and it depends on an experienced team reading the slab. Any surface treatment or dry shake topping is applied at the point in that sequence the floor specialist specifies. This is the stage where the difference between an acceptable floor and a complained-about floor is actually made.
- 7
Step 7: Cure deliberately and protect the result
Curing controls how much moisture leaves the top of the slab relative to the bottom, and that difference is what drives curling. Curing is applied promptly and maintained for the period the floor specialist sets, using the method they specify. The floor is then protected from following trades, from plant tracking over it, from spillage and from point loads until it has gained strength. A great deal of damage on warehouse floors happens in the fortnight after the pour, done by other trades to a slab nobody was guarding.
- 8
Step 8: Survey, accept and hand over the record
The finished floor is surveyed against the agreed criteria within the agreed window, and the results are reviewed with the floor specialist and the structural engineer. Any remedial work is agreed on the basis of that survey rather than on impressions. The as-built joint layout, the design basis, the survey results and the maintenance requirements are handed over together, because a future occupier changing the racking needs to know what the floor was designed for and where the joints are.
What are the benefits of FM-class free movement floors?
- Suits traffic travelling in any direction, so the floor does not constrain the layout
- Achievable with conventional floor plant and normal good workmanship
- Lower cost and shorter programme than a defined movement floor
- Allows the racking arrangement to be changed later without the floor becoming the limitation
- Well understood by the whole supply chain, so quality expectations are consistent
- Suits mixed uses - storage, sorting, manufacturing and pedestrian areas on one slab
What are the limitations of FM-class free movement floors?
- Not accurate enough for very narrow aisle or automated equipment running on fixed paths
- Joints remain the weak point and deteriorate under repeated crossing
- Curling at panel edges is difficult to eliminate entirely and creates steps at joints
- Highly weather-sensitive during pouring, finishing and curing
- Damage by following trades before the slab has hardened is common and hard to police
- Remedial work on a finished floor is disruptive and rarely fully restores the surface
What is FM-class free movement floors best suited for?
What plant does FM-class free movement floors need?
- Laser screed for placing and levelling large areas to consistent level
- Ride-on and walk-behind power floats and trowels for finishing
- Concrete pumps and dumpers for distribution across large pours
- Vibrating beams and pokers for consolidation at edges and around penetrations
- Joint cutting saws and joint sealing equipment
- Survey equipment for sub-base levels and for the finished floor assessment
How is FM-class free movement floors quality-checked?
- Sub-base levels, compaction and uniformity proven and recorded before the membrane goes down
- Joint layout formally coordinated with the racking layout and column positions
- Reinforcement position checked during the pour, not assumed from the delivery note
- Concrete consistency monitored load to load, with a documented response to variation
- Curing method and duration applied as specified and recorded
- Finished floor surveyed within the agreed window and results reviewed with the designer before acceptance
More high-tolerance warehouse floor slabs methods
Next method
DM-class defined movement floors