Large-bay and jointless slabs
Very large pours with far fewer joints - better under wheels, but shrinkage has to be managed rather than accommodated.
Last updated 2026-09-06
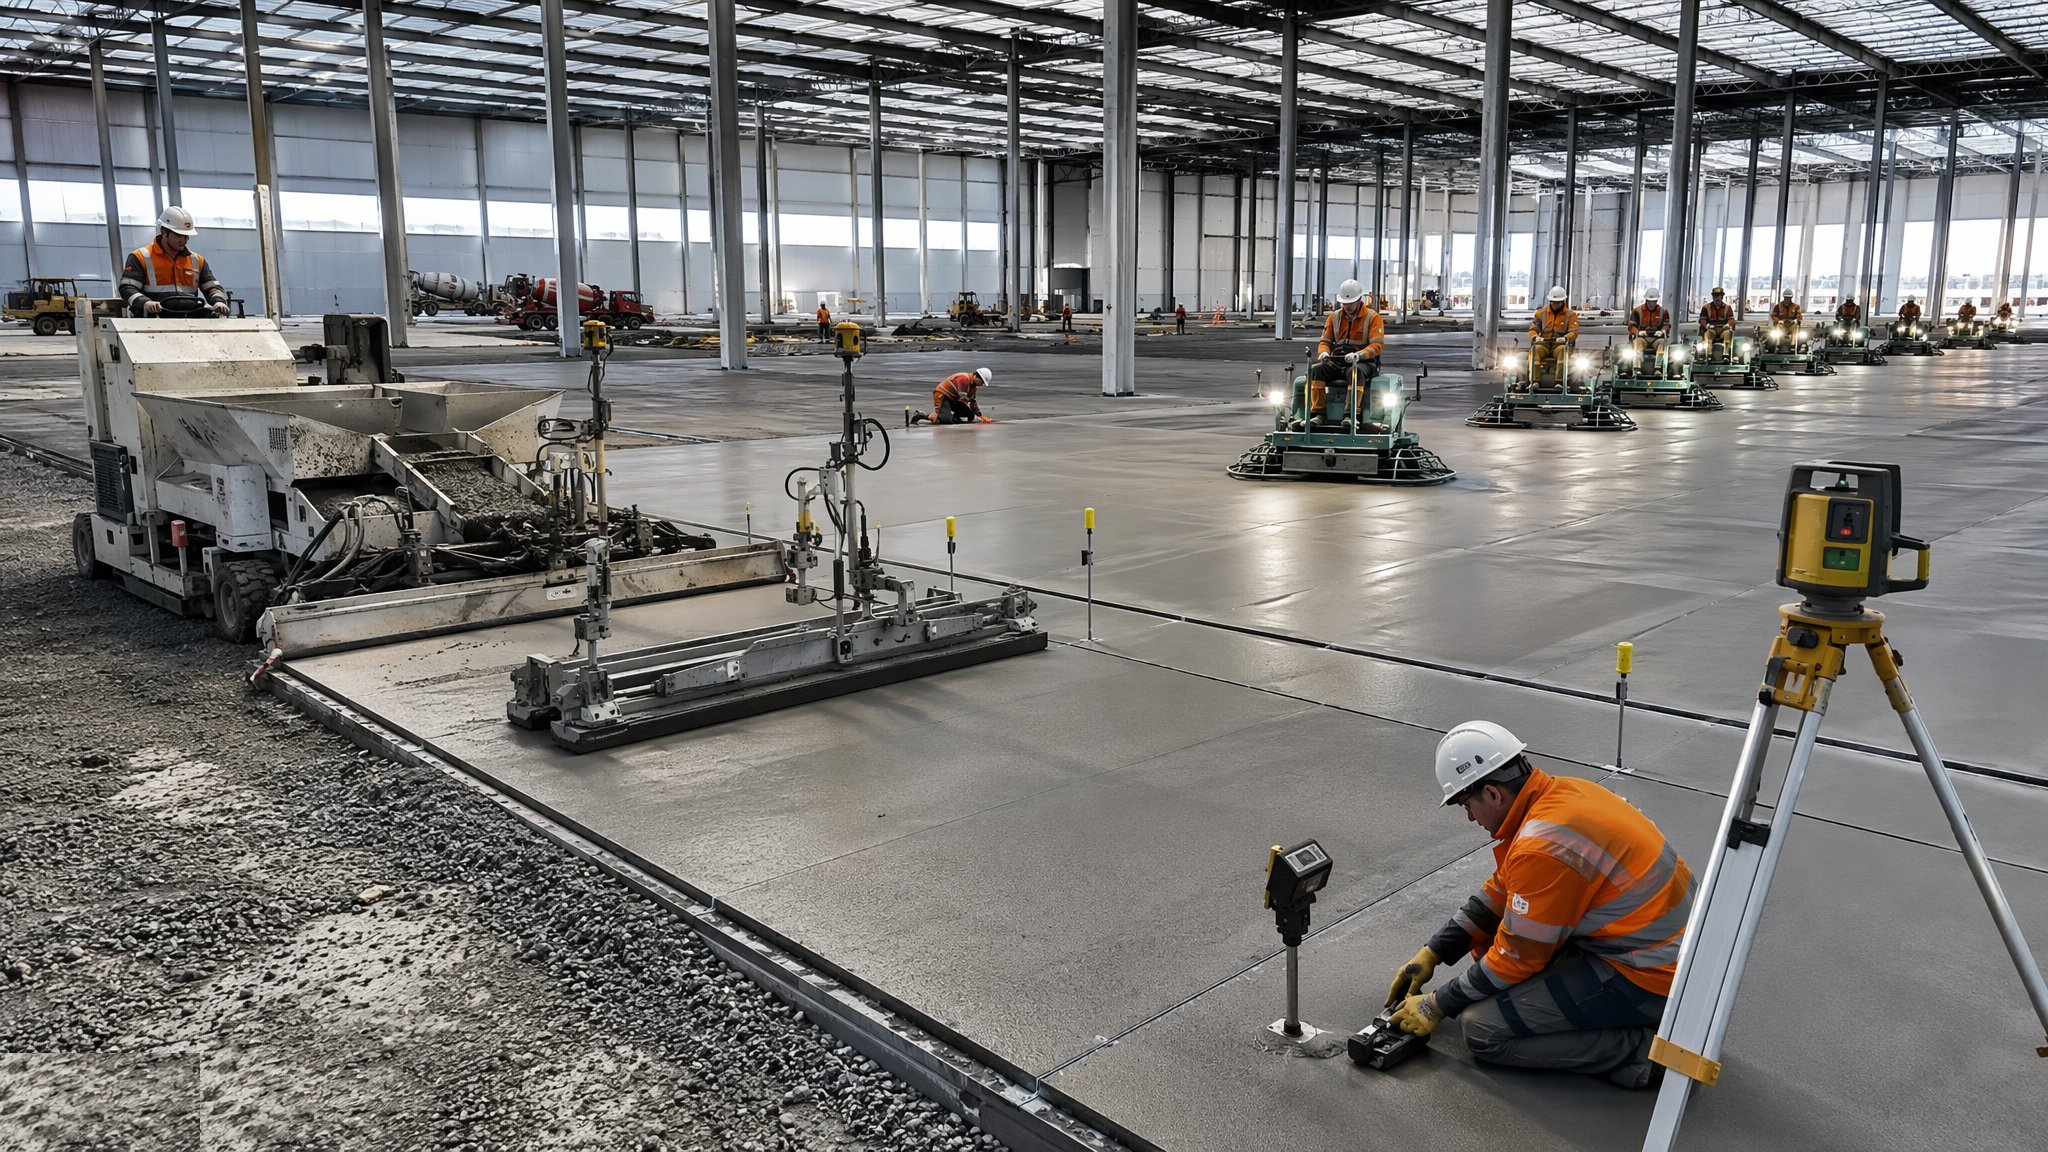
What is Large-bay and jointless slabs?
Large-bay and so-called jointless floors attack the problem that dominates warehouse floor performance: joints. Instead of building the slab as many narrow strips, the floor is poured in very large panels - sometimes covering a substantial part of a warehouse in a single day - with far fewer joints between them. The term jointless is a slight exaggeration; there are still joints, but there may be a small fraction of the number a strip-built floor would have. Fewer joints means fewer discontinuities for wheels to cross, fewer edges to curl and spall, and dramatically less joint maintenance over the life of the building.
That matters most where traffic is intense and where equipment is sensitive to surface discontinuities. Very narrow aisle operations, automated handling and high-throughput distribution all suffer disproportionately from joints, so a jointless approach is commonly chosen for those buildings even though it costs more to construct. It also produces a floor that is easier to clean, easier to seal and less prone to the progressive edge breakdown that turns a serviceable floor into a maintenance liability after a few years of heavy use.
The difficulty is that shrinkage does not go away because the joints did. A large panel of concrete shrinks as it dries, and if there is no joint for that movement to happen at, the movement has to be controlled some other way - through the reinforcement approach the structural engineer and the floor specialist select, through the mix design, through curing, and through detailing that lets the slab move relative to whatever restrains it. Restraint is the enemy: a large slab cast tight against a column base, a wall or a pit will crack from that restraint outwards. The design of a jointless floor is genuinely a specialist engineering exercise, and it is unforgiving of shortcuts in curing or in workmanship. It also demands large-scale logistics on the day - a very large pour needs uninterrupted concrete supply, a big finishing team, and a contingency plan if either fails.
How does Large-bay and jointless slabs work, step by step?
- 1
Step 1: Confirm that the operation justifies the approach
Jointless floors cost more and demand more, so the case has to be real: intense random traffic, very narrow aisle or automated equipment, a long lease where joint maintenance would accumulate, or an operation where floor downtime is unacceptable. The floor specialist, the structural engineer and the operator assess it together against a strip-built alternative. Where the traffic is moderate and the building speculative, the extra cost may not be justified, and saying so early is better than discovering it during value engineering.
- 2
Step 2: Design the shrinkage control, not just the slab
With few joints, shrinkage becomes the governing design problem. The structural engineer and the floor specialist select the reinforcement approach, the mix characteristics and the joint arrangement that together control it, and they detail every point of restraint - column bases, walls, pits, penetrations, dock edges - so that the slab can move relative to them. This is where jointless floors succeed or fail, and it is a design decision in every respect. Nothing about the shrinkage strategy is adjusted on site.
- 3
Step 3: Plan the pour as a logistics operation
A very large pour needs concrete arriving continuously for many hours, a finishing team big enough to work the whole area at the right time, pumps or distribution plant positioned to reach every part of the panel, lighting for work that will run into the evening, and a written contingency for a plant breakdown or a road closure. Weather windows are chosen deliberately. The plan is rehearsed with the concrete supplier before the day, because a large pour that stops halfway creates exactly the unplanned joint the whole method exists to avoid.
- 4
Step 4: Prepare a uniform, low-friction sub-base
The sub-base is compacted to uniform stiffness and surveyed, with underslab services complete. Because the slab has to shrink freely across a very large area, the slip layer matters more here than on any other floor type - friction between the slab and the base is restraint, and restraint over a large panel generates cracking. The membrane is laid carefully and protected from damage during reinforcement fixing.
- 5
Step 5: Fix reinforcement and isolate every restraint
Reinforcement is placed as designed and its position is verified before and during the pour. Isolation details around columns, bases, walls and penetrations are installed and inspected, because a single missed isolation detail can crack a whole panel. This inspection is done formally and signed off before concrete is ordered - once the pour starts there is no opportunity to fix it.
- 6
Step 6: Place and level continuously across the panel
Concrete is placed and struck off, normally by laser screed, working across the panel at a rate that keeps the whole area at a similar stage of set so that it can be finished as one. Consolidation is thorough and consistent. Concrete consistency between loads is monitored throughout, because on a pour of this size a change in the mix partway through produces a visible and permanent difference in the finished surface.
- 7
Step 7: Finish as one operation and cure without compromise
The finishing team works the whole panel through float and trowel stages, timed to the concrete. Curing is applied promptly and maintained for the full period specified - on a jointless floor curing is not a finishing detail, it is part of the shrinkage control strategy, and cutting it short undoes the design. The floor is then protected absolutely from following trades and plant until it has gained the strength the floor specialist requires.
- 8
Step 8: Cut and seal the few joints, survey and record
Where induced joints are designed they are cut at the timing specified, since cutting late allows random cracking and cutting early damages the surface. Joints are sealed once early shrinkage has largely occurred. The floor is surveyed against the agreed criteria and reviewed with the designer, and the as-built layout, the design basis and the maintenance requirements are handed over. The occupier is told what the floor was designed for, because a jointless floor loaded outside its design basis has no joints to relieve the resulting stress.
What are the benefits of Large-bay and jointless slabs?
- Far fewer joints, so far fewer places for the floor to deteriorate under traffic
- Much lower joint maintenance cost over the life of the building
- Better surface for very narrow aisle and automated equipment
- Fewer curled edges and fewer steps for wheels to hammer
- Easier to clean and to seal, which suits food and pharmaceutical operations
- Faster area coverage on site once the pour is under way
What are the limitations of Large-bay and jointless slabs?
- Higher construction cost and a more demanding design process
- Shrinkage must be actively controlled rather than accommodated at joints
- Any missed isolation detail at a restraint can crack a whole panel
- Requires uninterrupted concrete supply and a large experienced finishing team
- Highly sensitive to curing discipline and to weather on the day of the pour
- A failure part way through a large pour creates an unplanned joint in a bad place
What is Large-bay and jointless slabs best suited for?
What plant does Large-bay and jointless slabs need?
- Laser screed and large-capacity placing equipment for continuous coverage
- Multiple concrete pumps and a co-ordinated delivery fleet
- Ride-on power floats and trowels in sufficient number to finish the whole panel
- Temporary lighting and site power for pours running past daylight
- Curing equipment and coverings sized for very large areas
- Joint cutting saws timed to the concrete, and sealing equipment
How is Large-bay and jointless slabs quality-checked?
- Shrinkage control strategy and restraint isolation details approved by the designer before the pour
- Reinforcement position and every isolation detail formally inspected and signed off pre-pour
- Slip membrane continuity checked after reinforcement fixing
- Concrete consistency monitored load to load throughout the pour with a documented response plan
- Curing applied promptly and maintained for the full specified period, and recorded
- Induced joints cut within the specified timing window and the floor surveyed against agreed criteria