Masonry cavity walls
Two leaves, a cavity and a tie every 900 mm - the wall Britain learned to trust.
Last updated 2026-09-05
What is Masonry cavity walls?
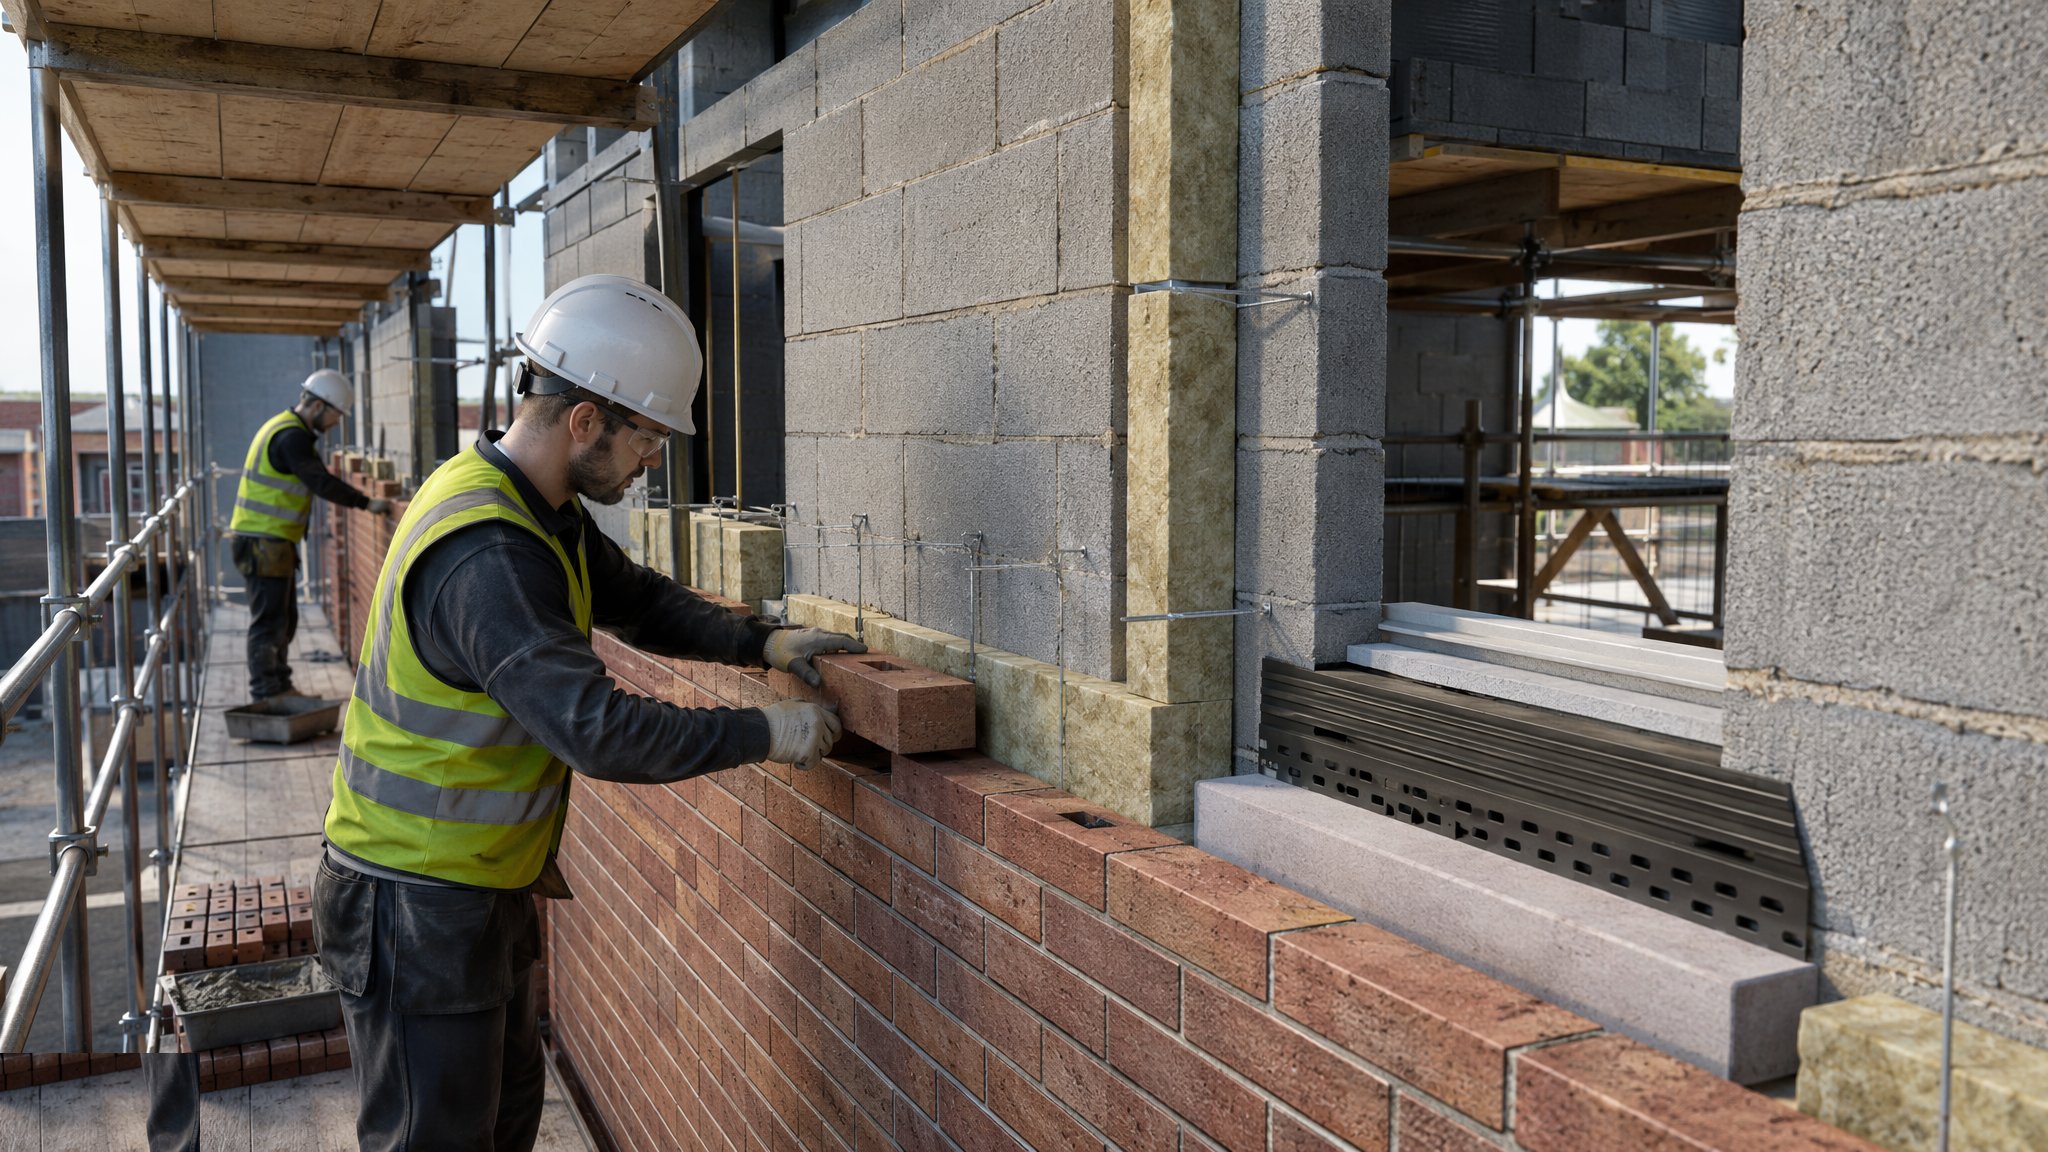
The masonry cavity wall is the default structure of low-rise housing: an inner leaf of aerated or dense aggregate blockwork carrying the floors and roof, a cavity of 50–150 mm holding full- or partial-fill insulation, and an outer leaf of facing brickwork that sheds the weather and carries nothing but itself. The two leaves are stitched together with stainless steel wall ties at designed densities - typically 2.5 ties per square metre, more around openings - and the whole assembly stands on the foundation with a DPC separating it from the ground. Done properly it is warm, quiet, repairable and good for a century; done carelessly it produces damp patches, bulging leaves and cracking that nobody can quite explain.
The cavity is the clever part and the part that fails. It interrupts the path for driven rain, holds the insulation, and must stay clean and drained for the life of the building. Mortar snots dropped on wall ties bridge water across to the inner leaf. Cavity trays over openings and at abutments intercept whatever crosses and expel it through weep holes - which only work if they are actually formed and left open. Every lintel, every tray, every weep is a small decision that decides whether the wall is dry in year ten.
Thermal performance has moved the cavity wall a long way from its origins. A modern full-fill cavity with 150 mm of mineral wool and a low-conductivity inner block achieves wall U-values around 0.18 W/m²K, meeting current energy standards without exotic detailing. The trade has also industrialised: silo mortar with guaranteed consistence, factory-cut insulation batts, and proprietary trays and closers. But the fundamental truth is unchanged - the wall is built one course at a time by a person with a trowel, and the quality is in their hands and in the supervisor's mirror at the back of the cavity.
Process storyboard
Step 1 of 6 - slide through the snapshots.
STEP 1
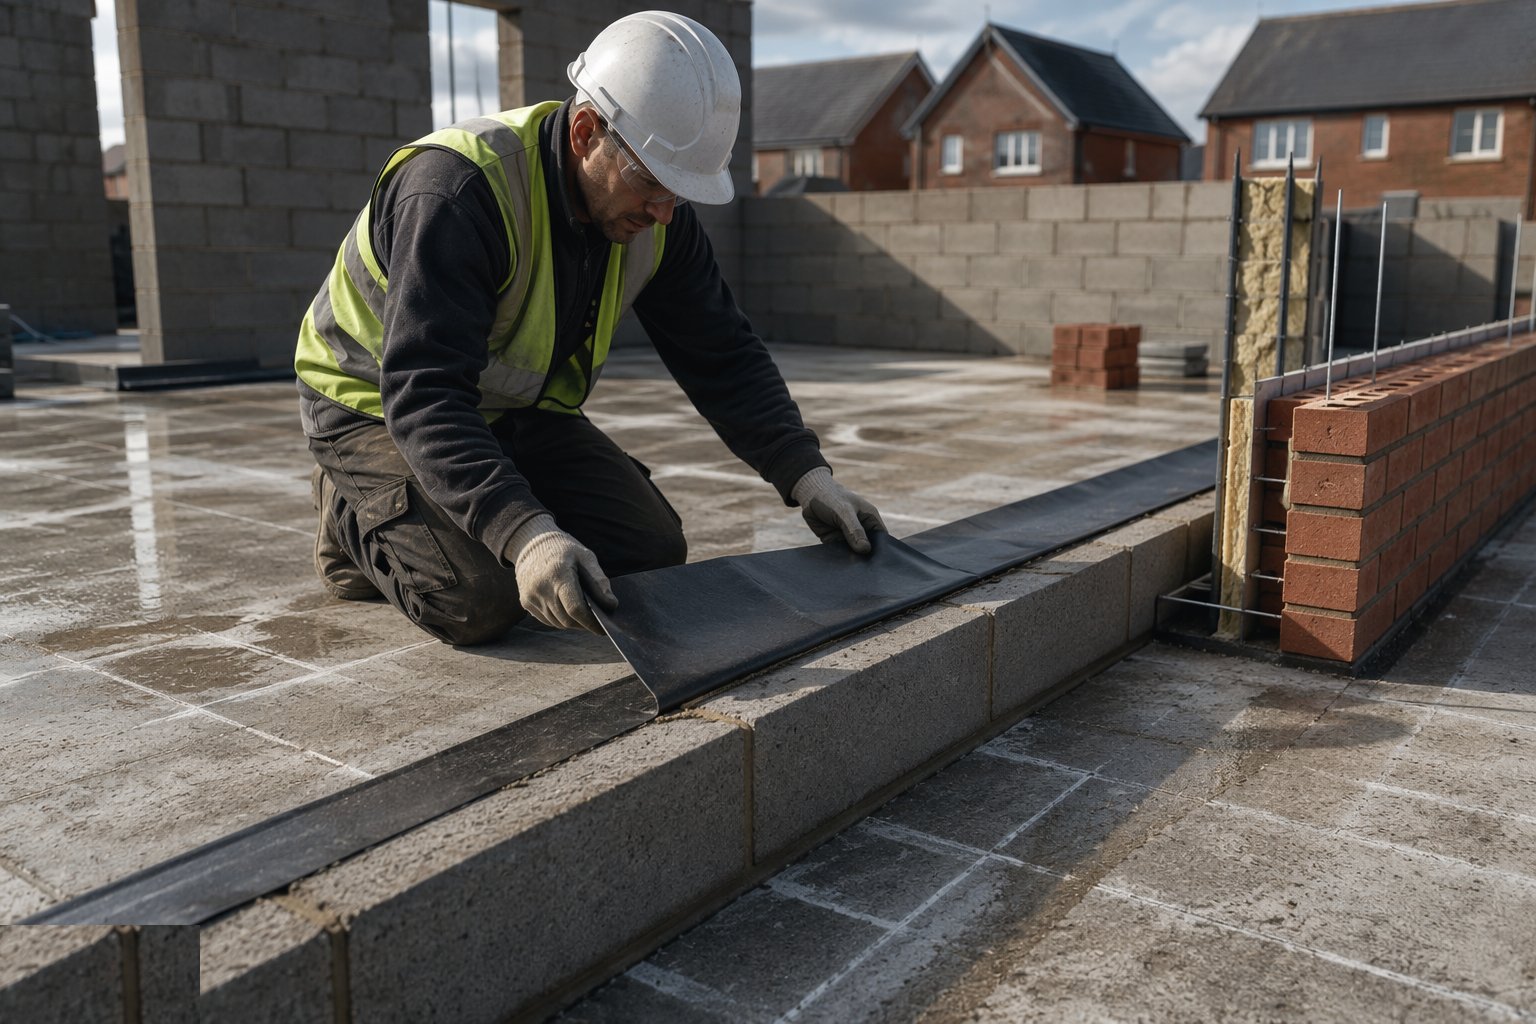
Set out and bed the DPC
Wall lines are marked on the slab or foundation from the setting-out drawings, with openings and pips for doors and windows located to the millimetre.
How does Masonry cavity walls work, step by step?
- 1
Step 1: Set out and bed the DPC
Wall lines are marked on the slab or foundation from the setting-out drawings, with openings and pips for doors and windows located to the millimetre. The DPC is bedded on a full mortar bed at the base of both leaves, lapped at joints and linked to the slab DPM - the ground-moisture defence must be continuous around the whole perimeter. Blocks and bricks are checked for type and strength class against the specification before a single unit is laid.
- 2
Step 2: Raise the inner leaf in lifts
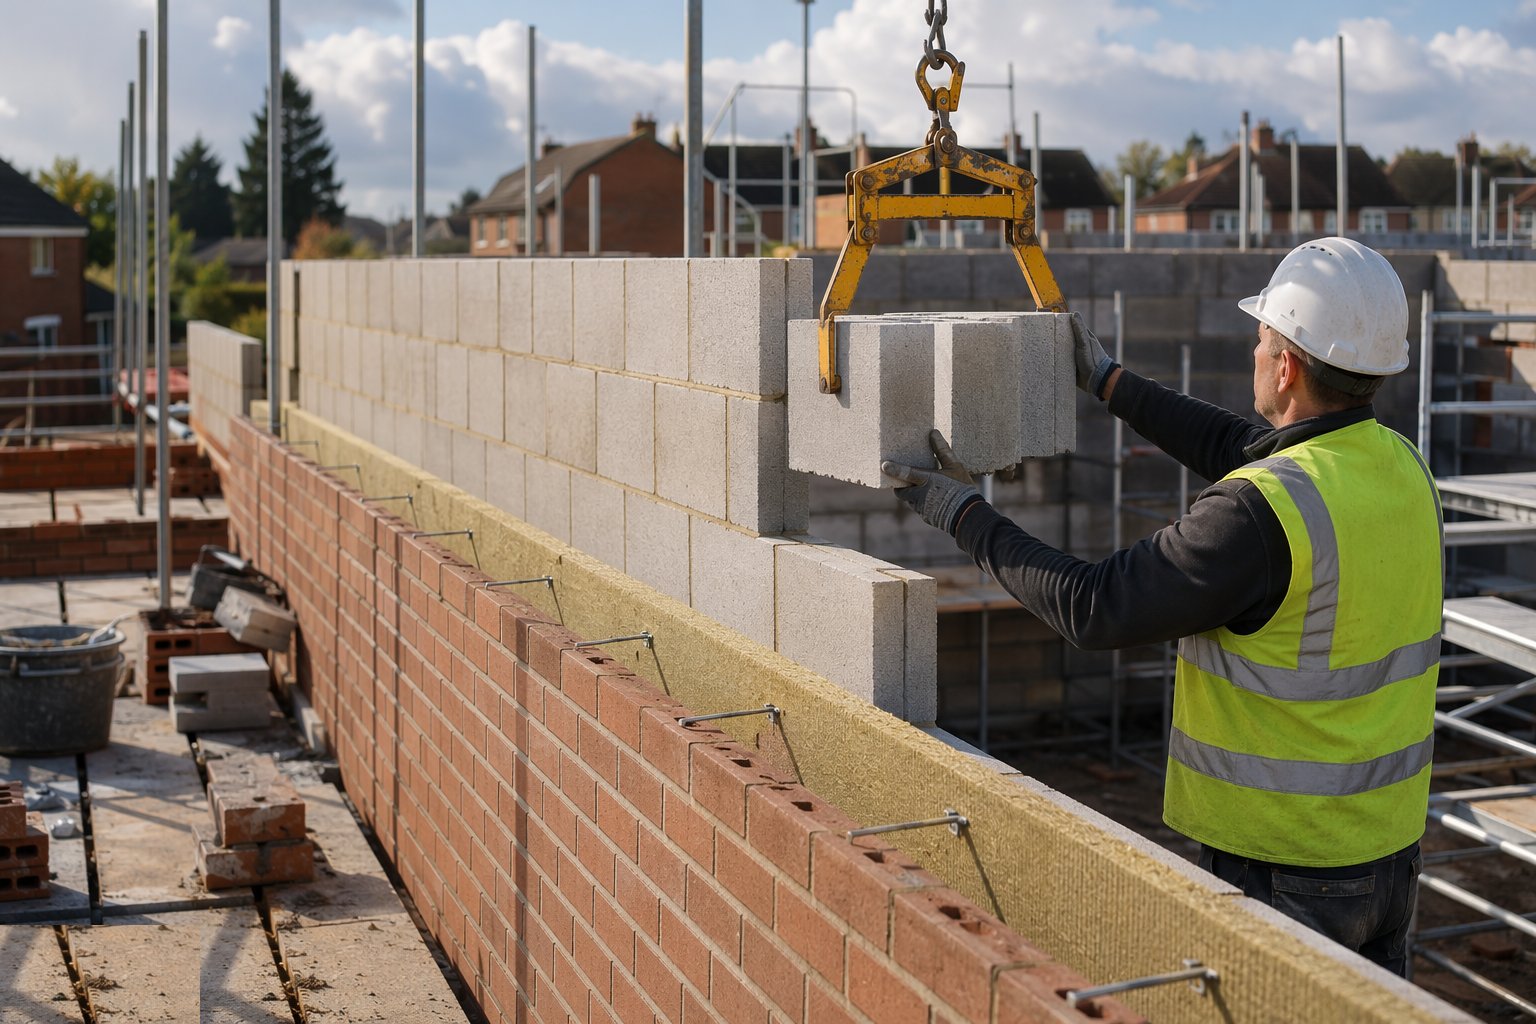
The structural inner leaf rises in lifts of roughly 1.2–1.5 m - a comfortable working height off trestles or the scaffold lift. Bed joints are fully filled, perpends buttered properly, and courses kept level and plumb off gauged corner profiles. Blockwork is the datum for everything that follows: floors, stairs and roof all bear on it, so cumulative level error is checked at every lift against a datum.
- 3
Step 3: Hold the cavity clean and set the ties
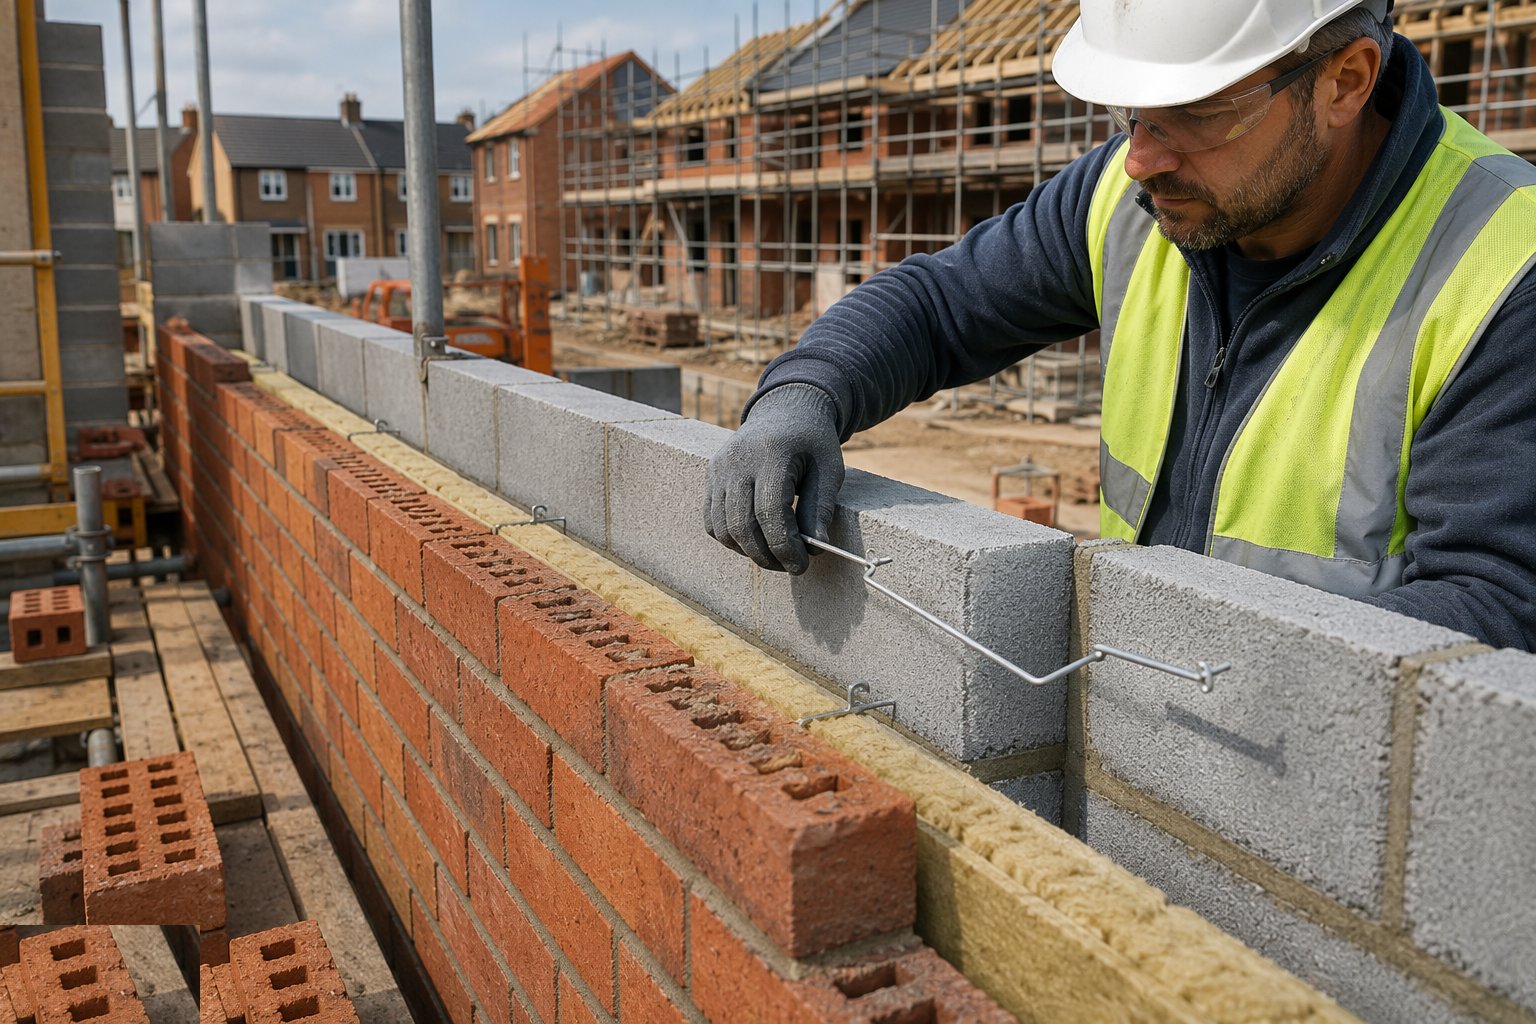
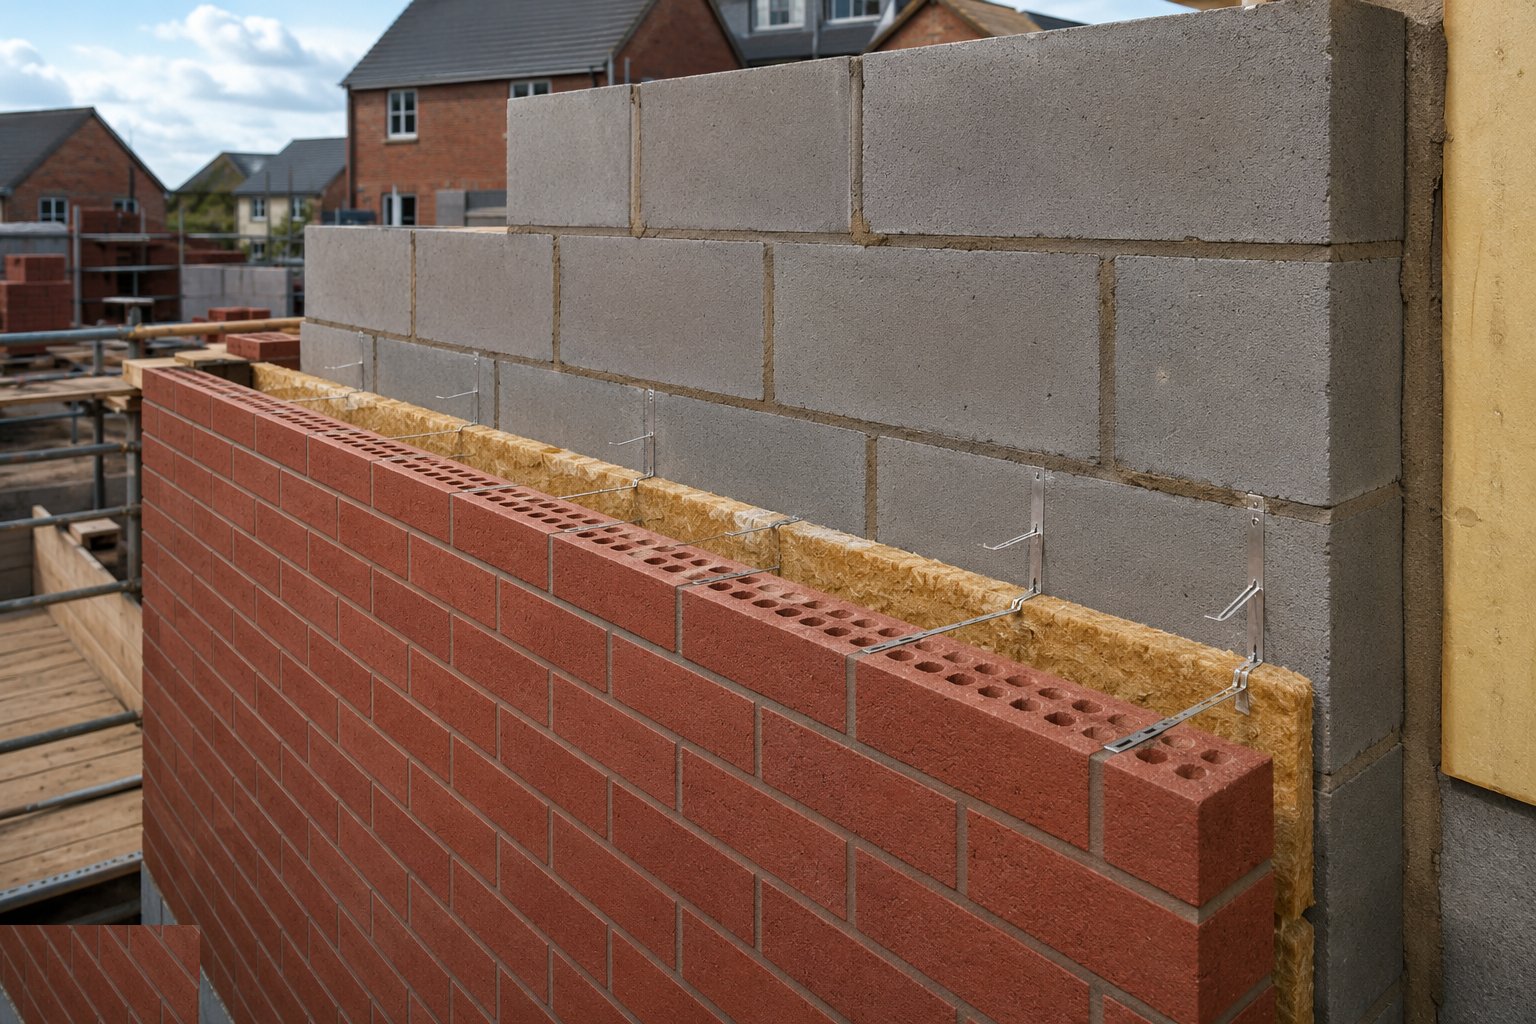
As both leaves rise, the cavity is protected with battens or boards lifted and cleaned at every lift, because mortar droppings on ties bridge water straight to the inner leaf. Wall ties go in at the designed spacing - staggered, embedded at least 50 mm each side, sloped slightly outward - with insulation batts clipped back against the inner leaf on partial-fill details. A mirror or camera down the cavity at the end of each lift tells the truth the eye cannot see.
- 4
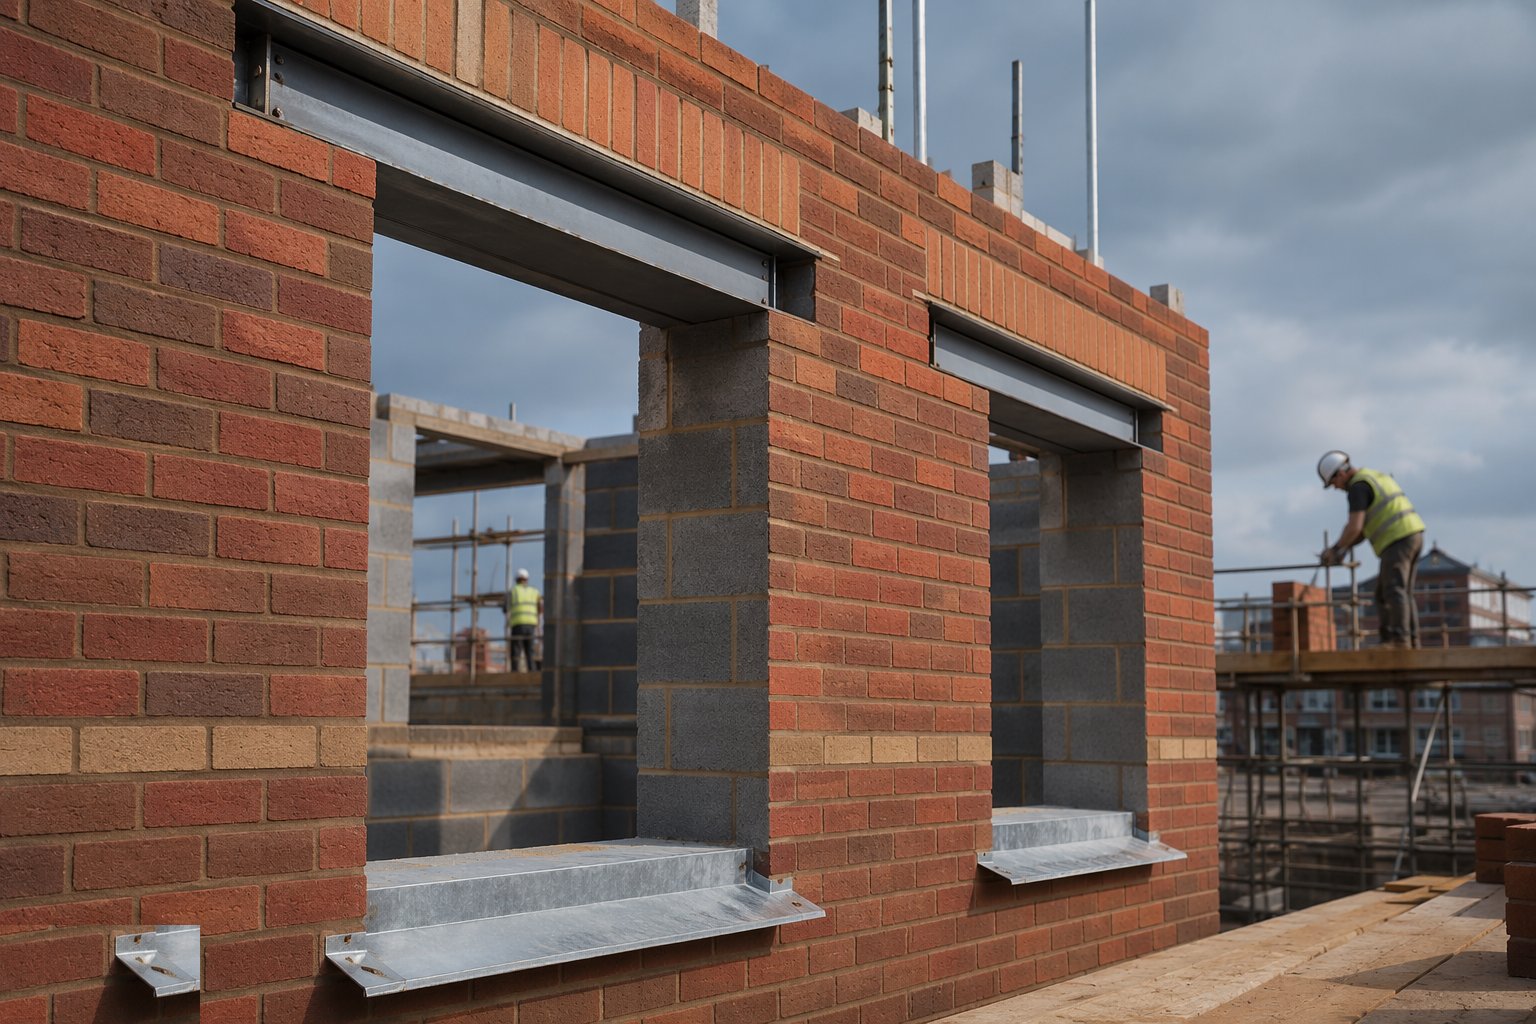
Step 4: Build in openings: lintels, trays and weeps
Every opening gets a lintel with the specified bearing - typically 150 mm each side minimum - and a cavity tray or DPC above it that falls outward and discharges through weep holes at 450 mm centres or per the design. Cavity closers at jambs, sills and heads close the cavity against cold bridging and fire spread. This is the fiddly, unglamorous work that decides the wall's leak record, and it is inspected opening by opening before the outer leaf closes it forever.
- 5
Step 5: Complete the outer leaf and point the joints
The facing brickwork rises with joints filled and struck or bucket-handled to the specified profile - a properly tooled joint is denser and sheds water better than an untooled one. Mortar is matched to the exposure zone and the brick: too strong a mix cracks the wall, too weak weathers out. Movement joints are formed where designed in long runs and at changes of height, filled with compressible filler and sealed, never bridged by a stray tie or a lump of mortar.
- 6
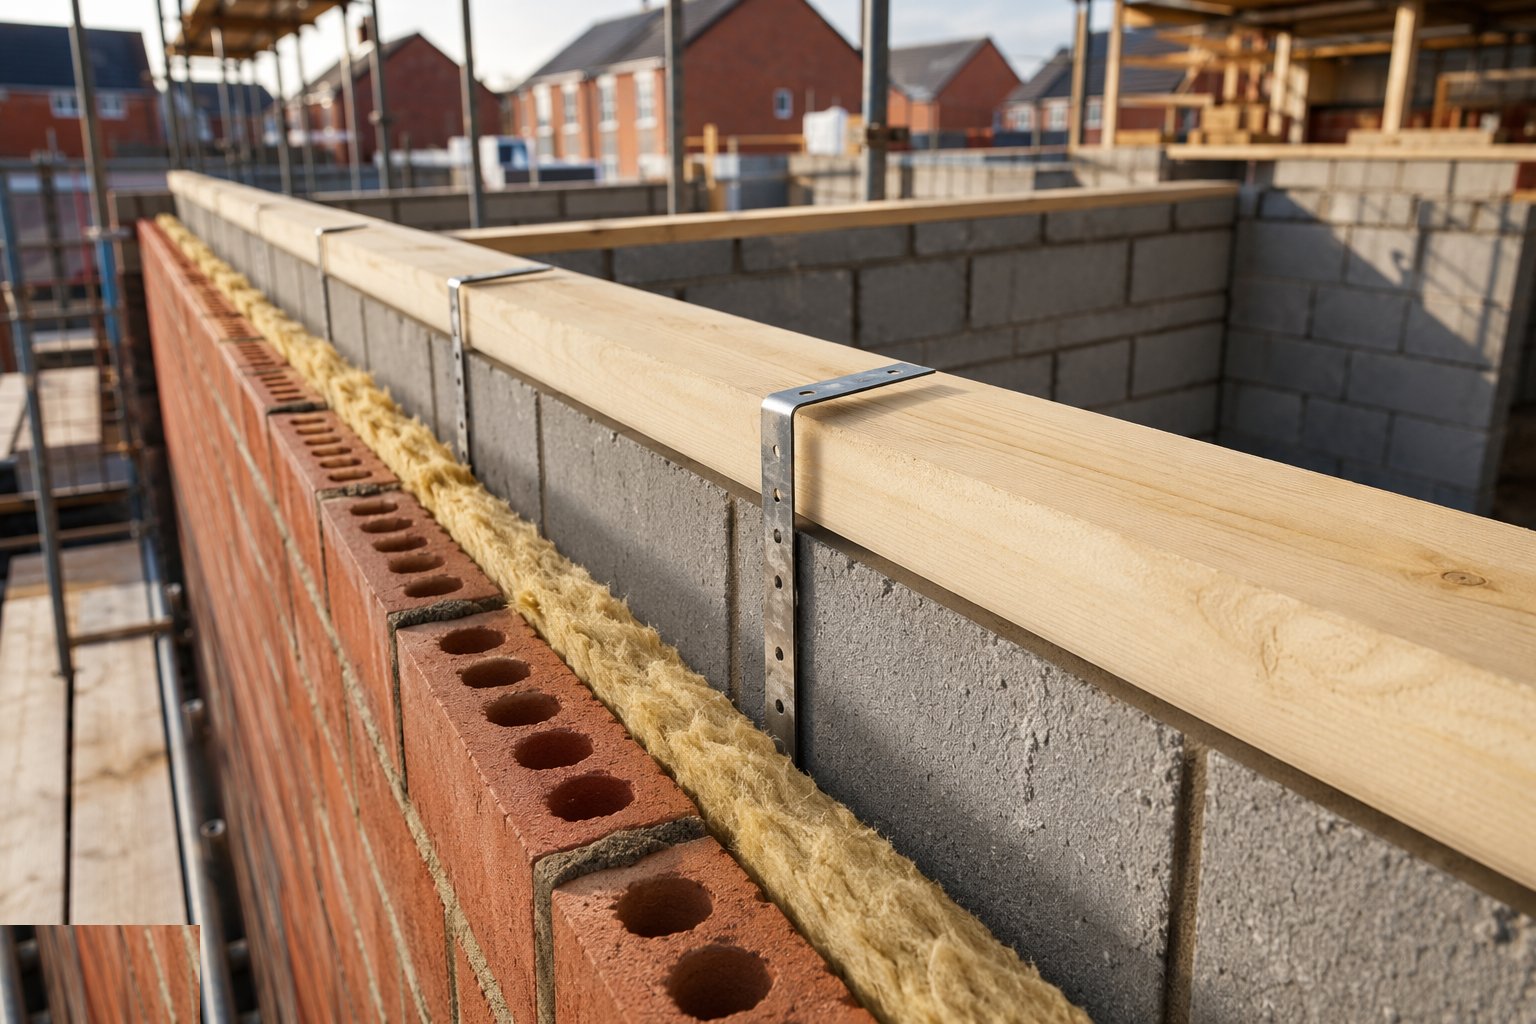
Step 6: Bed the wall plate and tie down the top
At the top of the wall the wall plate is bedded level on mortar, aligned for the roof carpentry, and held down with straps fixed into the blockwork at the specified centres - the roof's uplift resistance depends on them. Gable ends get their restraint straps back to the bracing walls. The completed wall is checked for line, plumb and level before the scaffold drops and the roof carpenters take over.
What are the benefits of Masonry cavity walls?
- Forgiving and familiar - every trade in the country knows it, and local materials and labour are never a problem
- Robust thermal mass - the inner leaf smooths temperature swings and helps summer comfort
- Excellent fire and acoustic separation between homes without additional linings
- Repairable and adaptable - repointing, tie replacement and local rebuilds are ordinary maintenance
- Achieves wall U-values around 0.18 W/m²K with full-fill cavity insulation and standard blocks
- Tolerant of sloping sites, stepped foundations and irregular plans that panel systems struggle with
What are the limitations of Masonry cavity walls?
- Slow and weather-dependent - mortar cannot be laid in frost or heavy rain, and output is measured in courses per day
- Quality depends on site workmanship - ties, trays and cavity cleanliness are only as good as the supervision
- Cold bridging at openings, lintels and junctions needs designed thermal details to meet current standards
- Cavity insulation upgrades after construction are disruptive - the wall is what it is built as
- Long runs need movement joints; restrained shrinkage and thermal movement otherwise show as cracking
- Skilled bricklayer supply is genuinely scarce in many regions - the programme risk is real
What is Masonry cavity walls best suited for?
What plant does Masonry cavity walls need?
- Mortar silo with guaranteed mix consistence, or gauged mixer and spot boards
- Telehandler for brick packs, blocks, lintels and silo placement
- Scaffolding - independent tied with loading bays, or trestles for the first lift
- Masonry saws with water suppression and block splitters
- Corner profiles, gauged rods, lines and levels
- Cavity inspection mirror or camera, and cavity battens or boards
How is Masonry cavity walls quality-checked?
- Mortar mix verified - silo delivery records or batch gauge-box checks, retempering banned
- Wall tie type, spacing, embedment and slope inspected per lift
- Cavity cleanliness checked per lift with mirror or camera - no snots on ties, no debris at the base
- DPC continuity, cavity trays, weep holes and closers inspected at every opening before covering
- Line, level and plumb checked per lift against datums; courses gauged
- Bricks and blocks checked for type, strength class and frost resistance against the specification
More masonry & timber frame methods
Next method
Open-panel timber frame